DIY- Pulsera tejida en macramé punto espiga ✨ || Macrame herringbone stitch woven bracelet ✨ [ESP/ENG]
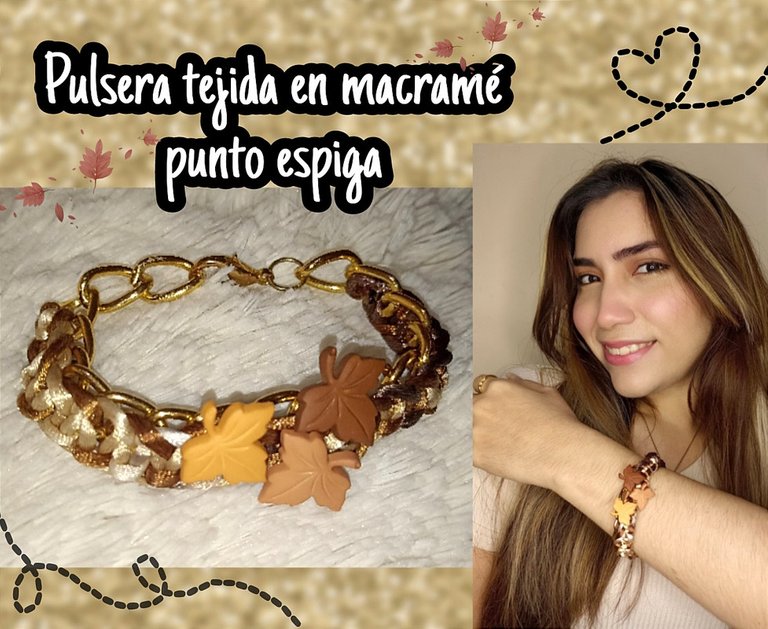


Hola mis queridos amigos de Hive y a los amantes de los accesorios ❤️ hoy les quiero compartir un pequeño tutorial para realizar una pulsera con una nueva técnica de nudo macramé llamado nudo espiga, es bastante sencillo ya que partiremos con un nudo plano, solo que esta vez usaremos dos hebras para tejer, pasando los hilos de un nudo sobre el otro y así formar un lindo diseño. Para este accesorio no quise hacer una pulsera sencilla, esta vez la quise combinar con una cadena y tejer sobre esta, además le agregué un lindo detalle en el centro con dijes que combinan con los tonos del hilo, una pulsera muy otoñal 🍁☺️. Si te gusta, te animo a que me acompañes y aprendas junto a mi a realizarlo con este sencillo paso a paso, y ahora sí, sin más que agregar... Comencémos!!

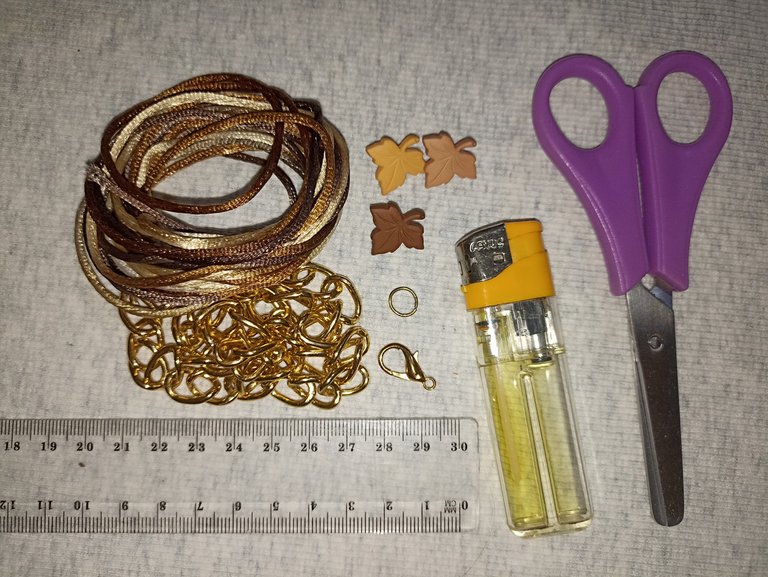

- 2 Hebras Hilo cola de ratón de 80cm
- 18cm Cadena
- 3 Dijes (hojas)
- 1 Argolla
- 1 Broche
- Tijera
- Encendedor


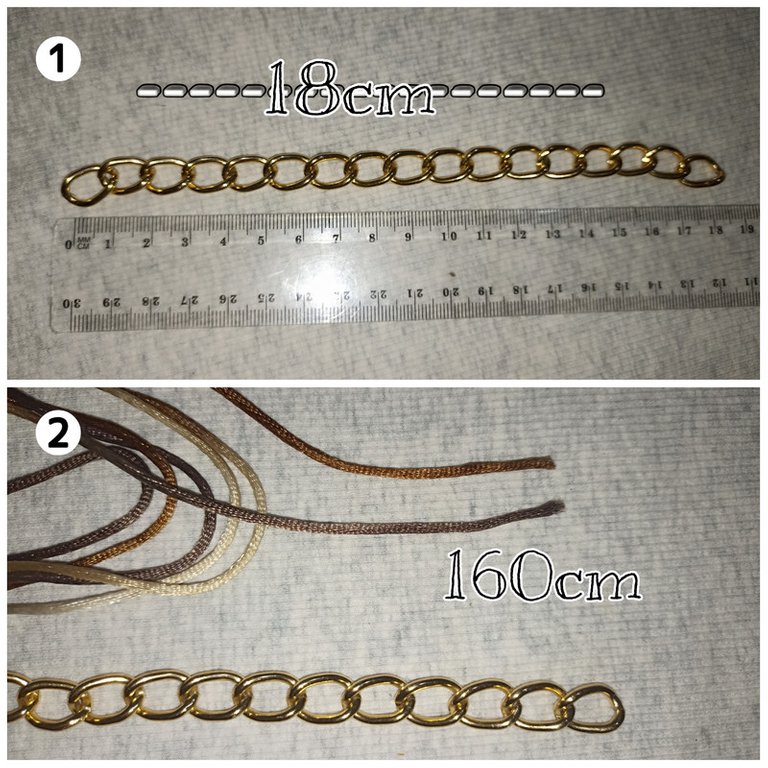
Primero vamos a medir nuestros materiales, en mi caso la cadena será de la medida de mi muñeca, aproximadamente 18 cm, y para los hilos necesitaremos dos hebras de 80cm para un total de 160cm en total.

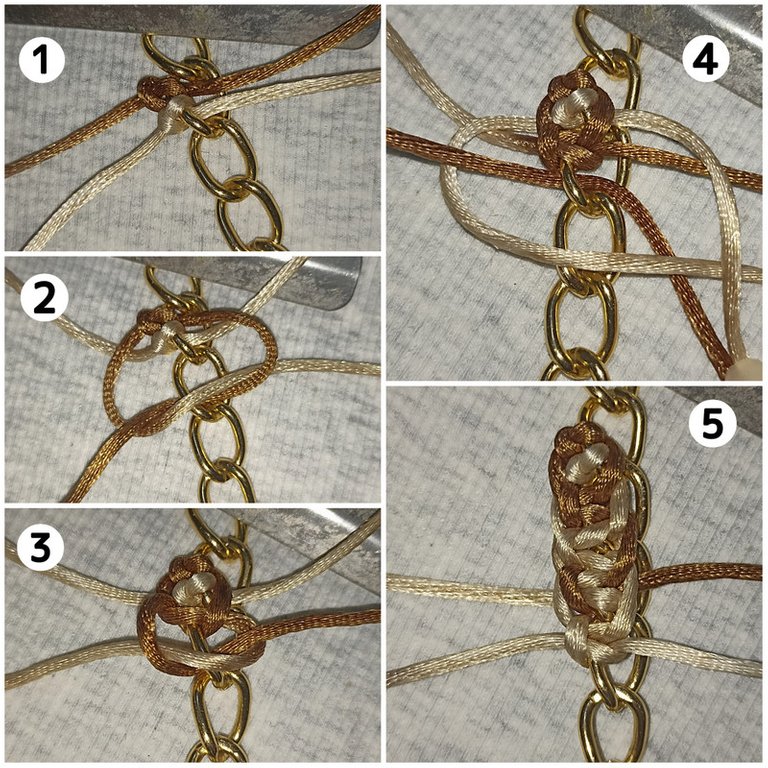
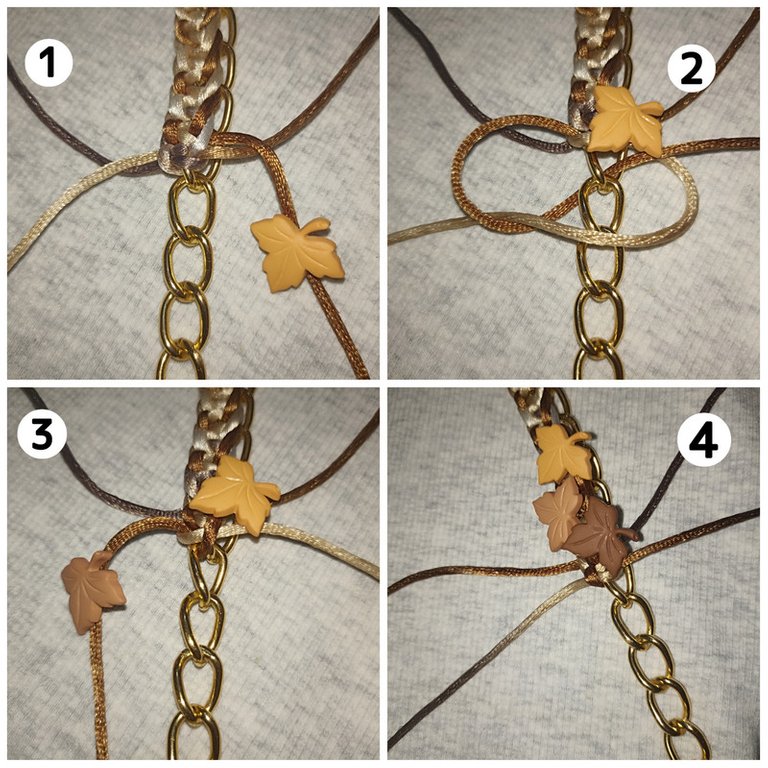
Lo siguiente que haremos será ubicar la cadena en nuestra tabla con pinza para que se nos haga más fácil y estemos cómodas a la hora de tejer. Vamos a empezar con la primera hebra y haremos un nudo plano tomando el eslabón cómo hebra central. Luego haremos lo mismo con la otra pasando los hilos sobre el nudo que hicimos anteriormente. Así repetimos el nudo hasta tener la mitad de la pulsera tejida.

Cuando lleguemos a la mitad, vamos a empezar a introducir los dijes en forma de hojas, primero uno de un lado, luego otro, y terminamos con el tercero, tratando que nos queden dos arriba y uno abajo para que nos quede un lindo diseño central.

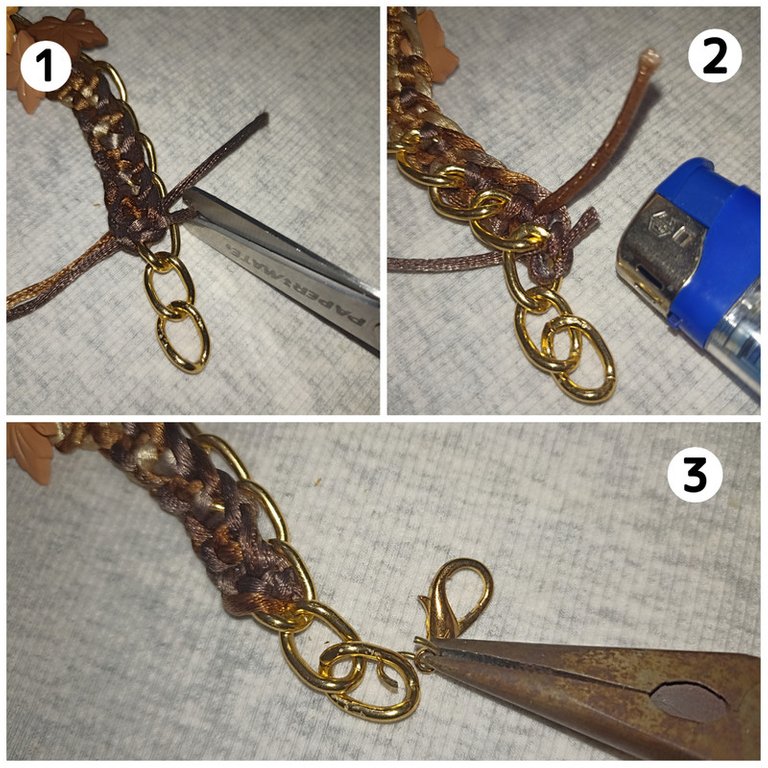
Cuando hayamos terminado volvemos con el tejido como hicimos al principio hasta completar la otra mitad. Cortamos el hilo sobrante, quemamos las puntas y le colocamos con ayuda de las pinzas una argolla en un extremo de la cadena y un broche en el otro extremo.

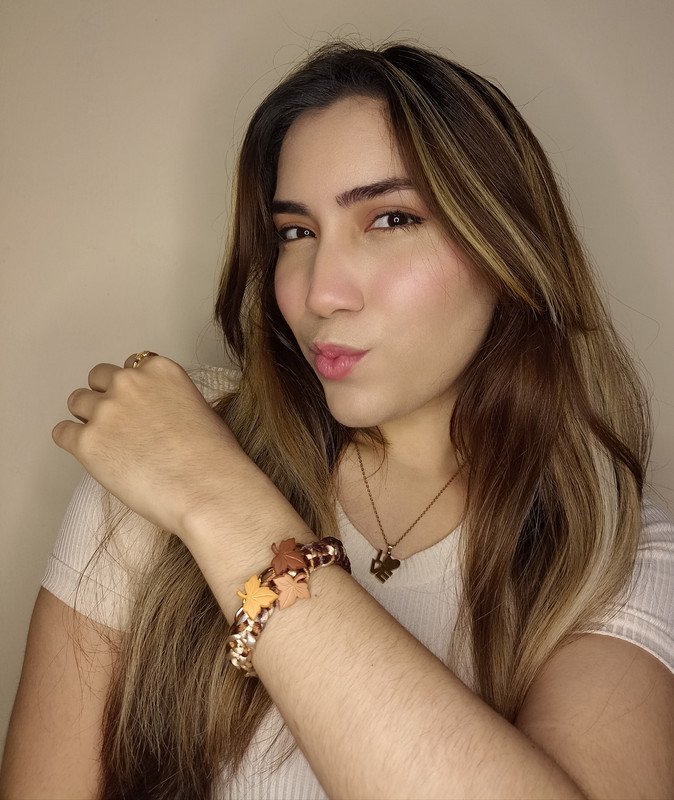
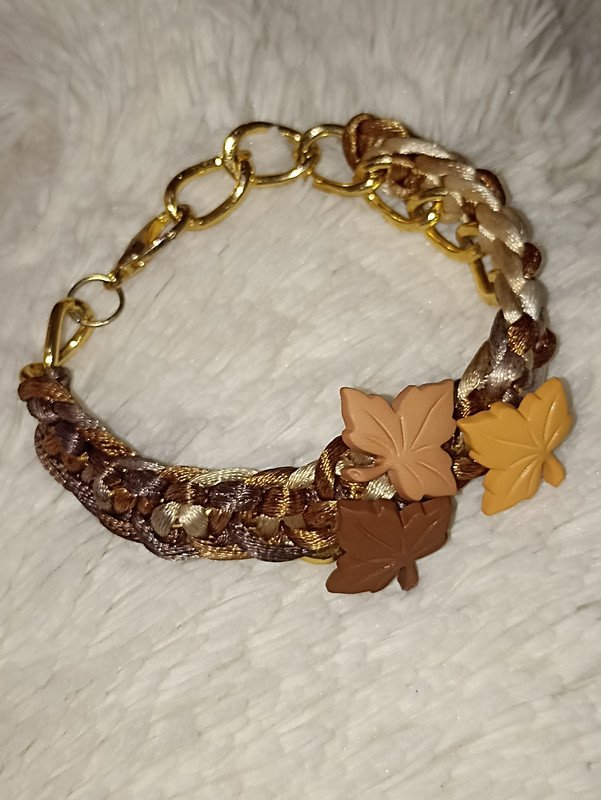
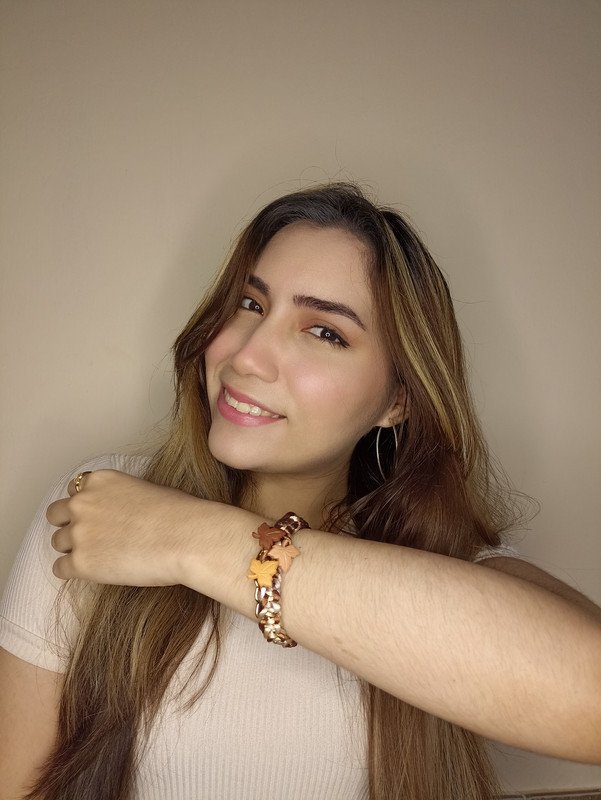
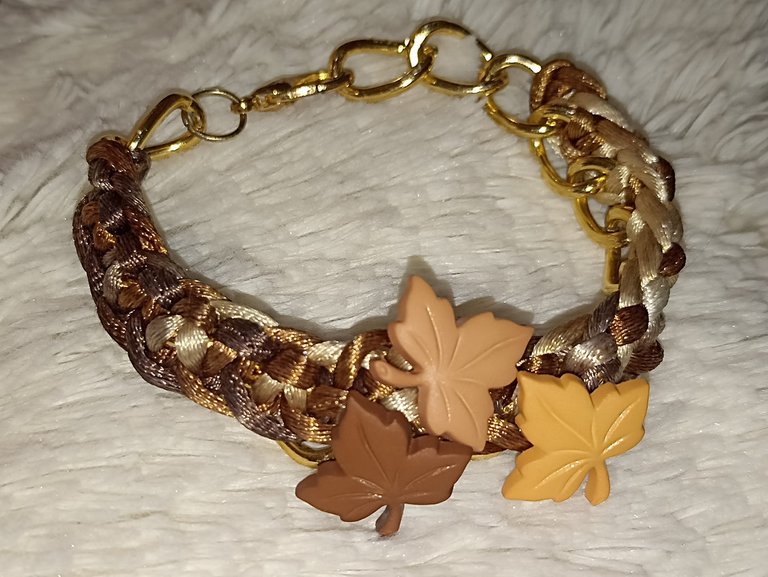
Y aquí les muestro la pulsera terminada!!. Puedes seguir mi guía tutorial o puedes dejar volar tu imaginación y hacerlo combinando los colores, piedras, cristales y el diseño que quieras... La creatividad es tuya y por supuesto un toque secreto de amor para que el trabajo quede con el mejor acabado 🥰.!! si te gusto te animo a que lo intentes, me encantó mostrarles este nuevo tutorial de esta pulsera inspirada en lindos tonos cálidos y otoñales, para tu uso personal, emprender o para regalar 😁...espero compartirles muy pronto nuevos trabajos, con mucho cariño me despido y será hasta la próxima !!💕


Hello my dear friends of Hive and lovers of accessories ❤️ today I want to share a small tutorial to make a bracelet with a new macrame knot technique called herringbone knot, it is quite simple because we will start with a flat knot, only this time we will use two strands to weave, passing the threads of a knot over the other and thus form a nice design. For this accessory I didn't want to make a simple bracelet, this time I wanted to combine it with a chain and weave over it, I also added a nice detail in the center with charms that combine with the tones of the thread, a very autumnal bracelet 🍁☺️. If you like it, I encourage you to join me and learn with me to make it with this simple step by step, and now yes, without further ado.... Let's get started!!!


- 2 strands of 80cm mouse tail thread
- 18cm Chain
- 3 charms (leaves)
- 1 Ring
- 1 Brooch
- Scissors
- Lighter


First we are going to measure our materials, in my case the chain will be the size of my wrist, approximately 18 cm, and for the threads we will need two strands of 80cm for a total of 160cm in total.


The next thing we will do is to place the chain on our clipboard to make it easier and more comfortable to weave. We will start with the first strand and we will make a flat knot taking the link as the central strand. Then we will do the same with the other strand passing the threads over the knot we made before. This way we repeat the knot until we have half of the bracelet woven.


When we get to the middle, we will start inserting the leaf-shaped charms, first one on one side, then another one, and we will finish with the third one, trying to have two on top and one on the bottom so that we have a nice central design.


When we have finished we go back with the weaving as we did at the beginning until we complete the other half. Cut the excess thread, burn the ends and place a ring at one end of the chain and a brooch at the other end with the help of the pliers.


And here I show you the finished bracelet!!!. You can follow my tutorial guide or you can let your imagination fly and do it combining colors, stones, crystals and the design you want..... The creativity is yours and of course a secret touch of love so that the work is with the best finish 🥰.!!! if you like I encourage you to try it, I loved to show you this new tutorial of this bracelet inspired by beautiful warm and autumn tones, for your personal use, undertake or to give away 😁...I hope to share very soon new works, with much affection I say goodbye and will be until next time !!!💕


Todo el contenido es de mi autoría y las imágenes son de mi propiedad
Cámara: Redmi note 10s
Uso un aro de luz LED como base para mi teléfono y tomarme las fotos
All content is my own and images are my property
Camera: Redmi note 10s
I use an LED light ring as a base for my phone to take pictures of myself

Edición y Separador|Editing and Separator
App PicMonkey - App Picsart - App Canva
Traductor|Translator
DeepL


https://twitter.com/2774723569/status/1624583376744185857
https://twitter.com/1048398048240566273/status/1624880218656673792
The rewards earned on this comment will go directly to the people( @kristal24 ) sharing the post on Twitter as long as they are registered with @poshtoken. Sign up at https://hiveposh.com.
Congratulations @edwarlyn11! You have completed the following achievement on the Hive blockchain And have been rewarded with New badge(s)
Your next payout target is 17000 HP.
The unit is Hive Power equivalent because post and comment rewards can be split into HP and HBD
You can view your badges on your board and compare yourself to others in the Ranking
If you no longer want to receive notifications, reply to this comment with the word
STOPTo support your work, I also upvoted your post!
Check out our last posts:
Support the HiveBuzz project. Vote for our proposal!
Hermoso tejido y el resultado precioso con la cadena, me gusta mucho el color.
Muchas gracias 😊 me alegra que te gustara!! Un saludito para ti amiga!!
Hola. Como siempre muy hermoso cada trabajo que nos presentas amiga!
Hoola ☺️aww muchas gracias me alegra mucho que te haya gustado, fue placer compartir 💕 un saludito para ti amiga!!
Hermosa pulsera me encanto el tejido y los colores.. 😍
Está preciosa, es una excelente opción para regalar. Saludos.