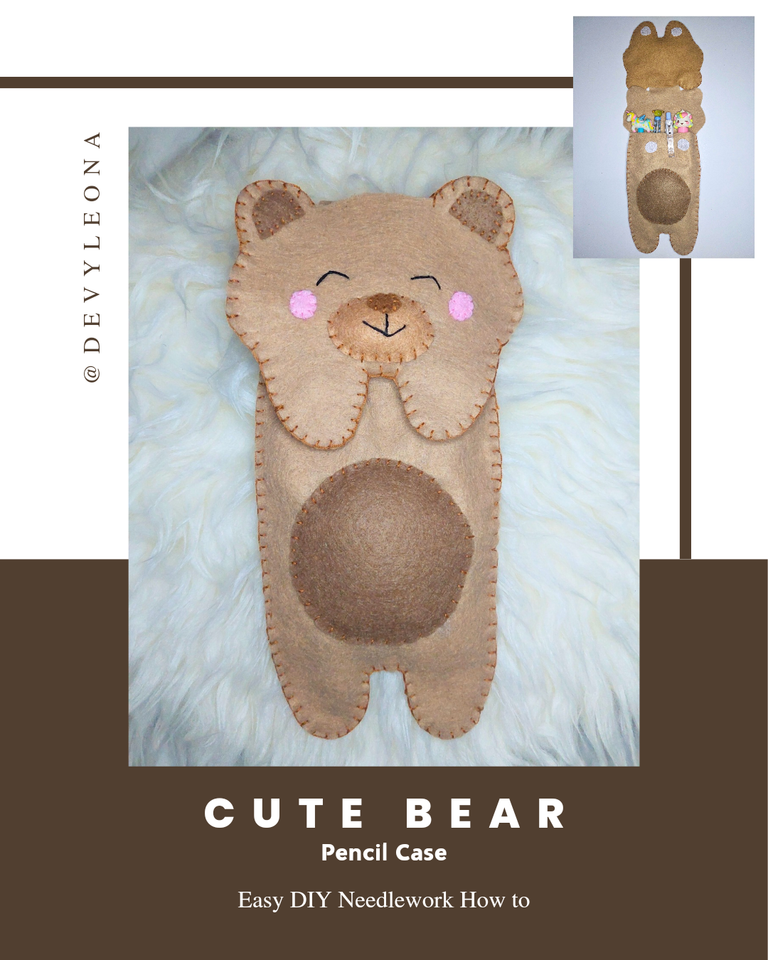
Cute Bear Pencil Case - Easy DIY Needlework How to
Hello, friends especially needleworkers!
In my uncertain spare time, i finally could make a craft, it such a relief for me that finally last night i could make a craft, this cute bear pencil case. I could make it happened because i took a day off for today. Now without any more prologue let me show you how i made it easily.
Project Time: 4 hours
Difficulty: Medium
Skills needed:
- whipped stitch
- blanket stitch
- back stitch
- smile stitch
Materials and Things needed:
•paper and pencil to make pattern
•felt fabrics in brown shades. I used light brown for the whole body then medium for around the mouth, brown for inside ears and tummy then earthy brown for the nose, plus soft pink for the cheeks
•scissors (i used my old paper scissors)
•pins
•sewing needle
•embroidery thread
• dacron filling fiber
•velcro fabric adhesive
• glue gun
How to make it:
1ST
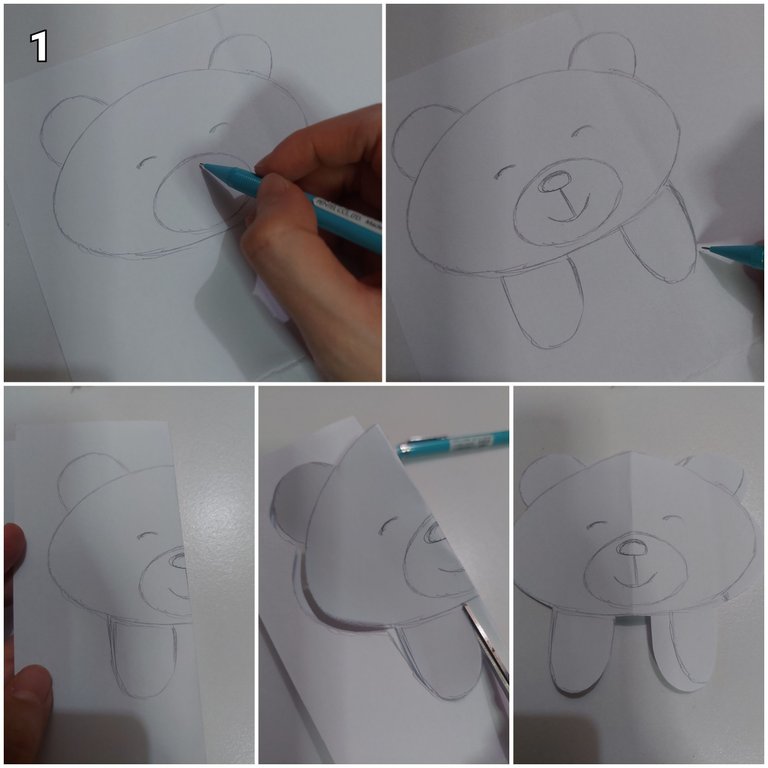
First i drew the bear's cute face with two hands in the front. Then to make sure that it was symmetric i folded it in the middle then cut it off.
2ND
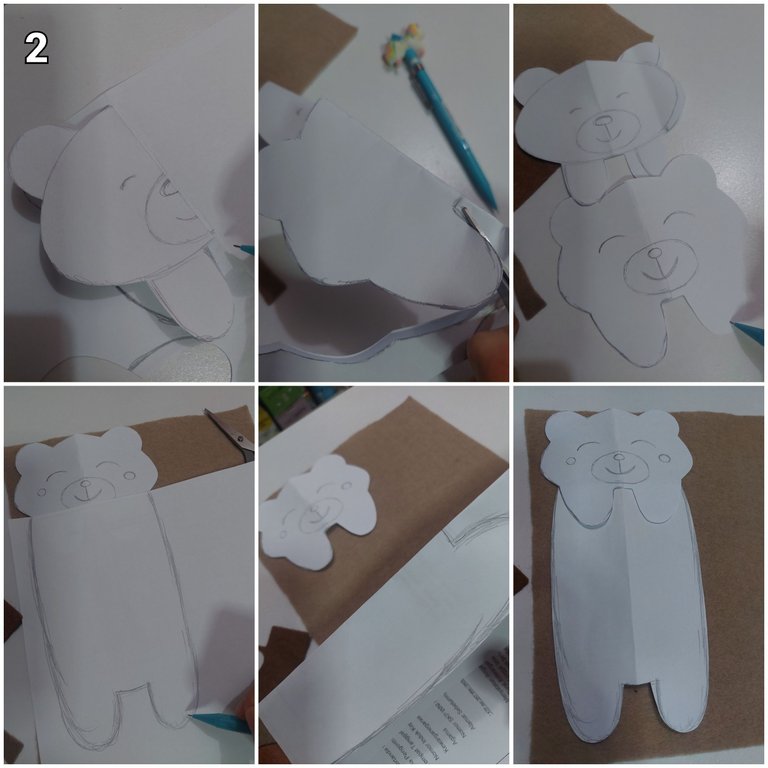
Then I realized that the hands were too narrow. So i copied the half part of it to make the new bear pattern, i made the hands wider this time. After well done, i made the body of the bear. It would be the front separate part to the head and hands.
3RD
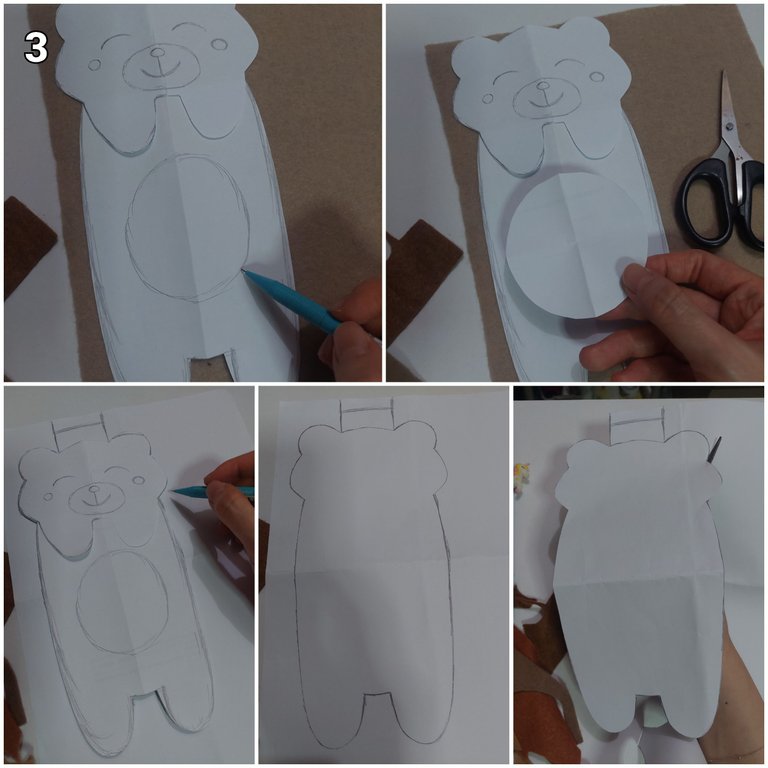
Next i cut an oval paper for the tummy. Then i drew the whole body of the bear as the back part. I also cut it off.
4TH
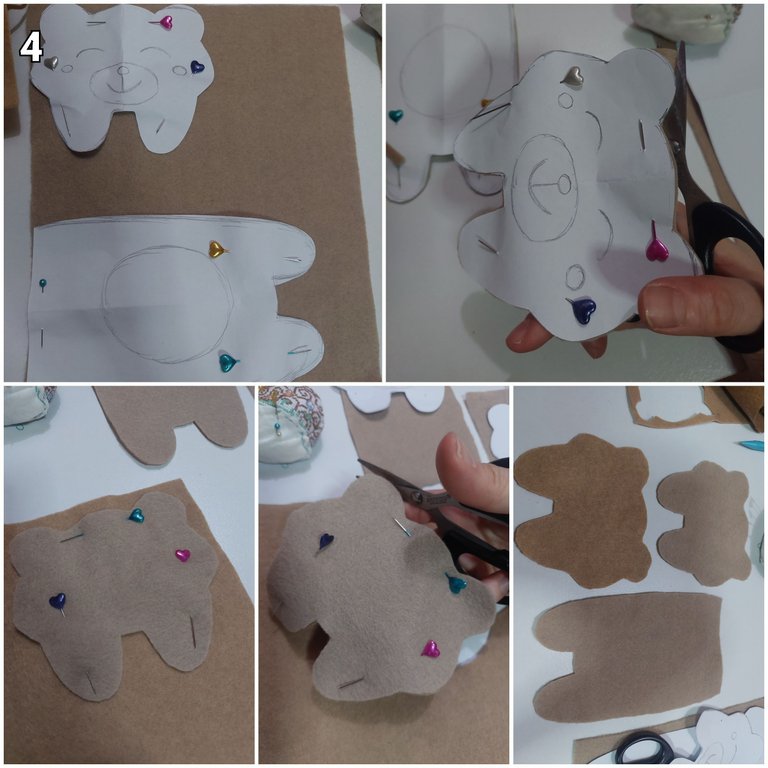
Next i pinned the pattern on the light brown fabric. Cut two for the head - hands part, then cut one for the body.
5TH
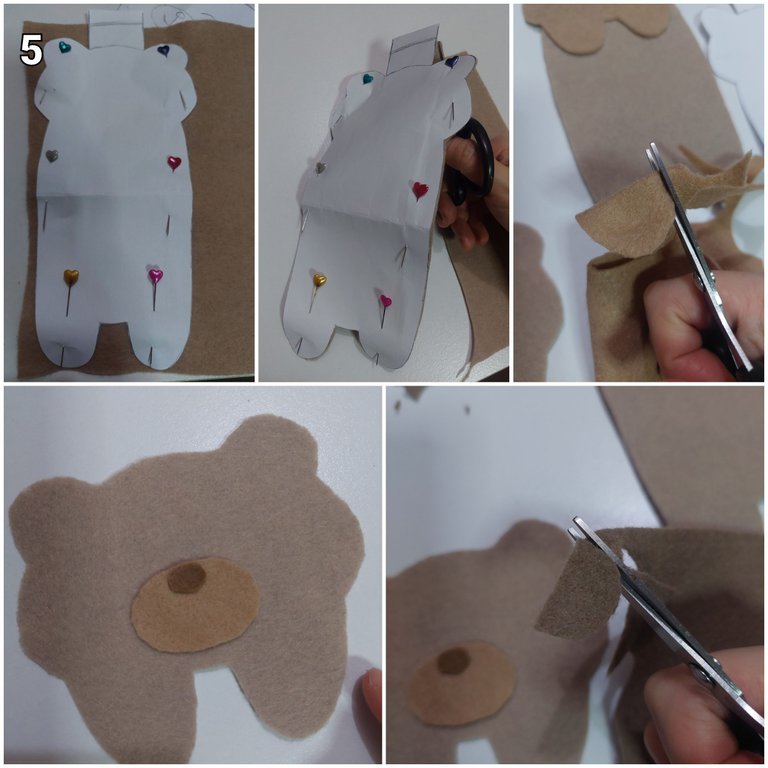
I also pinned the whole body pattern to the light brown fabric and cut it off. Next, i cut brown felt fabric for inner ears area, medium brown for near mouth area and earthy brown for the nose.
6TH
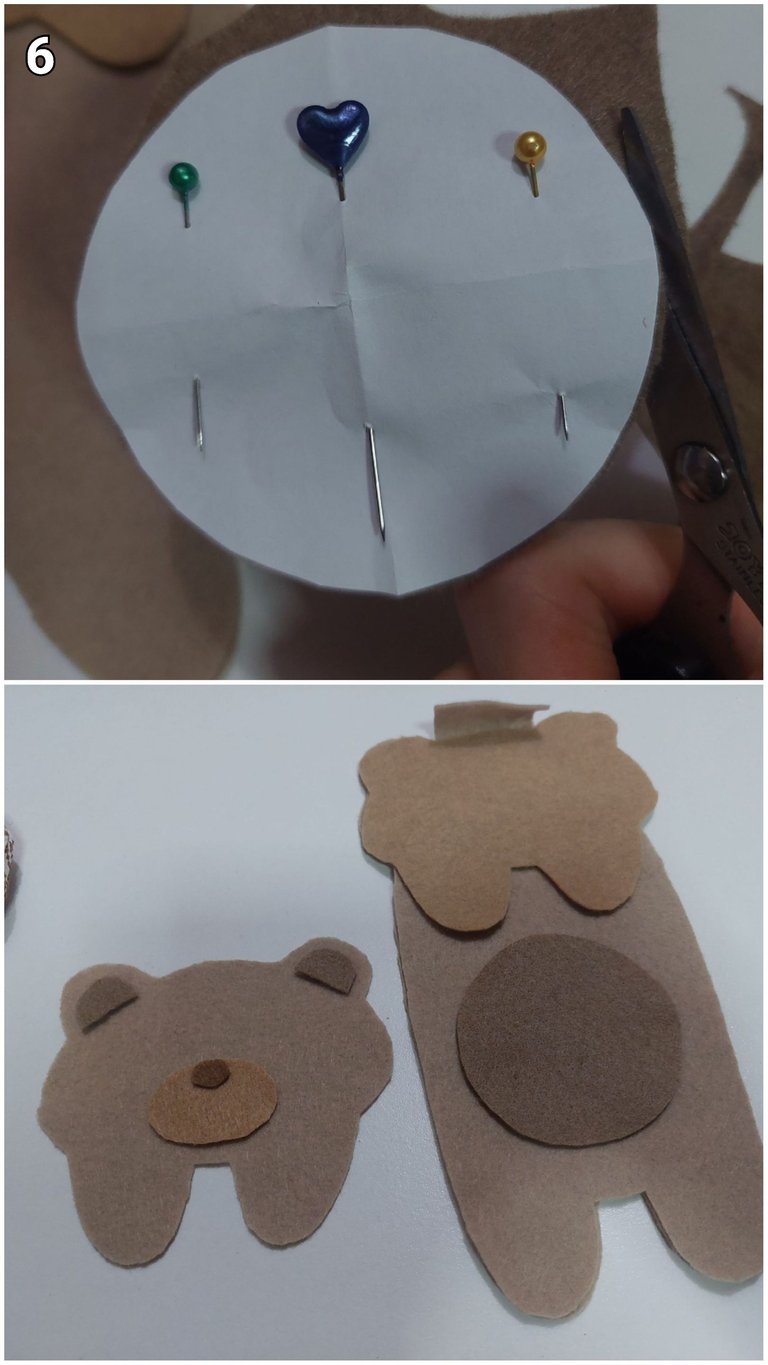
For the tummy i pinned the oval pattern on the brown fabric then cut it off. Now i got all the parts cut off.
7TH
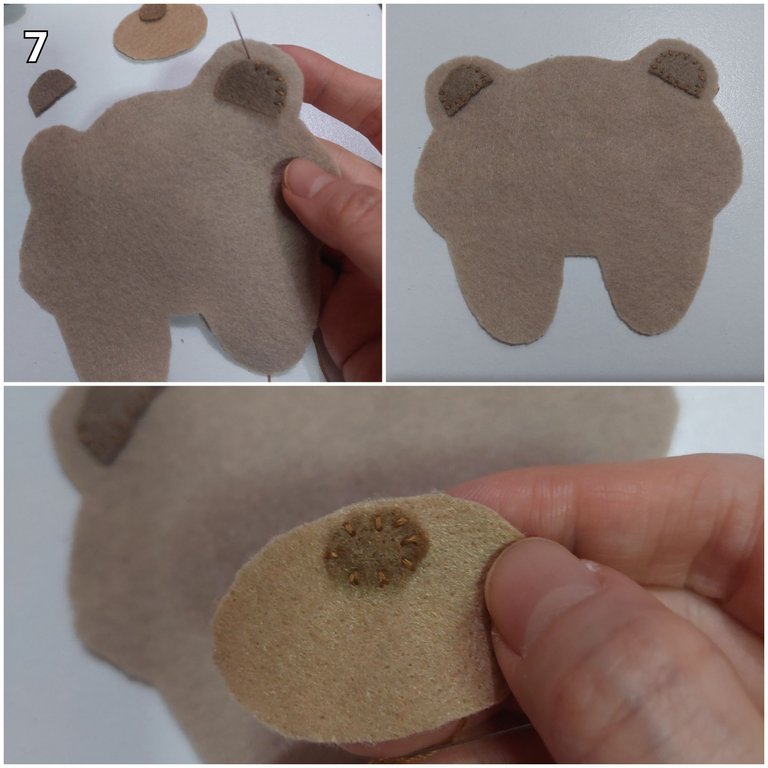
After that i whipped stitch inside the ear area, and also the nose.
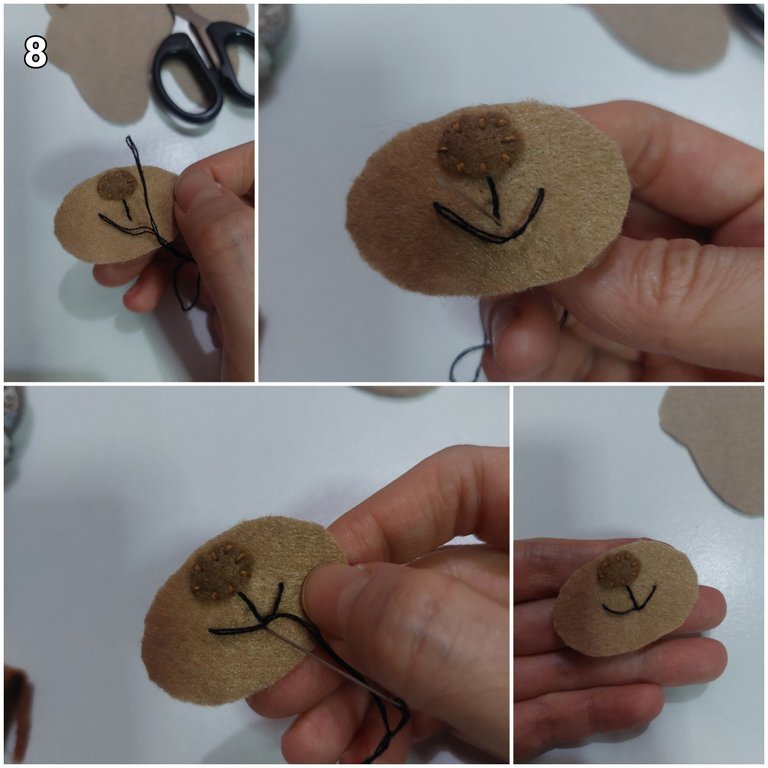
8TH
Next i back stitched and smile stitched for the mouth.
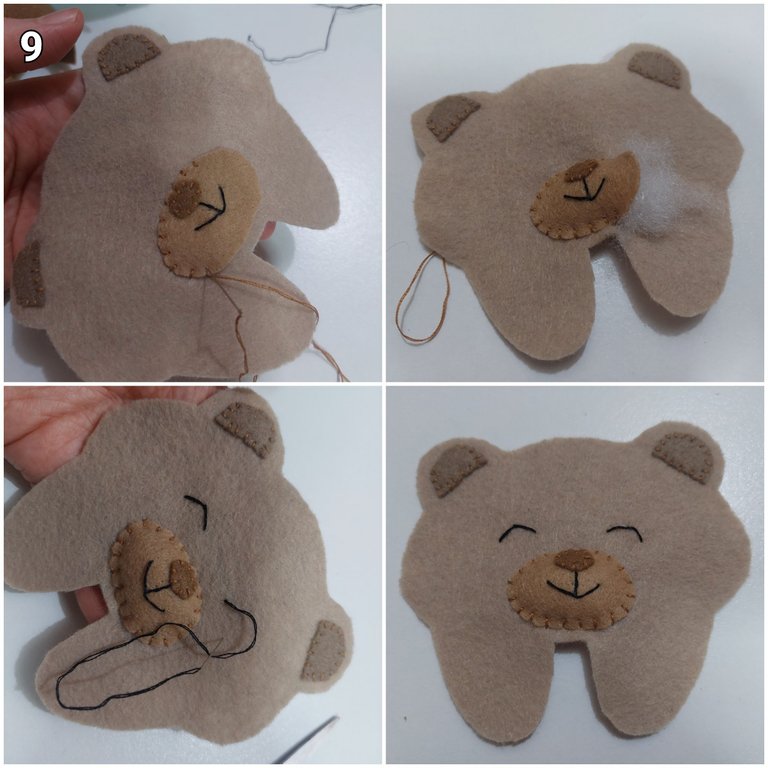
9TH
I whipped stitched around for the mouth then i put dacron inside before i closed it. I also used the smile stitch technique for the closed smiling eyes.
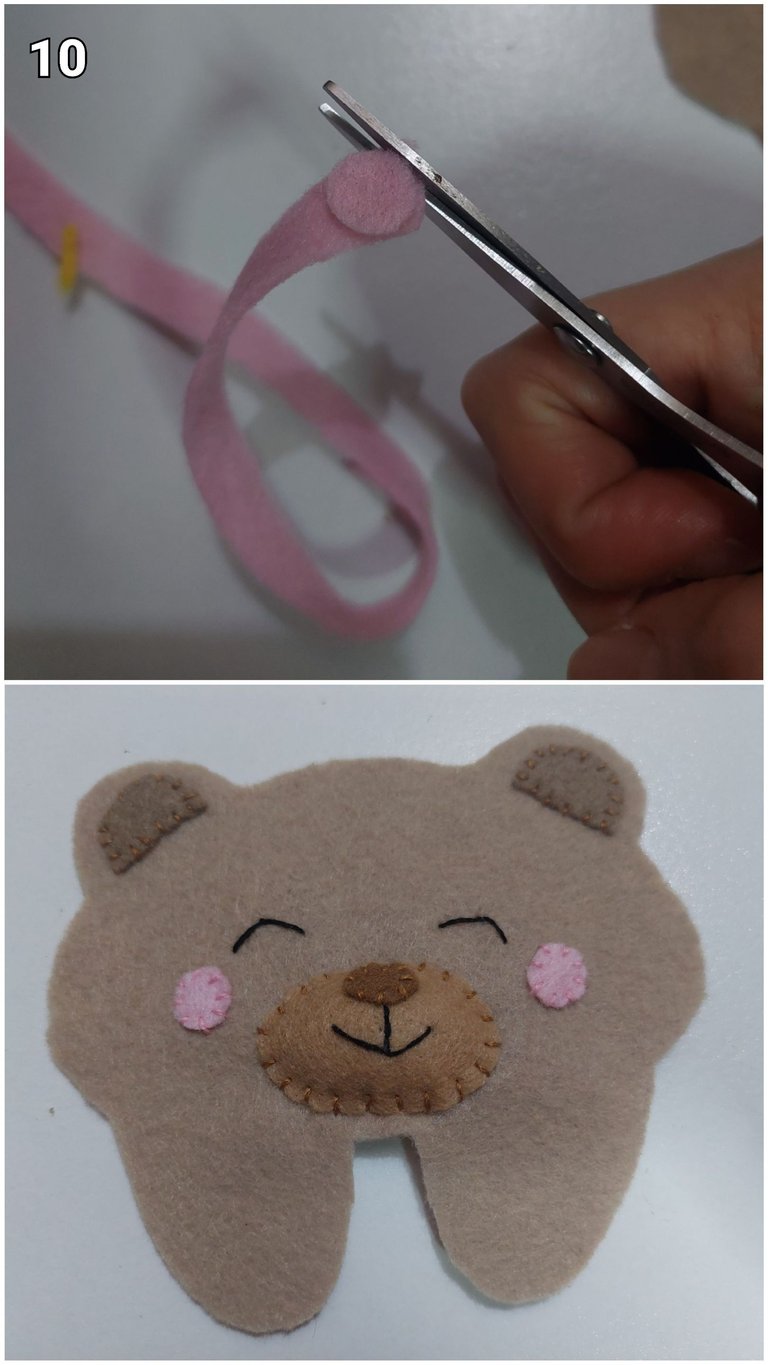
10TH
To complete the face, i cut off soft pink felt for the cheeks. Then i also whipped stitched it on the face. Now the happy face was done.
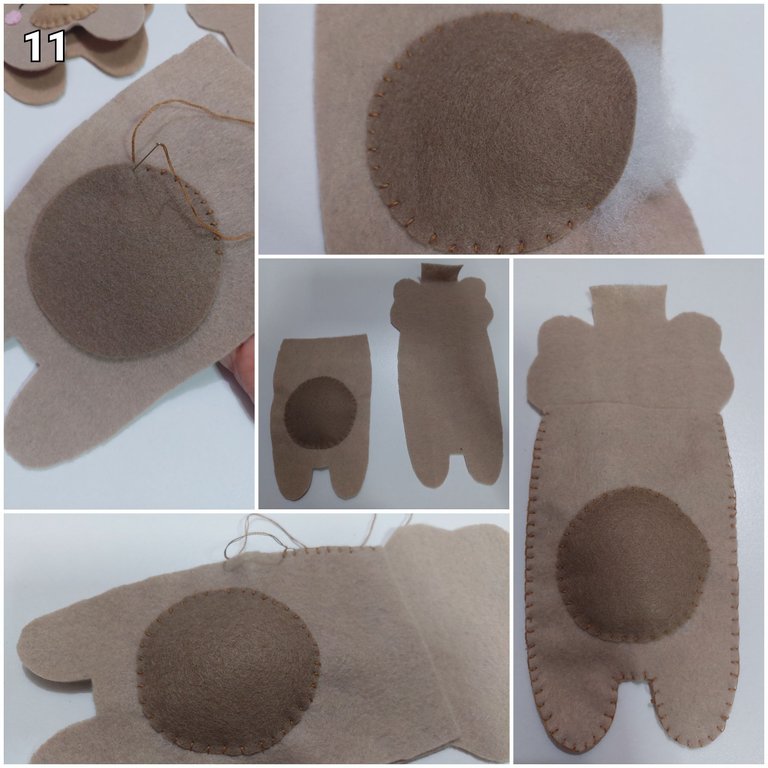
11TH
I whipped stitched the tummy part, then put the dacron in it then i closed it. To join the whole body part and body part i used the blanket stitch.
12TH
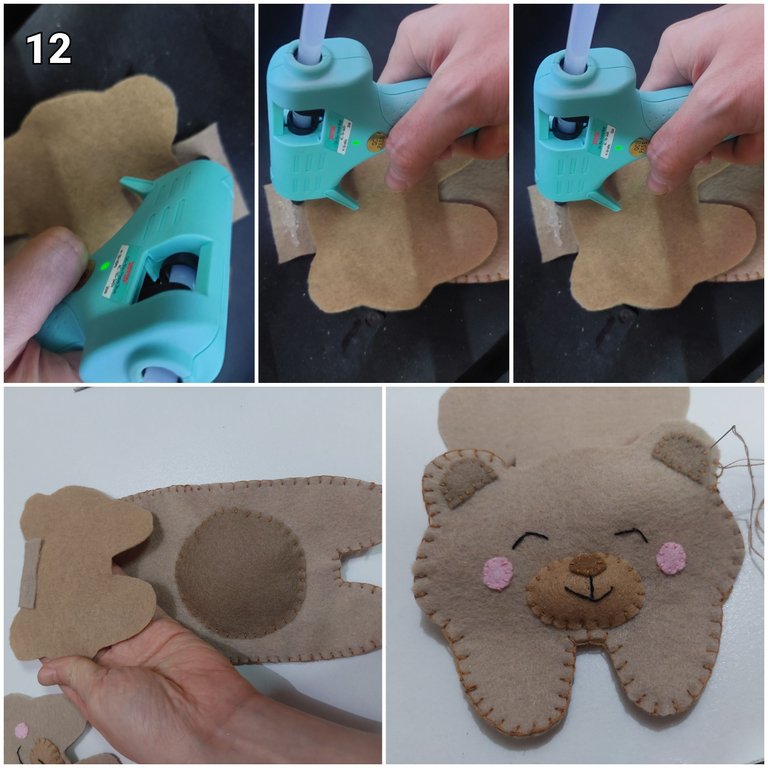
Then i joined the back parts to the back head part with the hot glue gun. After that, i blanket stitched it with the front face part.
13TH
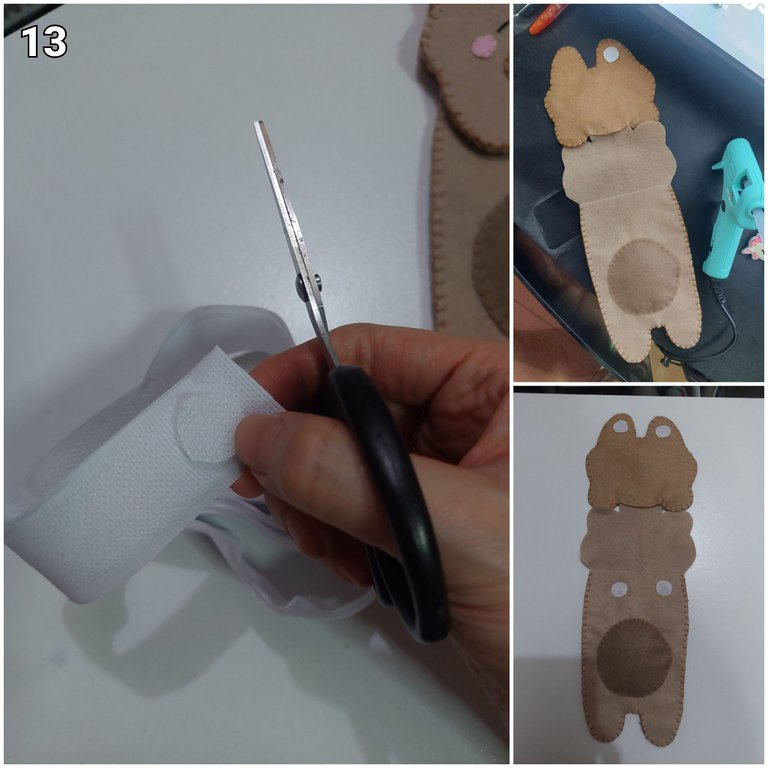
Last, added the velcro to back hand part with the glue gun.
THE RESULT
Voila, here it is...
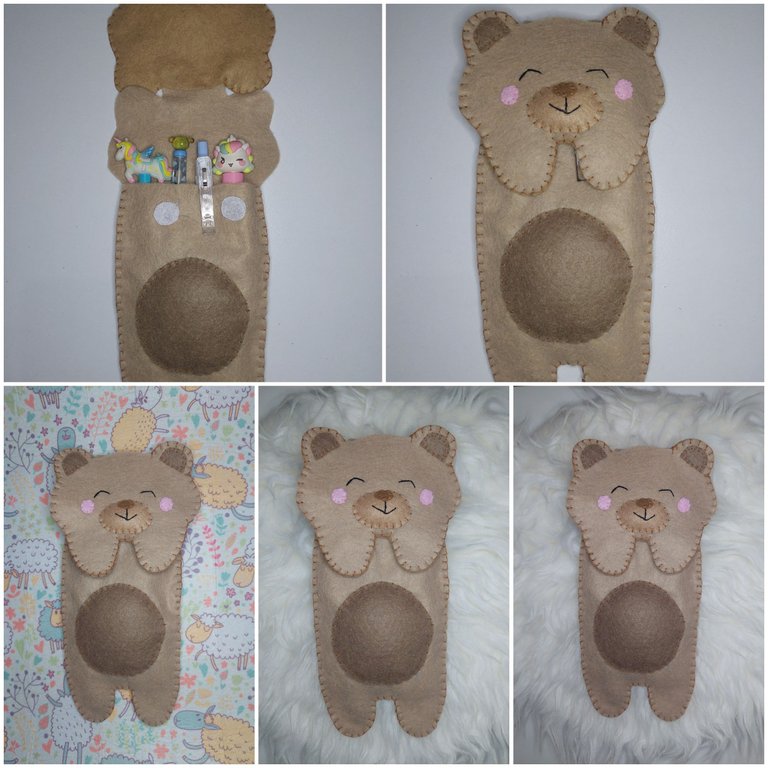
This cute bear pencil case is done and now it is ready to use, do you think it's cute?
Thanks for reading my article, if you enjoy my article, upvote, reblog, follow me and stay tune for more CRAFT things from me!
All of the pictures were taken with Samsung A52 5G android phone and I used Canva for the cover picture.
A bit about the author
She works in a bank but she interests in CRAFT (CRaft, Art, Food and Travel). To pursue her art passion she does the cross stitch, embroidery, handsewing, crafts, crochet and also draws. Find hers in
https://de-creartique.redbubble.com and https://decreartique.threadless.com/designs. Also find her cute collectibles pixel cat pictures here https://opensea.io/collection/pixelcryptocat .
Wow I’m happy to see that you have time to come around again now and with a detailed tutorial on how to make this. I can imagine myself rocking a school bag in this design too much more than just a pencil case. Thanks for sharing dearie
Thanks a lot for your support and i am so glad you like it :)
It is really cute, delicated and useful. Nice project, thanks for sharing.
Thanks a lot, i am glad you like it