Let's make a cute crochet cup or glass rest. || [ESP\ENG]
Hello friends once again welcome to my blog!
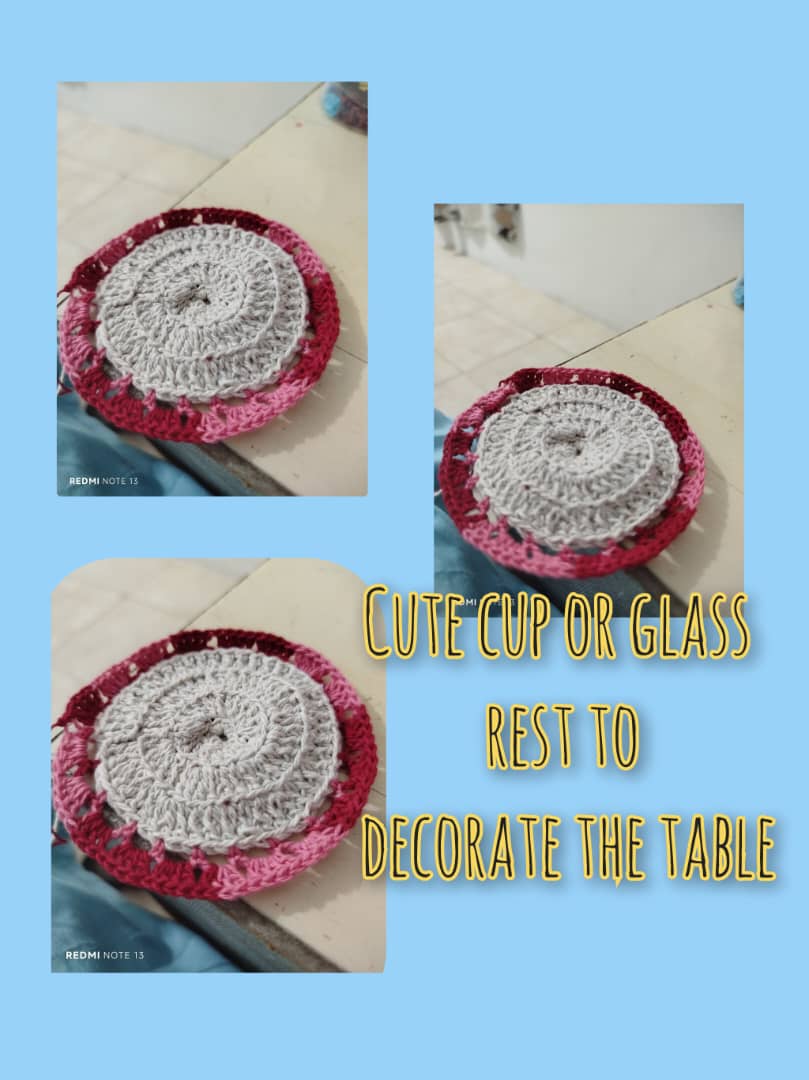
Hello hello 👋 I hope your day was wonderful, peaceful and quiet, doing what you love most, and above all, in good health, which is the most important thing. A warm and affectionate virtual hug, hivers friends. Today I want to share a lovely crocheted piece with you: a cup or mug rest. This piece is very useful and practical; it can be used to decorate your table. With just a few stitches, you can make this project. Here are the steps to follow:
Hola hola 👋 deseo que su día haya sido genial en paz y mucha tranquilidad haciendo lo que más le gusta y sobre todo con buena salud que es lo primordial. Un cálido y afectuoso abrazo virtual hivers amigos. Hoy les quiero compartir un lindo trabajo se trata de un Reposa vaso o taza a crochet.. Es muy útil y práctica está pieza sirve para decorar tu mesa, con unas cuantas puntadas elabora este proyecto. A continuación te indicamos los siguientes pasos a seguir:

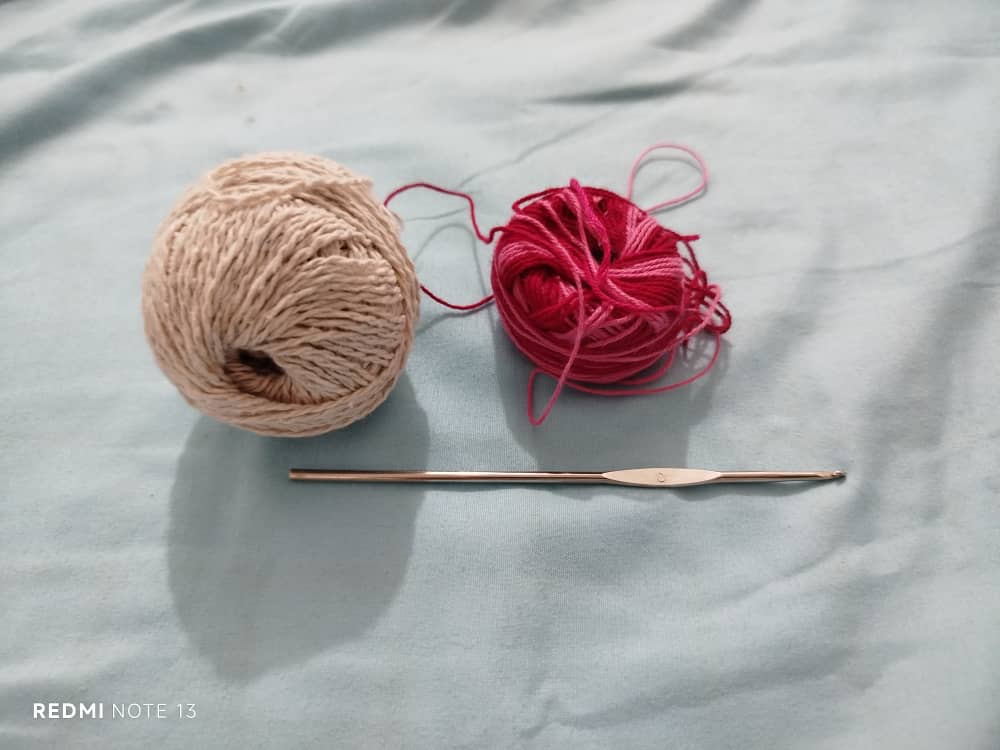
Materiales.
♥️knitting thread.
♥️Scissors.
♥️Knitting needle.
Materials:
♥️Hilo de tejer.
♥️Tijera.
♥️Aguja de tejer.
Paso a Paso
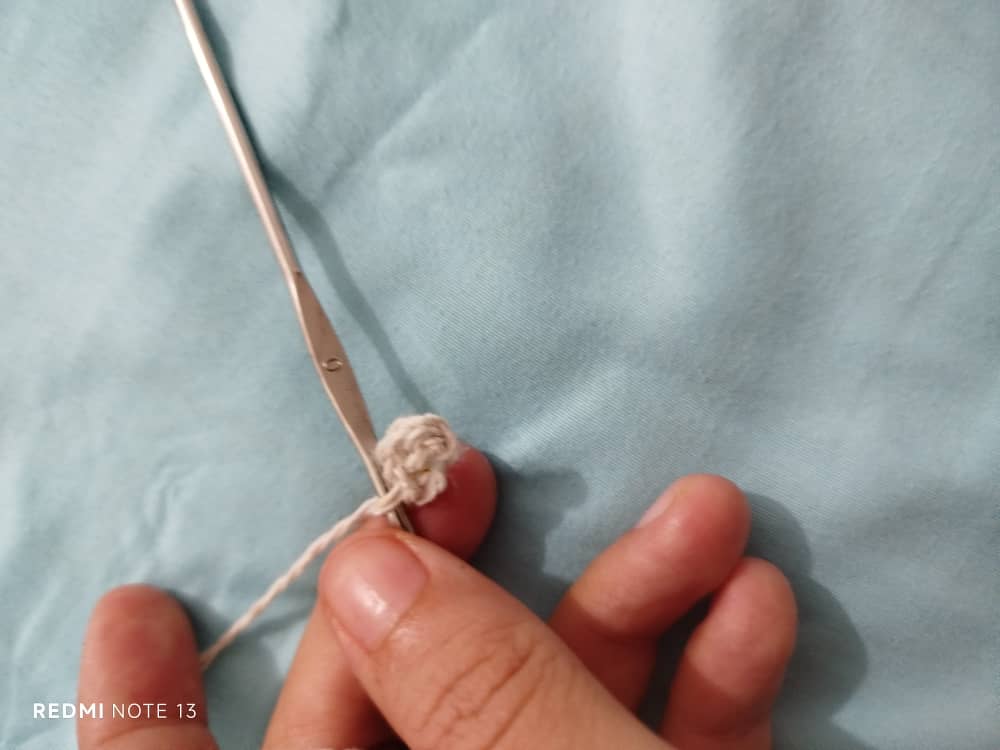
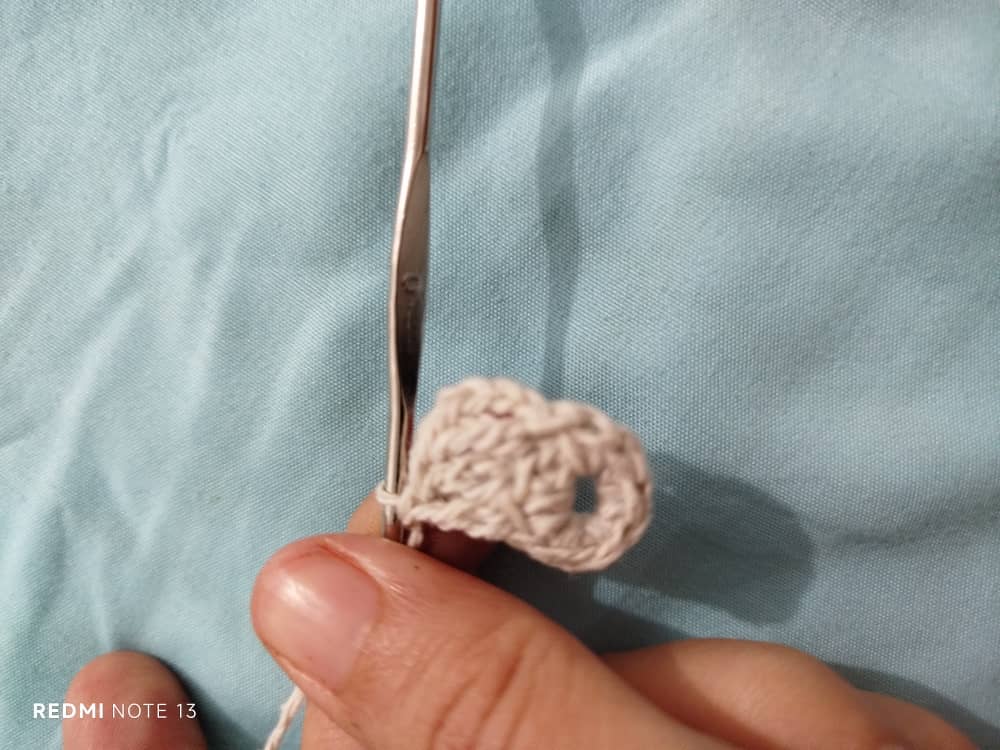
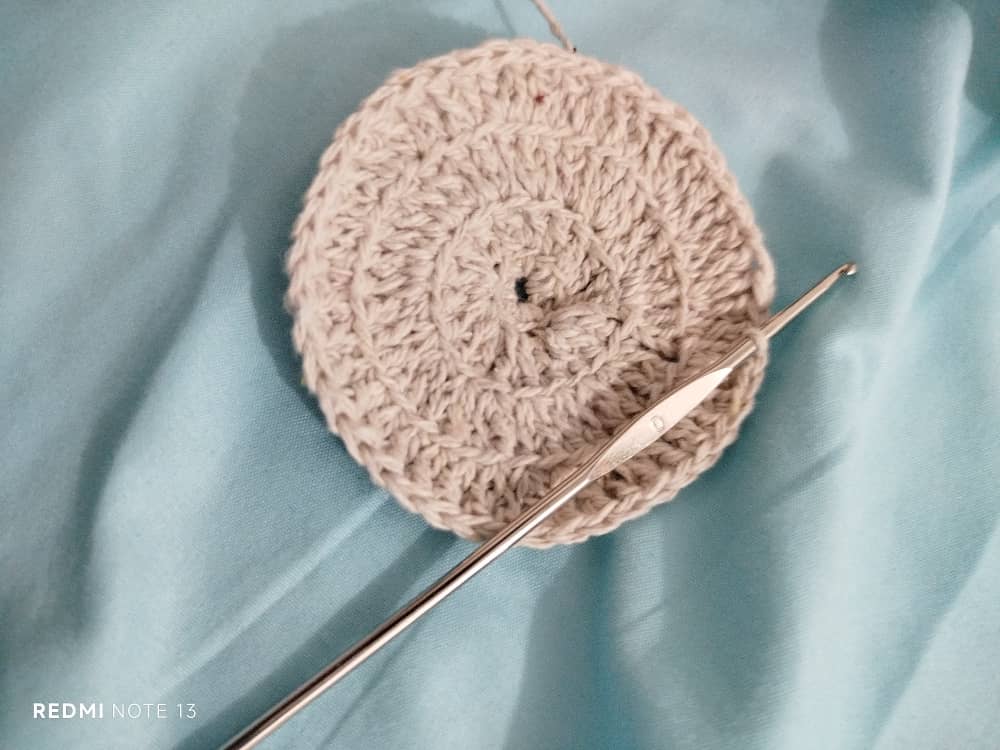
Step 1: We will start by taking the thread and making a knot at the end, making a chain of 5 stitches, closing with a slip stitch and then closing with 6 half stitches.
1er paso: Vamos a iniciar tomando el hilo y hacer un nudo en la punta armar una cadena de 5 puntadas cerrar con un punto dezlisado para luego cerrar con 6 medios puntos.
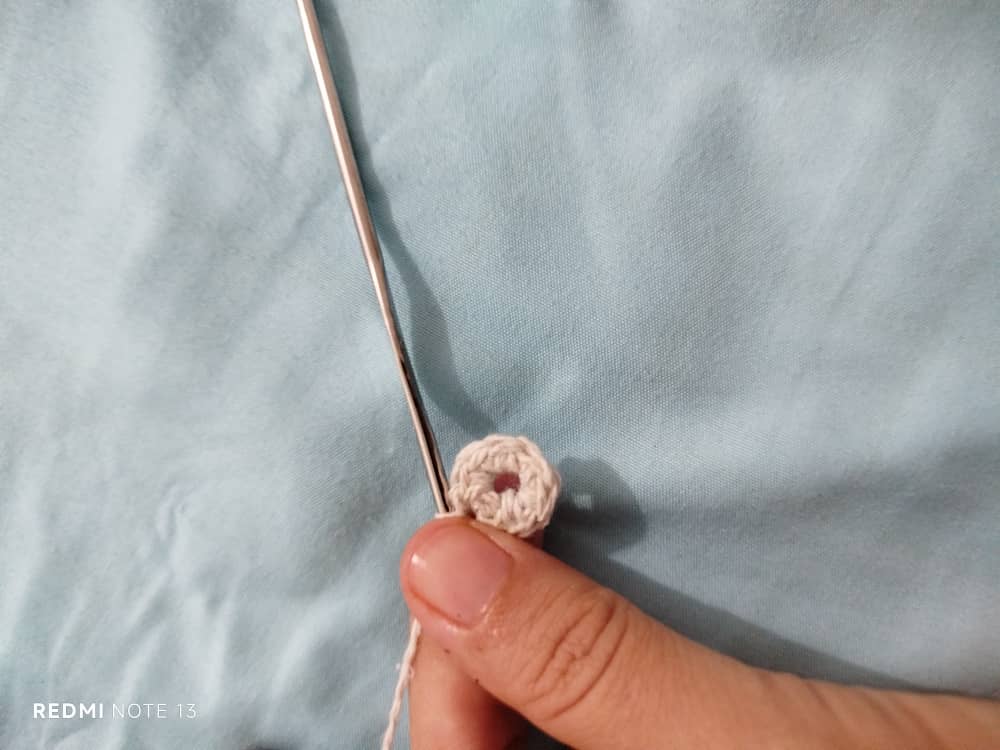
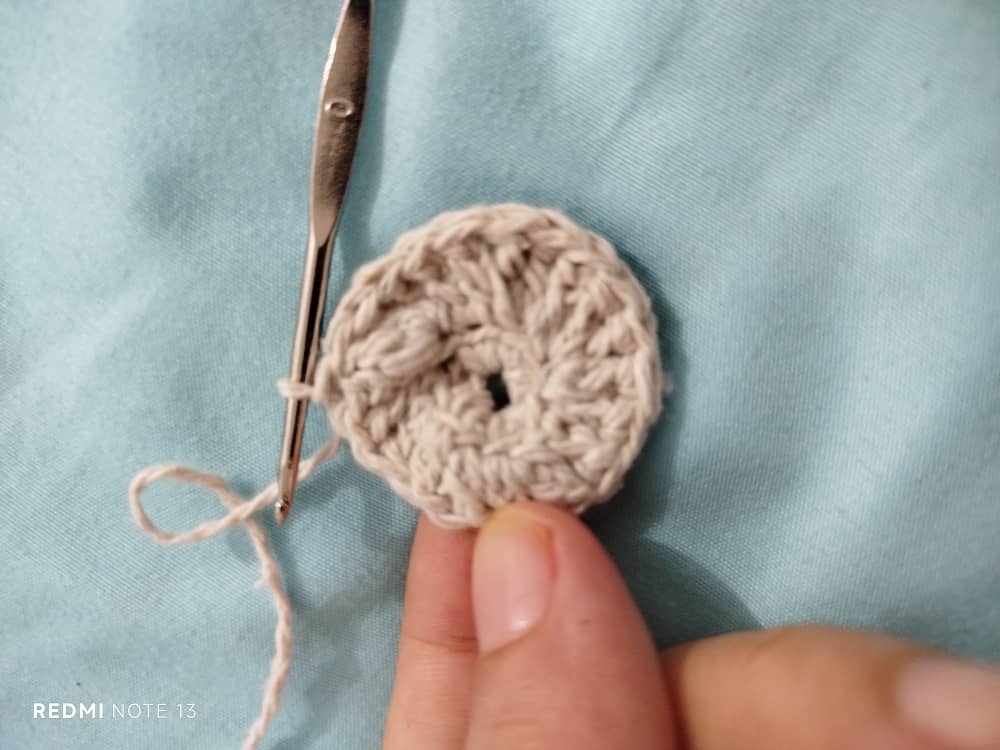
2nd step: Then make an increase of a chain of 3 stitches and make 25 double crochet stitches and close with a slip stitch.
2do paso: Luego hacer un aumento de una cadena de 3 puntos y hacemos 25 puntos altos y cerramos con un puntos deslizado..
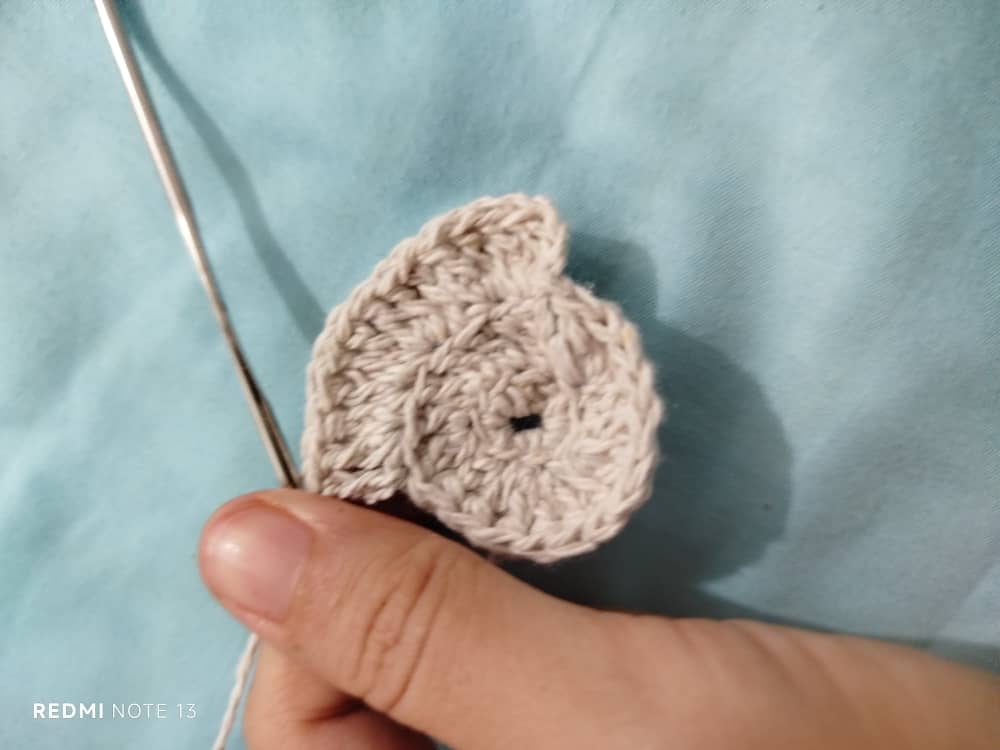
Step 3: Continue repeating the same procedure but add an extra stitch in each increase and close with a slip stitch.
3er paso: Continuar repitiendo mismo procedimiento pero añadimos un punto extra en cada aumento y cerrar con un punto deslizado.
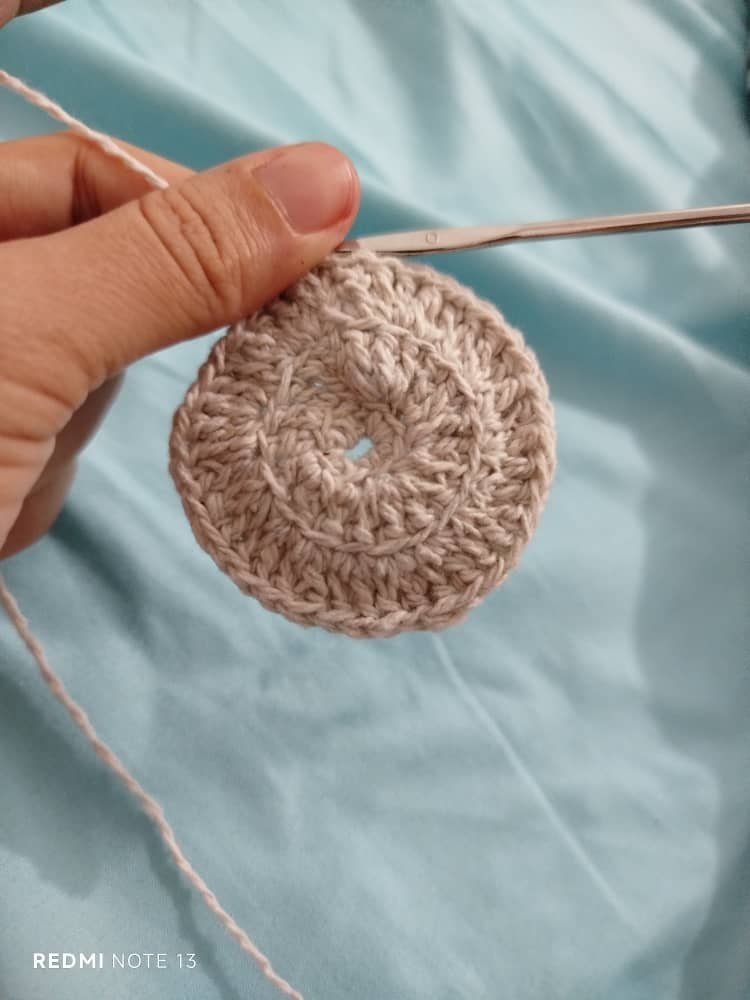
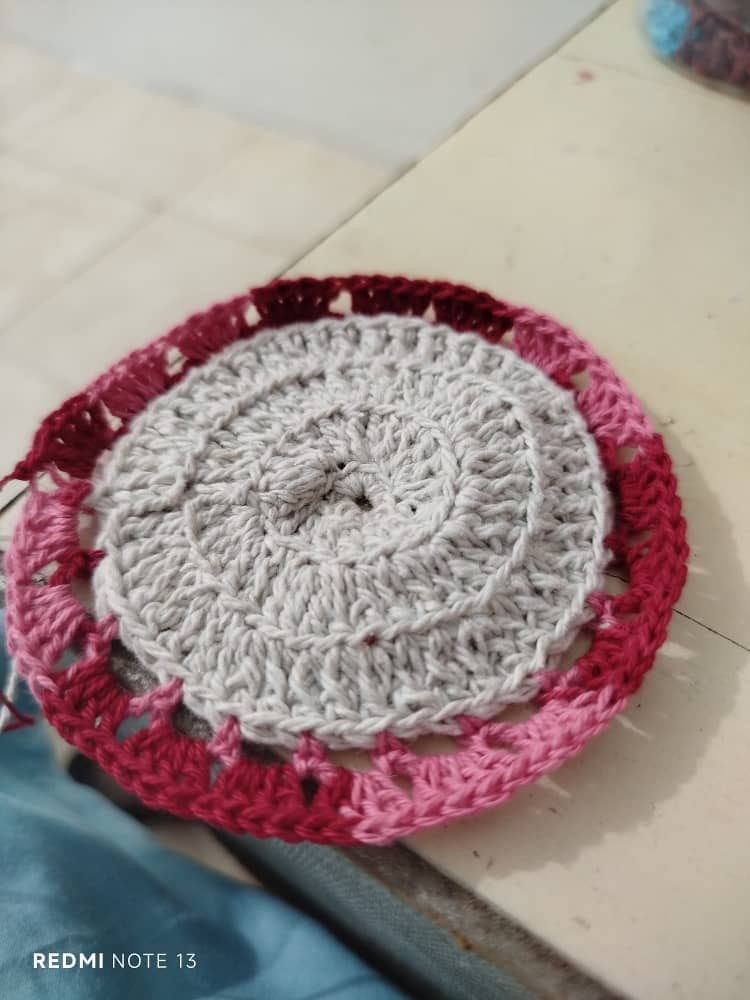
Step 4: Next, we take the shaded yarn and make the edge starting with a chain of four stitches and closing with a single crochet, then filling with double crochets.
4to paso: Seguidamente procedemos a tomar el hilo amatizado y hacer la orilla partiendo de una cadena de cuatro punto y cerrando con un punto bajo, luego rellenar con puntos altos.

Final results: I hope you liked my tutorial and found it useful. A big hug. Have a nice night 🌉
Resultados final: Espero les haya gustado y le sea útil mi tutorial un fuerte abrazote Bonita noche 🌉
Thank you very much for reading me many blessings to all.
Muchas gracias por leerme bendiciones para todos.
Separador de Texto Source
Las fotos son editadas en el collage GridArt
Las fotos son tomadas de mi teléfono Redmi Note 13

Wow, the knitting is very beautiful, the circle pattern is also very detailed, the color combination is also perfect so it looks elegant and attractive.
This work is beautiful, and we love the effort you put into every detail. Congratulations, it is very nice that you publish it in DIYHub Community, we are sure that you will inspire other participants.