Spiderman in 3D Quilling Technique [Eng-Esp]
Hello everyone... ✨
Hello to my dear Hivers and the beloved community of artists #DIYHub, as always very pleased and excited to be here again, showing you my work made with love and especially for you.
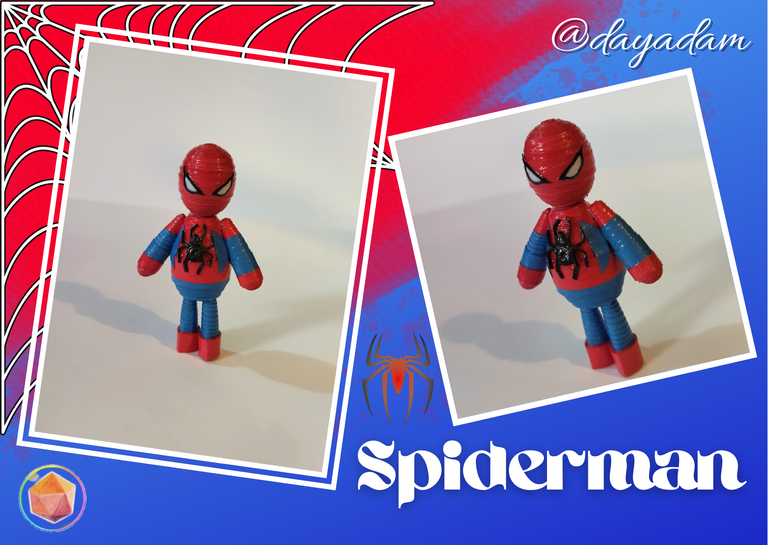
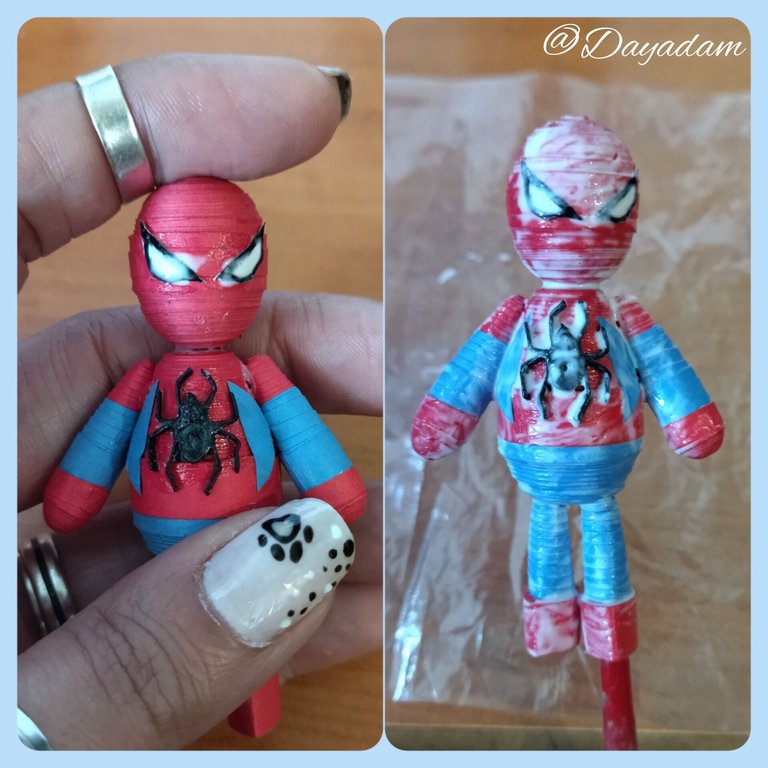
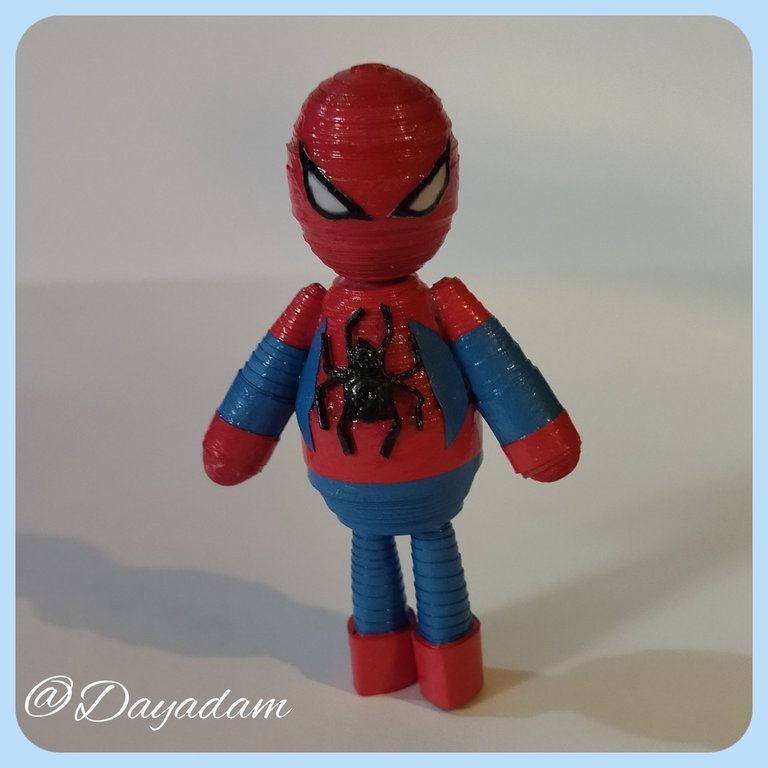
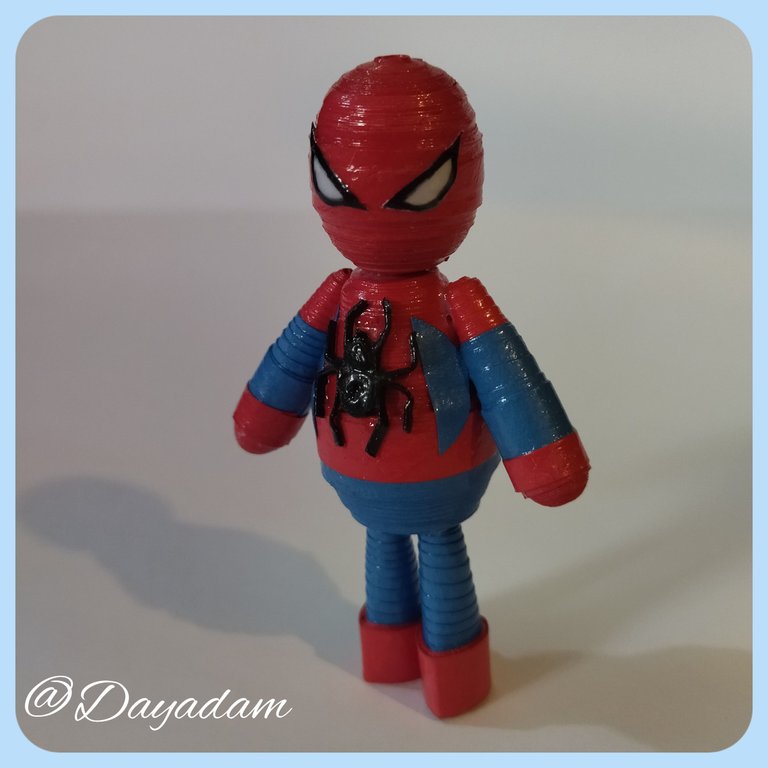
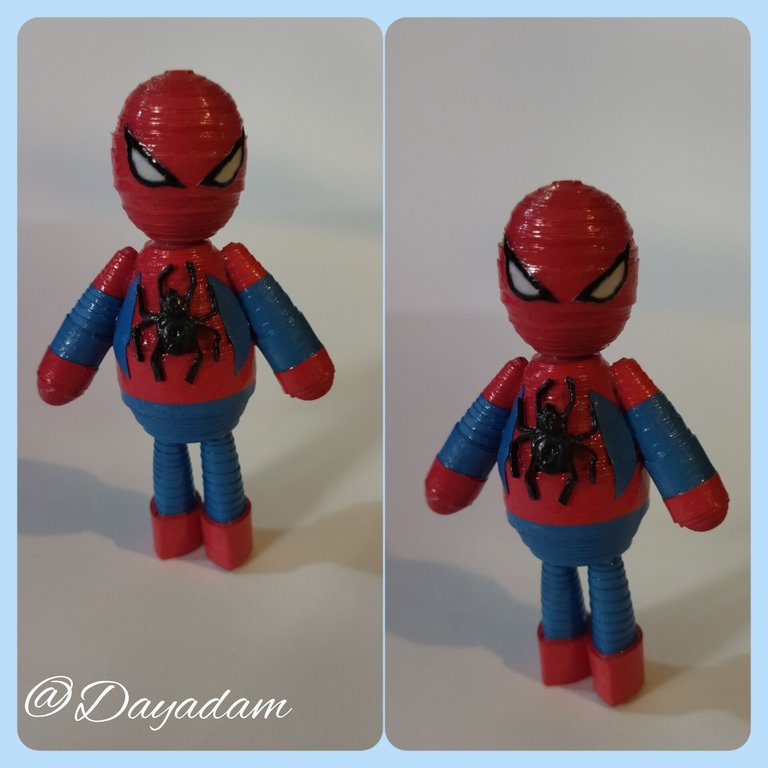
Today I bring you for lovers of the well-known super hero Spiderman, a small 3D figurine that I made in the quilling technique.
Hoping that you like this little fan-art, without further ado I leave here my creative process...
Let's get started:😃

Hola a Todos... ✨
Hola a mis queridos Hivers y a la querida comunidad de artistas #DIYHub, como siempre muy complacida y emocionada de encontrarme por acá nuevamente, mostrándole mi trabajo hecho con mucho amor y especialmente para ustedes.
Hoy les traigo para los amantes del conocido súper héroe Spiderman, una pequeña figurita en 3D que elabore en la técnica de quilling.
Esperando que sea de su agrado este pequeño fan-art, sin más preámbulos les dejo por acá mi proceso creativo…
Comencemos:😃

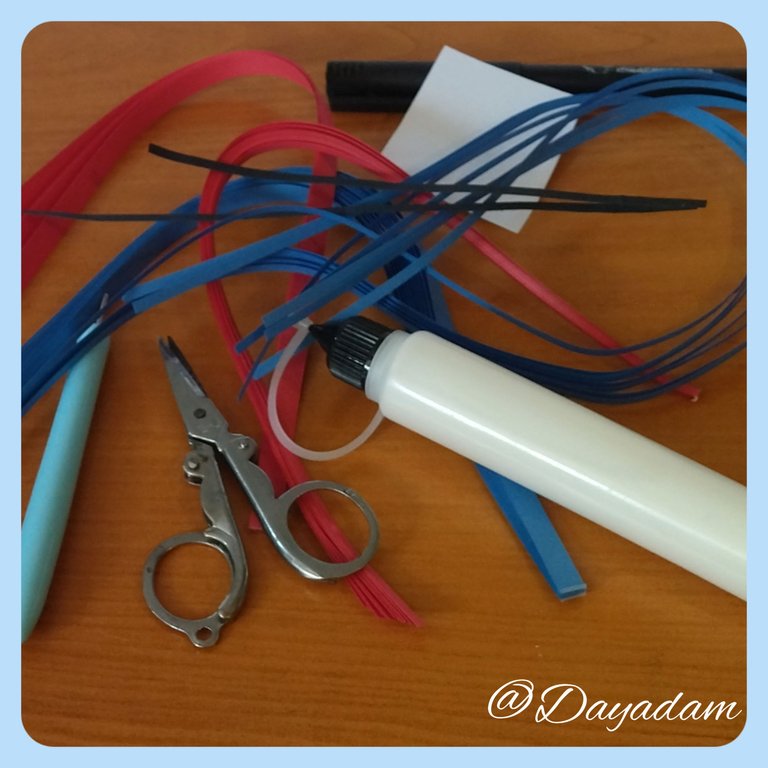
• Cintas de quilling de diversas medidas de ancho, rojas, azul oscuro y negra.
• Marcador negro.
• Trozo de hoja blanca.
• Aguja para quilling.
• Plantilla para moldear círculos.
• Pega blanca extra fuerte (de carpintería).
• Tijera.
• Pincel.
- Quilling ribbons of various widths, red, dark blue and black.
- Black marker.
- Piece of white sheet.
- Quilling needle.
- Template to mold circles.
- Extra strong white glue (carpentry glue).
- Scissors.
- Paintbrush.

Head:
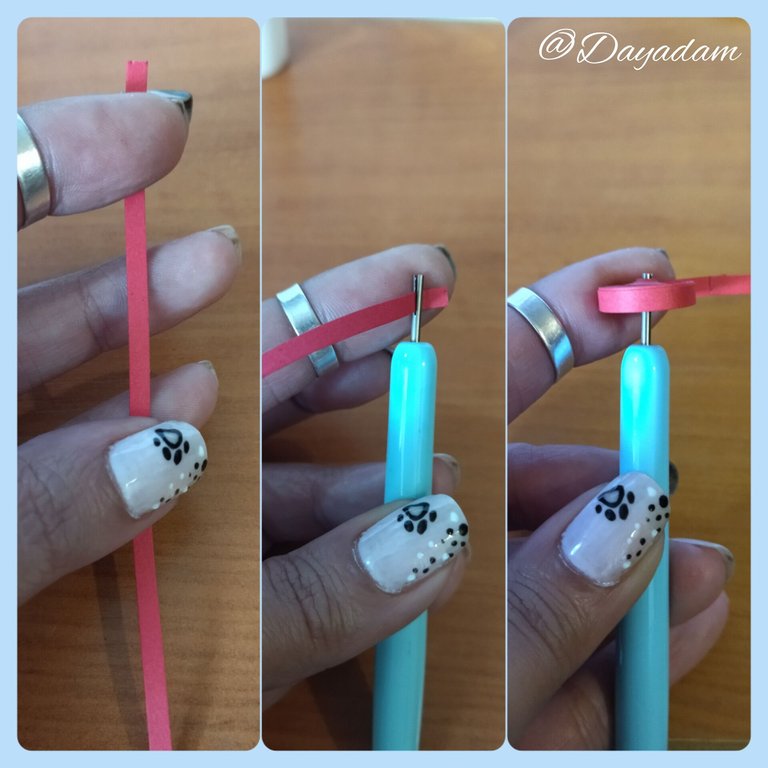
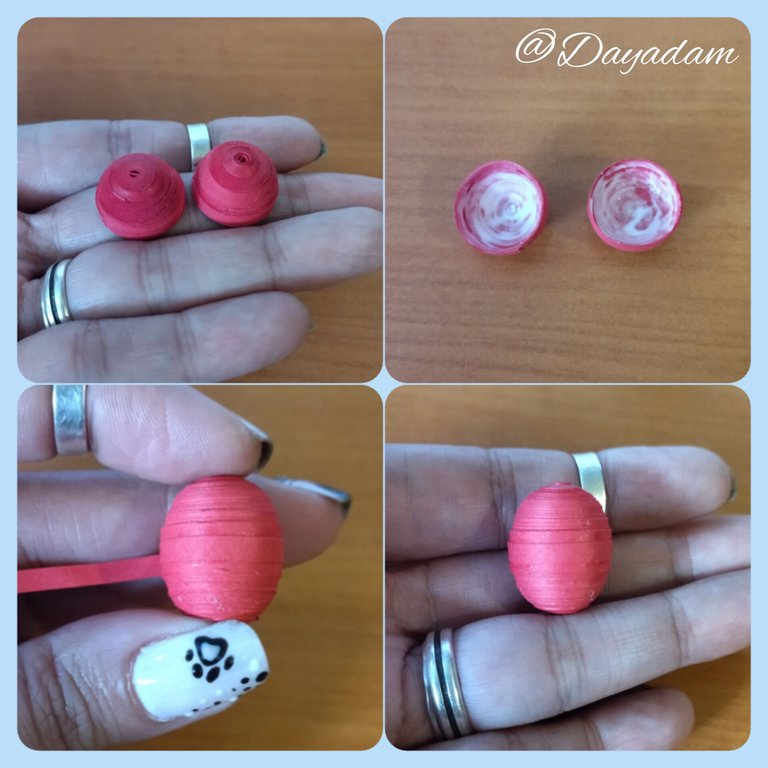
- We start by taking red quilling tape 3mm wide x 150cms long, we roll with the quilling needle until we reach the end of the tape, we seal with extra strong white glue, we remove from the needle, we will get a closed circle, we will need 2 circles like this one.
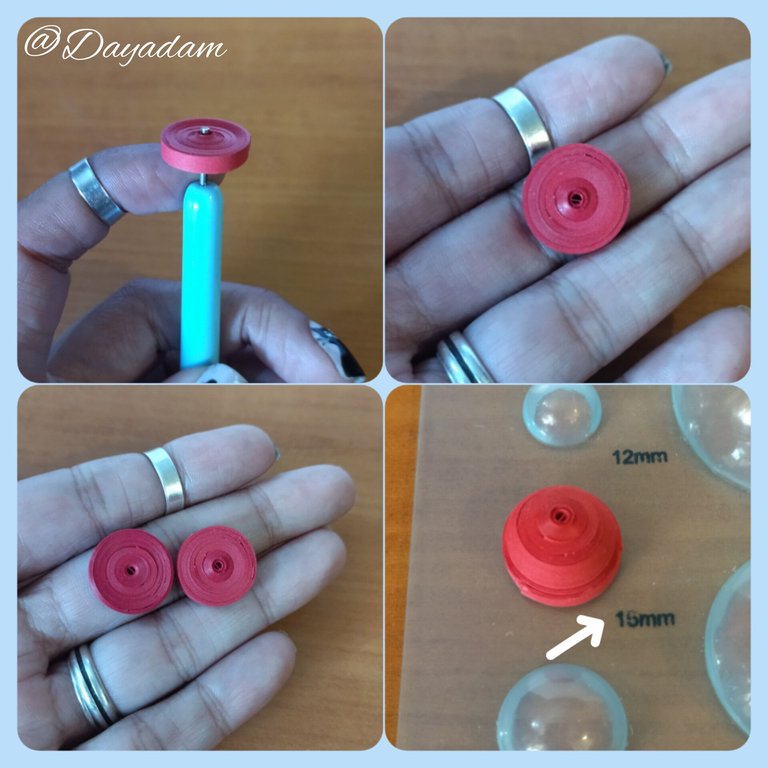
- We are going to mold the circles, placing the piece in the circle template in the 15mm measure (take into account that if we don't have this mold we can do it with our fingers trying to make it as round as possible), on the inside we add a little glue and let it dry to prevent the pieces from moving.
- We are going to take a small piece of red quilling tape, 3mm wide to join the 2 pieces we made, we join both pieces passing the tape through the middle with extra strong white glue.

Cabeza:
• Comenzamos tomando cinta para quilling de color rojo de 3mm de ancho x 150cms de largo, enrollamos con la aguja para quilling hasta llegar al final de la cinta, sellamos con pega blanca extra fuerte, sacamos de la aguja, obtendremos un círculo cerrado, vamos a necesitar 2 círculos como este.
• Vamos a moldear los círculos, colocando la pieza en la plantilla de círculos en la medida 15mm (tomemos en cuenta que si no tenemos este molde podemos hacerlo con los dedos tratando de que quede lo más redonda posible), en la parte de adentro agregamos un poco de pega y dejamos secar para evitar que se muevan las piezas.
• Vamos a tomar un pequeño trozo de cinta de quilling roja, de 3mm de ancho para unir las 2 piezas que elaboramos, acoplamos ambas pasando la cinta por el medio con pega blanca extra fuerte.
Body:
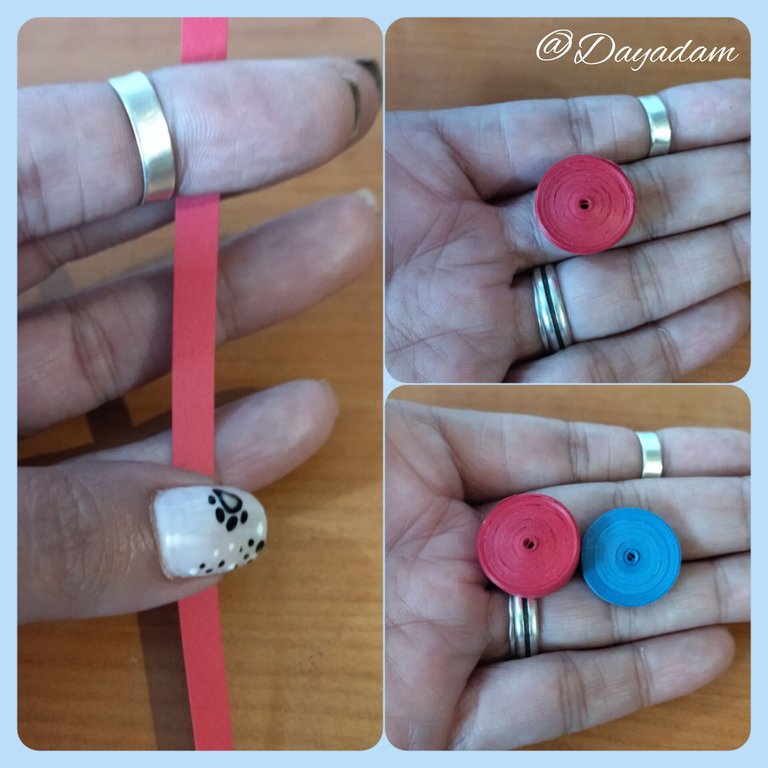
- We are going to take 6mm wide ribbon of 200cms long, one of red color and another of blue color of 3mm wide of 200cms long, with the quilling needle we are going to make 1 closed circle of each color, then we will mold both circles according to how we want the body to be, we apply white glue in the hollow part so that the pieces are not deformed and we will join both with a piece of 6mm wide ribbon of red color.
Arms:
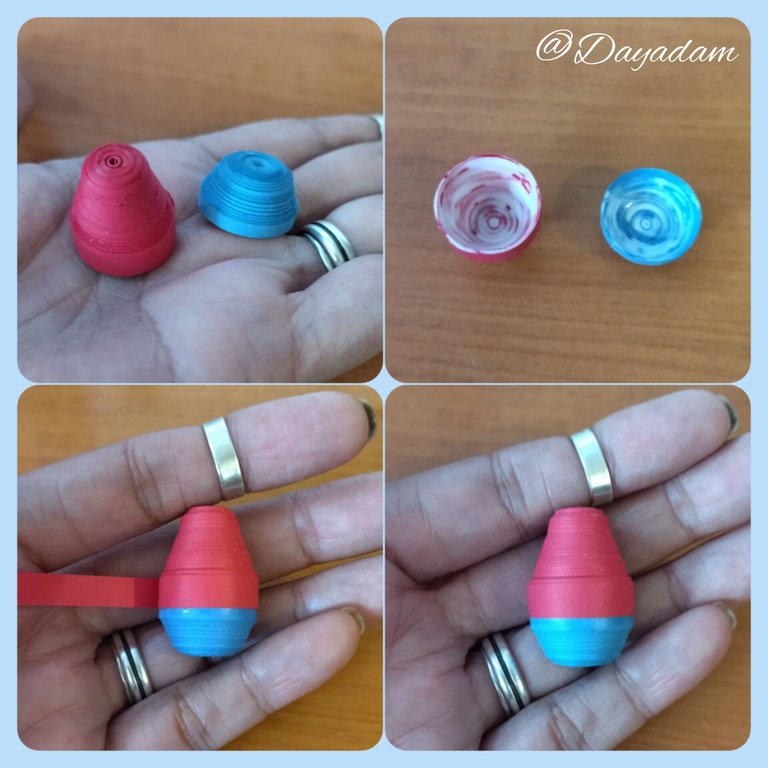
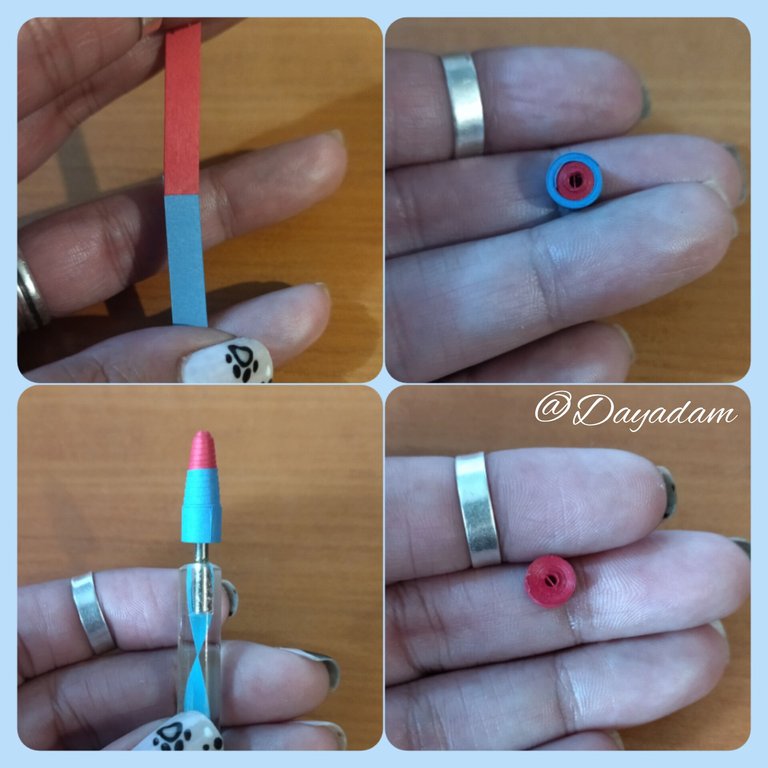
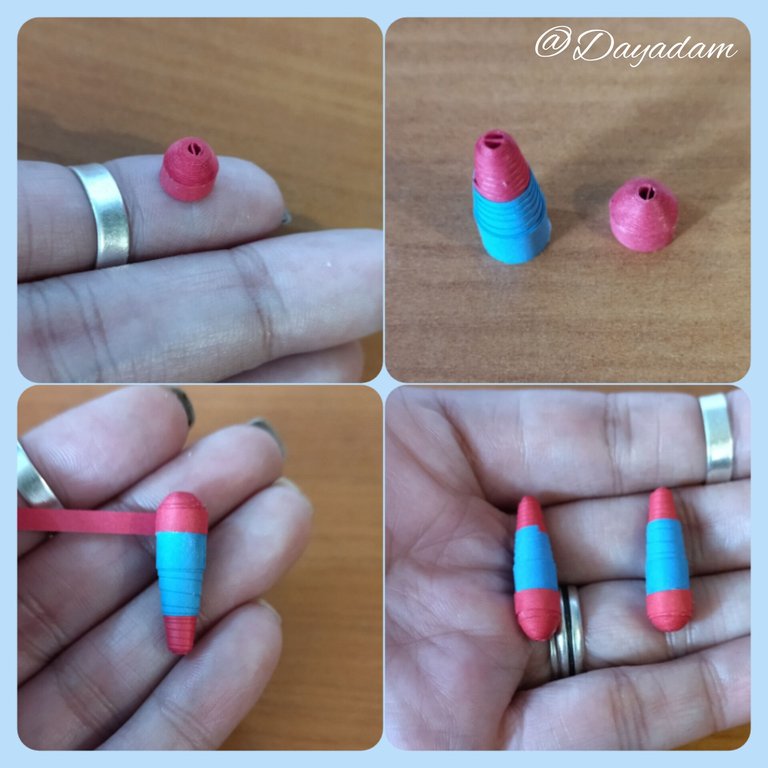
- We will take 2 pieces of red and blue 6mm wide x 14cms and 14cms respectively we join them both to form a single tape, we roll with the needle starting with the red color at the end we seal with a touch of glue to form a closed circle, like this we will need 2, finished we will mold going up with some object to form a cone, by the hollow part we will apply glue so that it does not deform.
- We will need another piece for the arms, we will make it with red ribbon 3mm wide x 28cms long, we roll it to form a closed circle then we will take a little bit out to give it a rounded touch, we will join the other piece in the shape of a cone with a piece of ribbon.

Cuerpo:
• Vamos a tomar cinta de 6mm de ancho de 200cms de largo, una de color roja y otra de color azul de 3mm de ancho de 200cms de largo, con la aguja para quilling vamos a realizar 1 círculo cerrado de cada color, luego moldearemos ambos círculos según como queramos que quede el cuerpo, aplicamos pega blanca en la parte hueca para que no se deformen las piezas y uniremos ambas con un trozo de cinta de 6mm de ancho color roja.
Brazos:
• Vamos a tomar 2 trozos de roja y azul de 6mm de ancho x 14cms y 14cms respectivamente las unimos ambas para formar una sola cinta, enrollamos con la aguja empezando por el color rojo al finalizar sellamos con un toque de pega para formar un círculo cerrado, como este necesitaremos 2, terminados moldearemos subiendo con algún objeto para formar un cono, por la parte hueca aplicaremos pega para que no se deforme.
• Necesitaremos otra pieza para los brazos esta la haremos con cinta de color rojo de 3mm de ancho x 28cms de largo, enrollamos para formar un círculo cerrado luego sacaremos un poco hacia afuera para darle un toque redondeado, uniremos a la otra pieza en forma de cono con un trozo de cinta.
Legs:
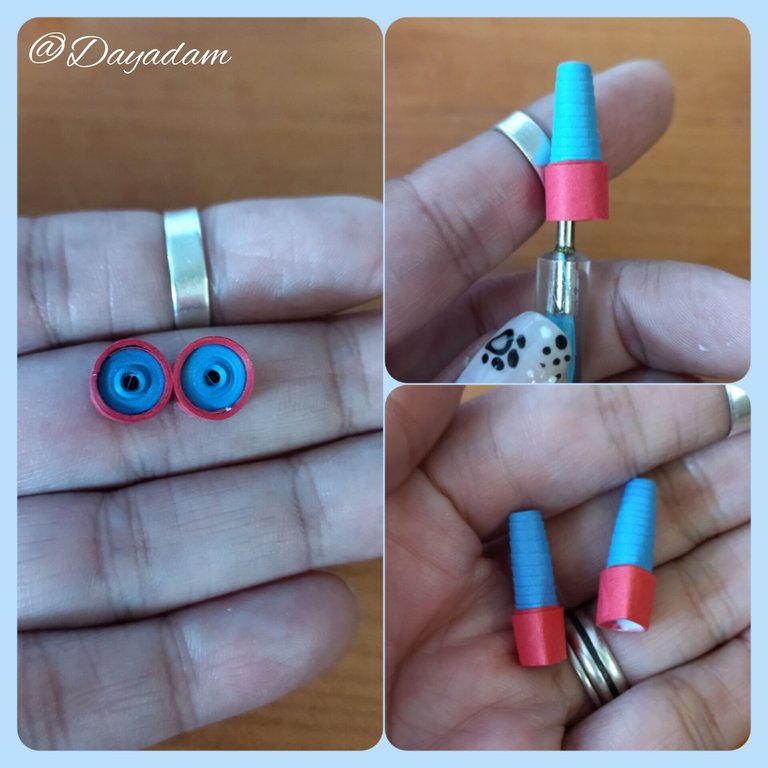
- We will take 6mm wide red and dark blue tape, we will join 50cms and 25cms respectively and we will follow the same process of the arms with the only difference that having the cone ready we are going to give it a pointed shape at the tip to shape a kind of shoe, as you will see in the image.
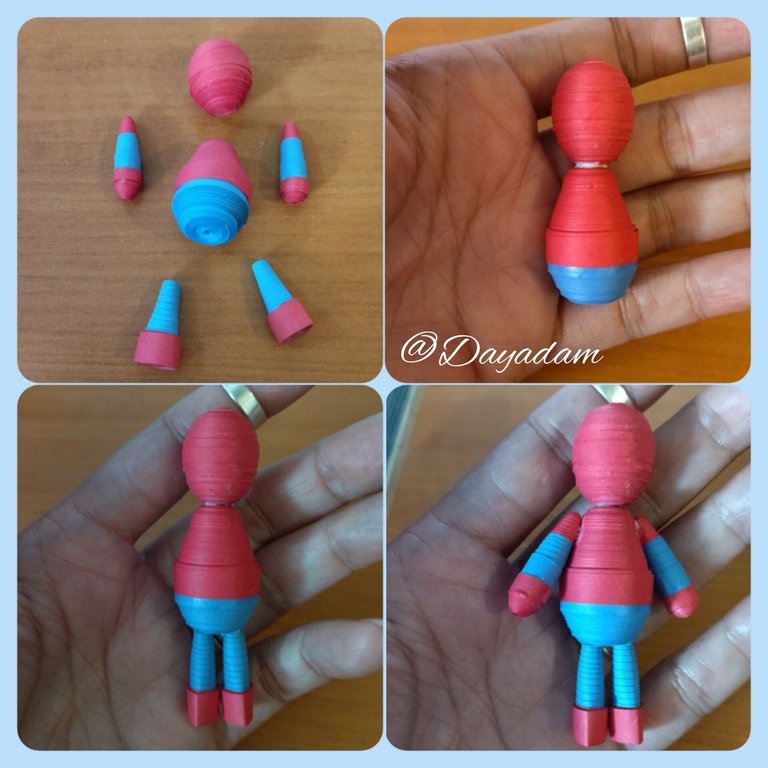
- We are going to join the pieces, waiting for them to dry well to prevent them from moving or peeling off, you can do it as you wish, in the way you want to place them.
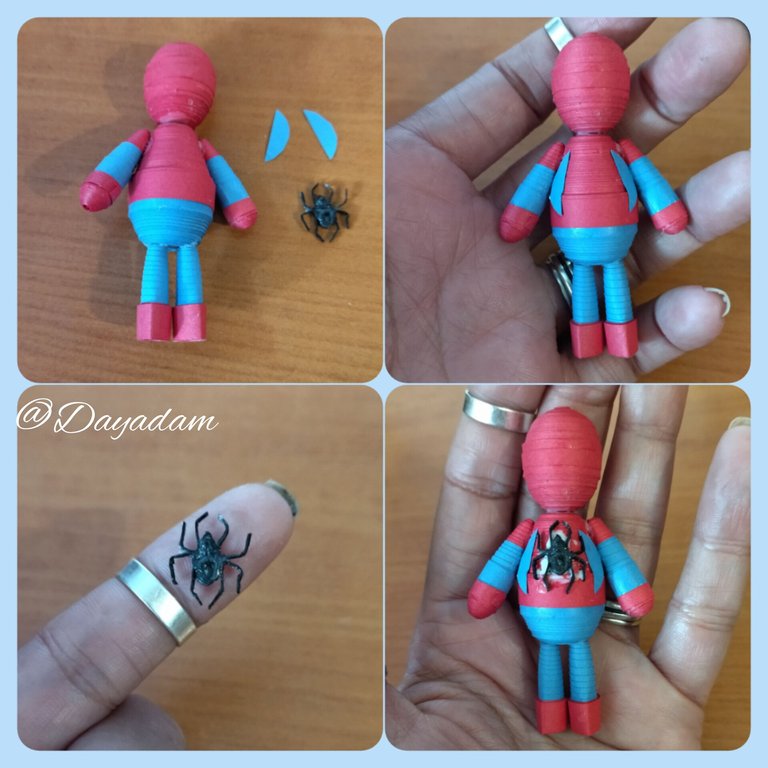
- Make a small quilling spider to glue in the center of the body, also place two small cuts of blue ribbon to give more resemblance to the costume.
- We proceed to paint the eyes on a white sheet, we glue them to the face.
- To finish we are going to apply a liquid protection (plasticizing), applying with a brush one or two layers of white glue extra strong, letting it dry between one layer and another.

Piernas:
• Tomaremos cinta de 6mm de ancho roja y azul oscuro, uniremos 50cms y 25cms respectivamente y seguiremos el mismo proceso de los brazos con la única diferencia que al tener el cono listo vamos a darle una forma puntiaguda en la punta para dar forma a una especie de zapato, como verán en la imagen.
• Vamos a unir las piezas, esperando que sequen bien para evitar que se muevan o se despeguen, pueden hacerlo como lo deseen, en la forma que quieran colocarlas.
• Realice una pequeña araña de quilling para pegarla en el centro del cuerpo, también le coloque dos pequeños cortes de cinta azul para dar más semejanza con el traje.
• Procedemos a pintar los ojos en una hoja de color blanca, los pegamos a la cara.
• Para terminar vamos a aplicar una protección liquida (plastificado), aplicando con un pincel una o dos capas de pega blanca extra fuerte dejando secar entre una capa y otra.

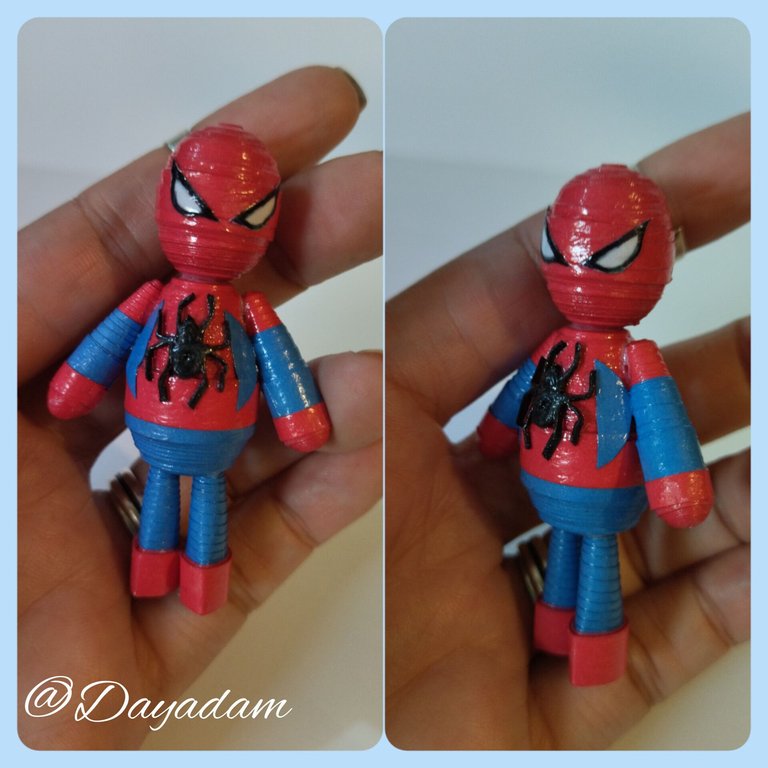
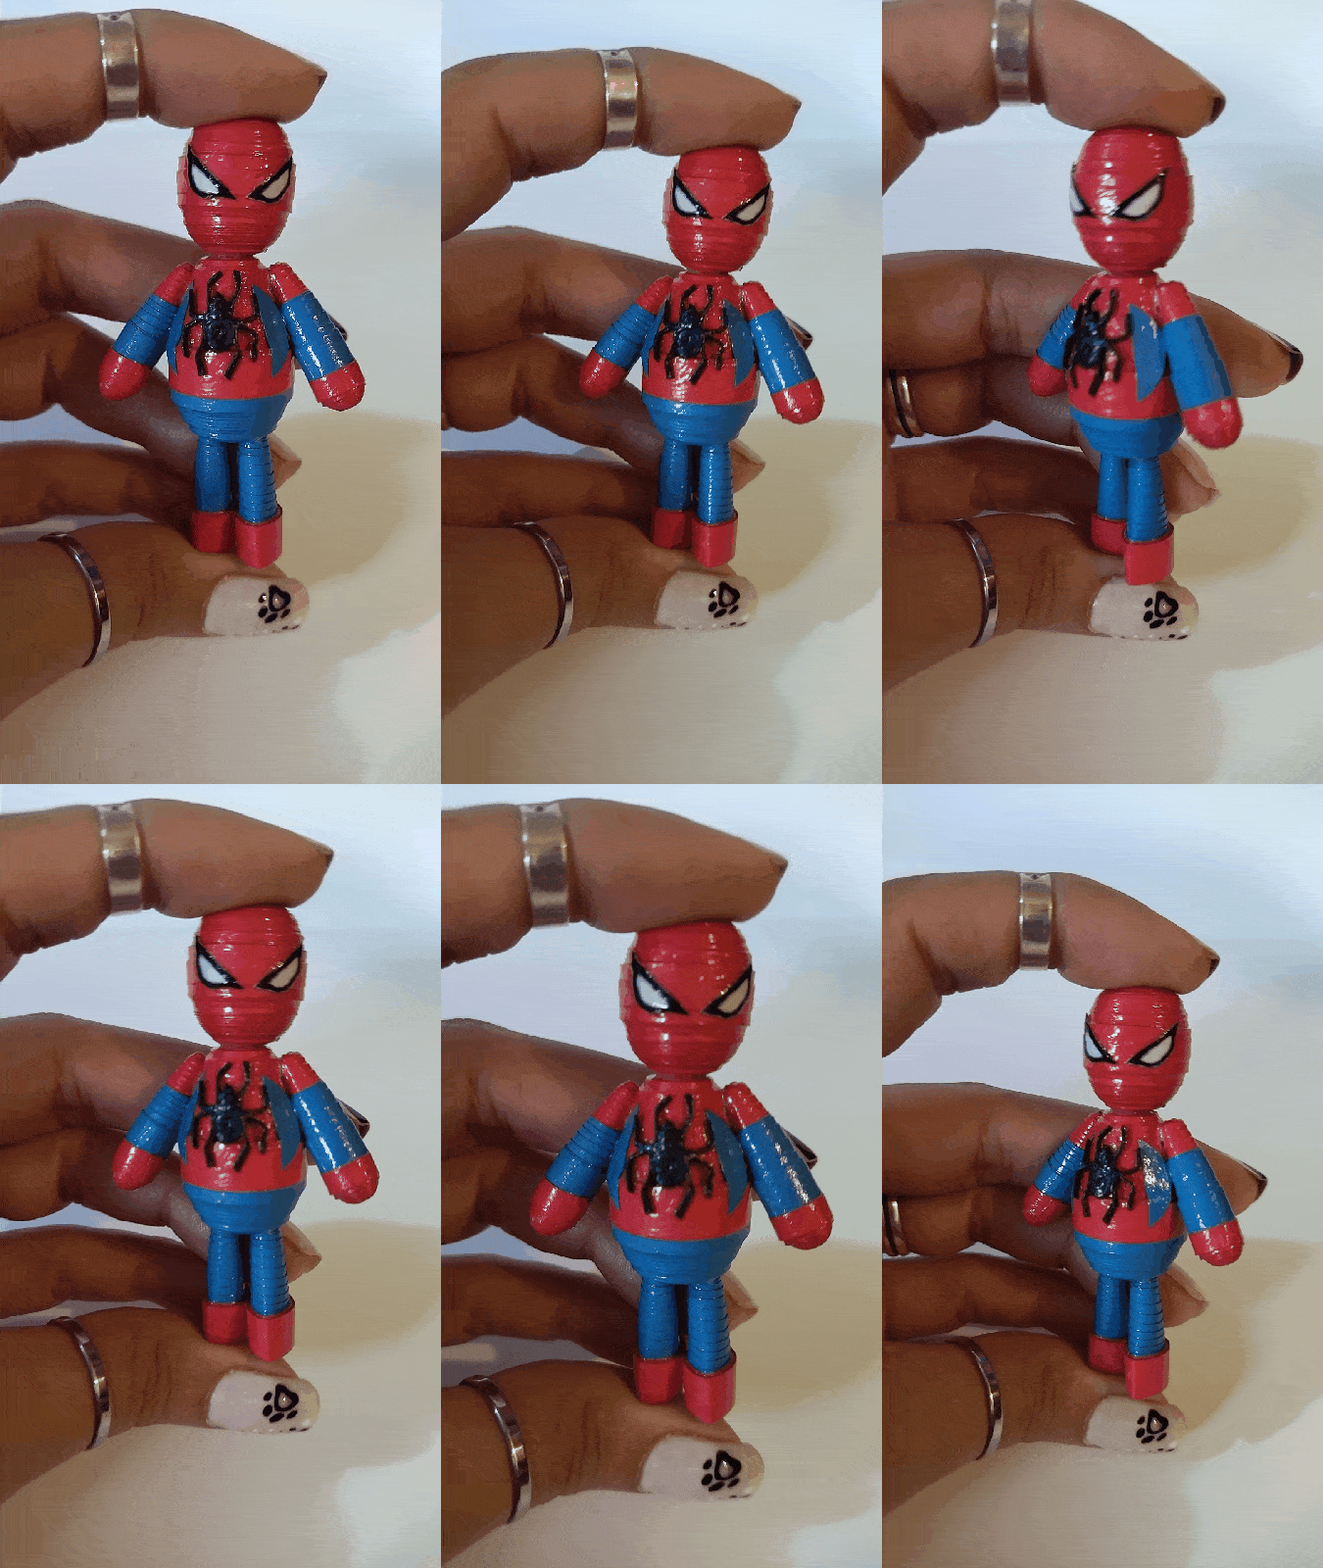
What did you think, did you like it?
I hope you did, I hope you liked my explanation, procedure and photos, I made them with love for you.
"Let out that muse that inspires you, and let your imagination fly".
Thank you all, see you next time.💙

¿Que les pareció, les gustó?
Espero que sí, que les haya gustado mi explicación, procedimiento y fotos, los hice con mucho cariño por y para ustedes.
"Deja salir esa musa que te inspira, y deja volar tu imaginación".
Gracias a todos, nos vemos en la próxima.💙

Todas las fotos usadas en este post son de mi autoría y han sido sacadas en mi celular personal un Redmi 9T y editadas en Canva y en Inshot Banner y separador hecho por mí en Canva Traducido con la ayuda de DeepL

Congratulations @dayadam! You have completed the following achievement on the Hive blockchain And have been rewarded with New badge(s)
Your next target is to reach 70000 upvotes.
You can view your badges on your board and compare yourself to others in the Ranking
If you no longer want to receive notifications, reply to this comment with the word
STOPMuchísimas gracias @hivebuzz 🥰
¡Eso es perfecto @dayadam! ¡Eres una verdadera inspiración para Hive! ¡Sigue adelante y logra este nuevo objetivo!
Gracias que lindas palabras @hivebuzz 😍💕
Seguiré esforzándome. Bendiciones...
I think your catspaw nails are lovely 🤩🌹
!diy
Thanks a lot friend. I decided to treat myself, I hadn't done my nails in years. You'll see how they all turned out, you can't see them in the photo hahahaha. You're so cute thank you @stevenson7 ☺️
I was right, they are cat themed 😊
So lovely 💙
You should treat yourself more often
I wish I could keep doing it, but they are very expensive for what I earn, they cost more than 10$ and sometimes that's what I earn here in the week, these I still owe, hahaha. I prefer to laugh, my friend, what's left for us.
I'm glad you liked them, I love them 🐱🐾❤️
Ha, that's a lot.
Well, I just contributed my tiny quota for the next one.
💙😊
Take care
Ainssssssss Thankssss 😍
Esta como para tenerlo de adorno, con una base o un cartoncito abajo para que se pueda poner parado en alguna repisa.
Bonito te quedo.
Lo puse en mi setup por ahora, hasta que seguro venga me hija y me lo quite, si queda paradito allí, no pesa nada y quedo equilibrado. Me alegra que te gustará. Gracias amigo 😊
ja ja ja no tarda tu hija en quitartelo de alli ja ja ja.
!LADY
!LOL
!GIF SPIDERMAN
Via Tenor
lolztoken.com
It was just so lava-able.
Credit: belhaven14
@dayadam, I sent you an $LOLZ on behalf of manclar
(1/1)
ENTER @WIN.HIVE'S DAILY DRAW AND WIN HIVE!
View or trade
LOHtokens.@manclar, you successfully shared 0.1000 LOH with @dayadam and you earned 0.1000 LOH as tips. (1/2 calls)
Use !LADY command to share LOH! More details available in this post.
Wow. These are so cute. My husband loves Spiderman :)
Thank you very much, I'm glad you like it. I hope you show it to your husband. Hugs @spoonies 🥰
that's a figurine for everyone. So nice. 👏🏿
Thank you very much for the words and support @diyhub 😊
You can query your personal balance by
!DIYSTATSExcelente. El amigable hombre araña, una maravilla.
!discovery 45
Thanks @diyhub ✨
Gracias @gaboamc2393, por el apoyo ☺️
Me alegra que te gustará.
Saluditos...
This post was shared and voted inside the discord by the curators team of discovery-it
Join our Community and follow our Curation Trail
Discovery-it is also a Witness, vote for us here
Delegate to us for passive income. Check our 80% fee-back Program
Thanks @discovery-it and @gaboamc2393 ✨
¡Hay no, no no no! ¡No puedo con tanta cuchitura en la vida!
¡Que nivel de detalle y precisión hasta para la diminuta araña! ¿Puedes por favor por favor y por favor realizar a la Mujer Maravilla pá la próxima?
Ay Dios mío tan bella. Honor que me haces con tus palabra mi linda @yenmendt. Está interesante el reto, anotada, si lo llegó a sacar cuenta con la mención, será dedicado a ti 🥰❤️
Cruce los deditos que salga. Tengo una colita de peticiones jajaja.
Muy agradecida con tu hermoso comentario 😊
Estaré pendiente cuando salga mi petición.
Okok jajajajjaja💕
Amigaaa te pasaste, que espectacular y además la explicación está super detallada, me encanta 🖤
Gracias hermosa por tus palabras. Un abrazo para ti @sylregne ☺️
https://leofinance.io/threads/dayadam/re-dayadam-2tswizctg
The rewards earned on this comment will go directly to the people ( dayadam ) sharing the post on LeoThreads,LikeTu,dBuzz.
Thanks @poshthreads ✨
This is brilliant! You are so talented. Your hands are a charm.
Thank you very much for your words. I'm glad you like my work. Amen amen... Greetings @mell79 😊
You're welcome. I do hope i can be more creative like you. 😘
Yay! 🤗
Your content has been boosted with Ecency Points, by @spoonies.
Use Ecency daily to boost your growth on platform!
Support Ecency
Vote for new Proposal
Delegate HP and earn more
Gracias por el apoyo @ecency and @spoonies 💕 Muchísimas bendiciones...
Little spiderman .My kids like spiderman a lot. It's cute.
!DIY
I'm glad you liked it @ladyfoth, I love it. I hope you show it to your kids ✨
Yeah, they have already seen and were like wow!
😊🥰
You can query your personal balance by
!DIYSTATSThanks ✨
Greetings friend I hope you are very well, and well here I am every day more admired with that talent so cute, is the Spider-Man more cute I've seen, I wish you much success with your beautiful and creative art sculpture. It is perfect.
Thank you for sharing with us.😃👏
Thank you so much beautiful for your words towards my work @lauracraft, they are a compliment for me. I am very happy that you liked it. Thank you very much for stopping by. Here always at your service. Have a nice evening 💕
Que lindoooooi
Gracias @crisch23 💕
😜
Sigue, contacta y se parte del testigo en: // Follow, contact and be part of the witness in:
Keychan - Hive.blog - Ecency - Peakd
Muchas gracias por el apoyo @hispapro ✨
@tipu curate
Upvoted 👌 (Mana: 31/71) Liquid rewards.
Thanks @tipu ✨
Gracias por el apoyo @yonnathang.
Porfa si puedes escucha el mensaje que te envié, y me agendas para conversar, jajajaja...
Saludos, y bella noche llena de bendiciones.
Hola amiga, esto es una gran obra de arte que nos compartes y ese personaje es uno de mis favoritos y siempre disfruto de cada una de sus películas. Además muchas felicidades por toda esa creatividad y llevar las cosas a otro nivel y de esa manera recrear esa gran pieza, done le colocas ese gran toque incuso hasta gordito ajajaja. Excelente amiga como siempre felicidades y éxitos. Yo quiero uno de esos.
Que lindo mi niño @davidpena21, muchísimas gracias por este bello comentario hacia mi trabajo, un placer que te guste. Trato de hacer lo mejor posible, dado que es un fan-art en quilling tengo que recrearlo a veces no tan similar si no tipo caricatura, ya que el proceso con las cintas no es tan fácil, si fuera en masa o plastilina el moldeado seria diferente pero aun así siento que me satisface el resultado final.
Y te hago los que quieras con todo gusto cariño.
Gracias nuevamente. Mil bendiciones... ✨
Excelente, saludos.
Que original trabajo con esta técnica de 3D quilling
Gracias amiga. Un placer que te guste. Saludos @leidys01 ✨
Que ternurita amiga 😍 me esta empezando a gustar esta tecnica jeje lo pondria de adornito en el mueble de la PC y me estaria vigilando que haga los deberes o me lanza telaraña jajaja
Saludos bella ❤️
Ainsss tan linda, gracias por apreciar mi trabajo. Y te cuento que precisamente esta allí en mi setup mirándome para que trabaje, si no lo hago quizás recurra a las telarañas, jajajajaja.
Que tengas un hermoso y bendecido día @elbuhito ✨
Holaa! es increíble lo que logras hacer con esa técnica, la he trabajado haciendo cosas con mi hija, muy simples, en 2 dimensiones y me parece trabajosa y compleja. Veo lo de haces en 3D y quedo gratamente sorprendida. Me encantó tu Spiderman 🥰.
Hola @mdrguez. Que genial saber que trabajas la técnica, cuando hagas algo no dudes en mencionarme. Me alegra mucho que te haya gustado mi trabajo en 3D, te cuento yo jamás imagine hacer cositas como estas, solo hacia, accesorios pero ya ves Hive nos reta, querer es poder, logramos lo inimaginable.
Muchos éxitos en tu nuevo transito por acá. Estoy a la orden bella. Bendiciones...
Woooow amiga @dayadam pero esto es otro nivel vale. Maravilloso y lo mejor es que hace que se vea facil. te re-quiero amiga. Gracias por compartir.
Mi hermosaaaaa @karelysk89 que gusto leerte por aquí mi amorcito querida. Mil gracias por tus palabras mi bella, me alegra que te haya gustado. Te he extrañado un mundo.
Dios te bendiga de manera infinita, hoy, mañana y siempre. 💕
!HUG
I sent 1.0 HUG on behalf of @dayadam.
(3/3)
Me quedé un raato viendo lo redondita que logra quedar la cabeza jajajaja esto si que es un "currazo" como dicen por aquí, un muy buen trabajo.
Y viste la razón por la cual quedo esa cabecita así de redondita??
Gracias, gracias y mil gracias @ninaeatshere ✨