Circles and ZigZag // Venezuela Collection // Earrings Quilling Technique [Eng/Esp]
Hello everyone... 💛💙❤️
Hello to my dear Hiver and the dear community of #Jewelry artists, as always very pleased and excited to be here to show you a work made with love and affection especially for you.
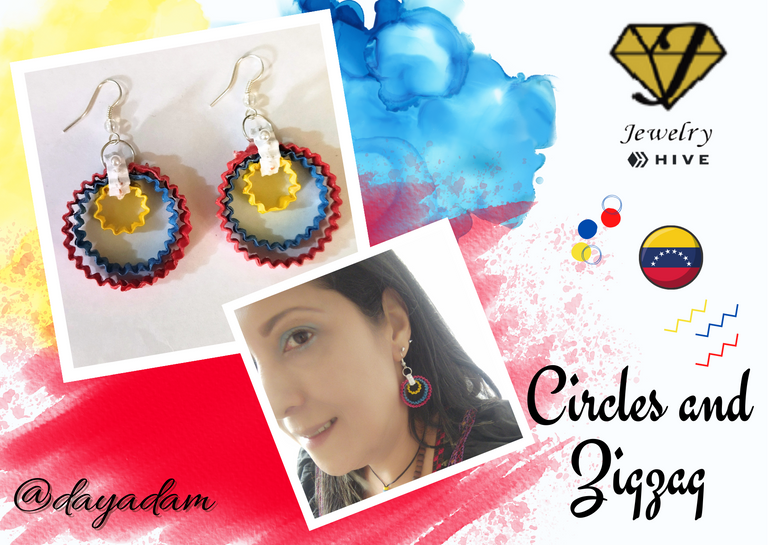
For today I bring you a little unusual work because I decided to make a pair of earrings with a circular shape, but at the same time molded with a corrugator to give them a wavy or Zigazag effect, I chose my national tricolor, to make them part of the collection that I want to make of Venezuela. This pair of earrings was an idea that came up suddenly and I was observing in the process if I could make them, and fortunately I succeeded hahaha.
So friends, without further ado, I hope you like it, join me in this creative process that I made especially for you.
Let's get started:😃

Hola a todos... 💛💙❤️
Hola a mis queridos Hivers, y a la querida comunidad de artistas de #Jewelry, como siempre muy contenta y emocionada de estar aquí para mostrarles un trabajo hecho con amor y cariño especialmente para ustedes.
Para hoy les traigo un trabajo un poco inusual ya que decidí realizar un par de pendientes con una forma circular, pero a la vez moldeados con una corrugadora para darles un efecto ondulado o de Zigazag, elegí mi tricolor nacional, para hacerlos parte de la colección que deseo hacer de Venezuela. Este par de aretes fue una idea que surgió repentinamente y que fui observando en el proceso si los lograba, y afortunadamente tuve éxito jajajja.
Entonces amigos, sin más preámbulos, esperando que sea de su agrado acompáñenme en este proceso creativo que realice especialmente para ustedes.
Comencemos:😃

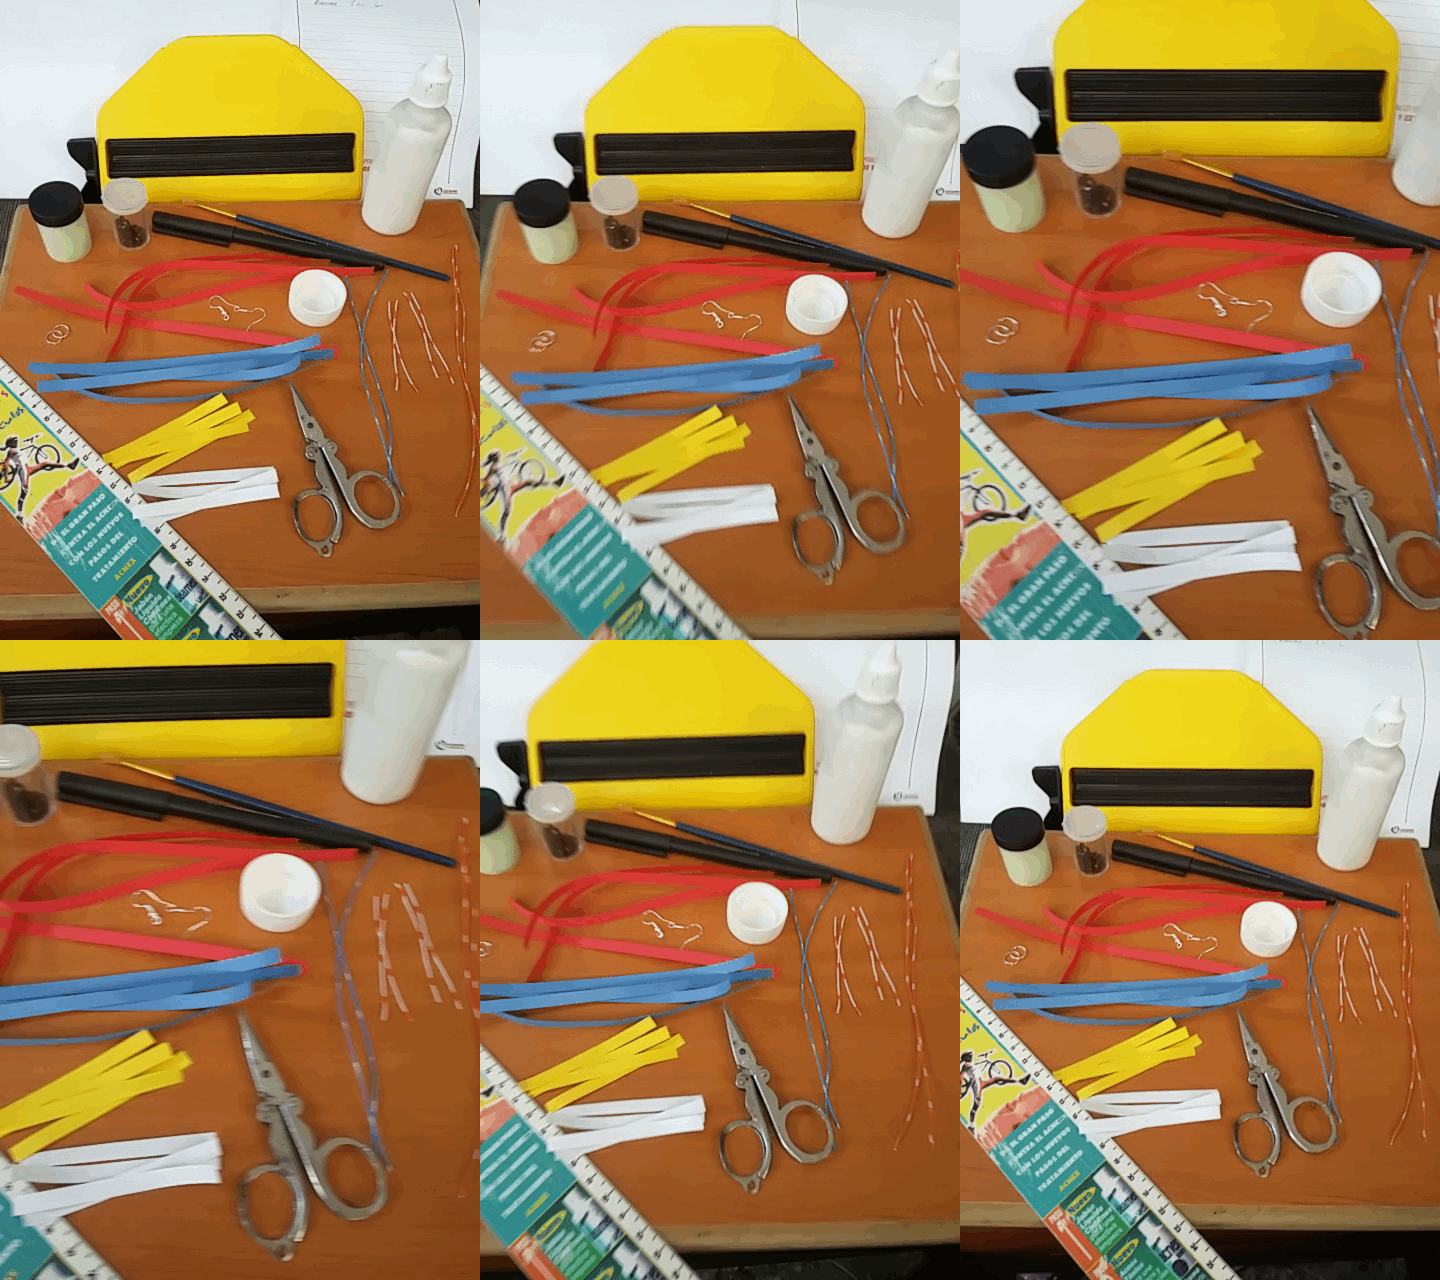
• Cintas de quilling de 6mm de ancho amarillas, azul, rojas, y blancas.
• Moldes para círculos de diversos tamaños.
• Alambre fino.
• Maquina corrugadora de papel.
• Pega blanca extra fuerte (de carpintería).
• Bases para zarcillos colgante (anzuelos).
• Tijera.
• Pinza punta fina
• Pincel.
- Quilling ribbons 6mm wide yellow, blue, red, and white.
- Molds for circles of various sizes.
- Fine wire.
- Paper corrugating machine.
- Extra strong white glue (woodworking glue).
- Bases for hanging tendrils (hooks).
- Scissors.
- Fine tip tweezers.
- Paintbrush.

I will begin by explaining what we must do to make the first piece. Under the same parameters we will proceed to make the others, the only difference will be the size of the ribbon that I will be giving you when appropriate.
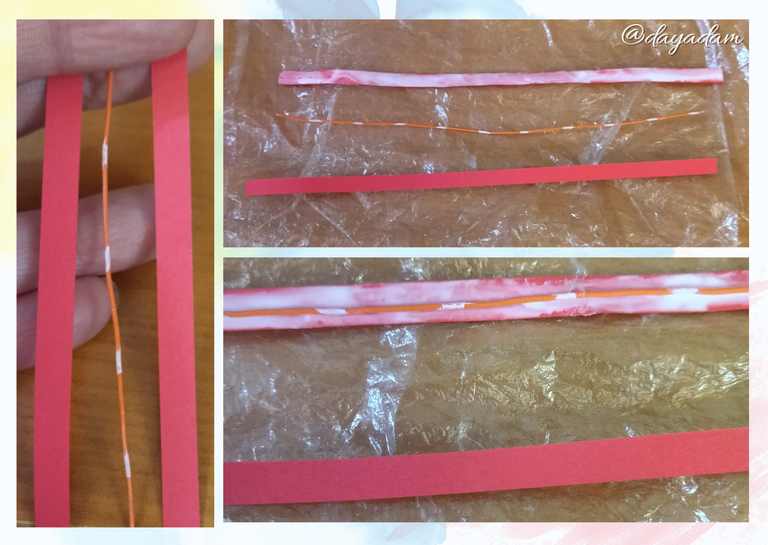
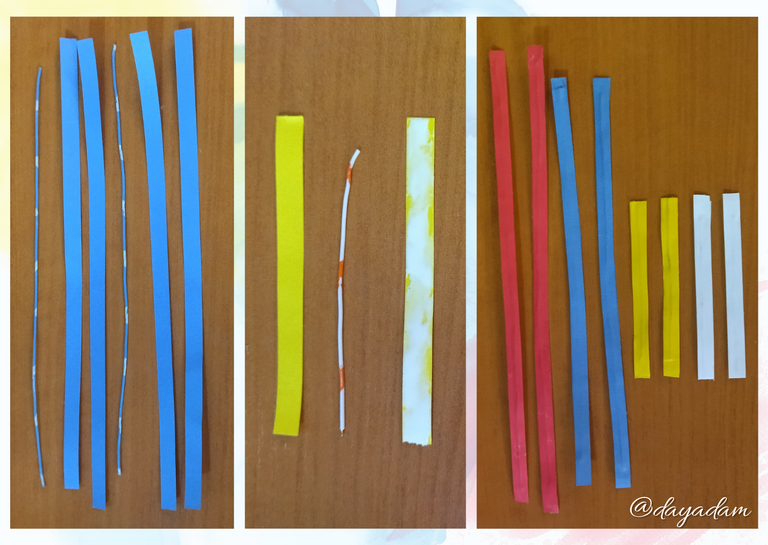
- We will begin by taking 2 pieces of quilling tape 6mm wide x 18cms long red color and a piece of fine wire of the same size, it can be floral, I took one that I had to recycle from a telephone cable.
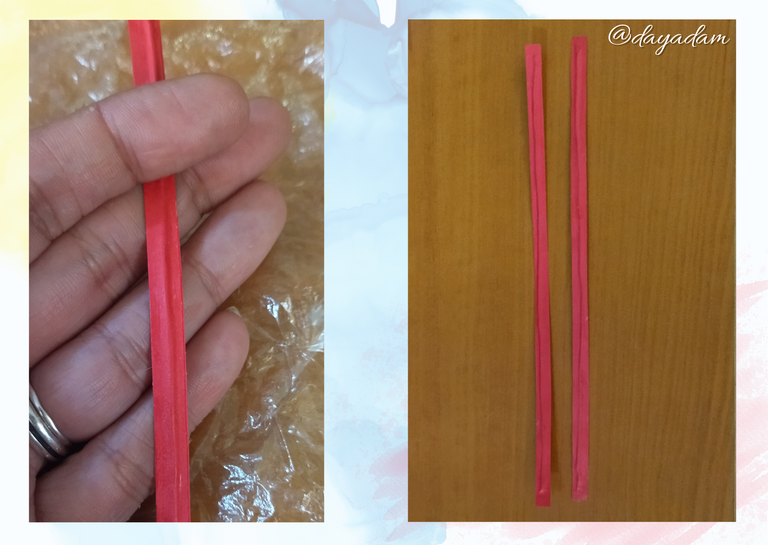
- We proceed to apply extra strong white glue (carpentry glue) on one of the ribbons, place the wire in the middle of the ribbon and place the other one on top, seal it with our fingers so that it is well joined and sealed, we must wait for it to dry very well. We repeat with another pair of ribbons and a wire since we will make a pair of earrings.
- We will repeat the same process with wire of the same size as the quilling strips, and likewise we will take blue ribbon of 6mm x 15cms long, yellow of 6mm x 7cms long and white of 6mm x 7cms long, in this way we will have 2 red, 2 blue, 2 yellow and 2 white strips. Keep in mind that we must let the strips that we join to the wire dry very well.

Les comenzare explicando que debemos hacer para elaborar la primera pieza. Bajo los mismos parámetros vamos a proceder a realizar las demás, la única diferencia será la medida de la cinta que se las estaré dando cuando corresponda.
• Comenzaremos tomando 2 trozos de cinta para quilling de 6mm de ancho x 18cms de largo color roja y un trozo de alambre fino de la misma medida, puede ser floral, yo tome uno que tenía para reciclar de un cable telefónico.
• Procedemos a aplicar pega blanca extra fuerte (de carpintería) en una de las cintas, colocamos el alambre en el medio de la cinta y colocamos la otra encima, sellamos con los dedos para que quede bien unida y sellada, debemos esperar que seque muy bien. Repetimos con otro par de cintas y un alambre ya que haremos un par de pendientes.
• Repetiremos el mismo proceso anterior con alambre de las medidas de las tiras de quilling, y así mismo tomaremos cinta azul de 6mm x 15cms de largo, amarilla de 6mm x 7cms de largo y blanca de 6mm x 7cms de largo, de esta manera tendremos 2 tiras rojas, 2 azules, 2 amarillas y 2 blancas. Tomen muy en cuenta que debemos dejar secar muy bien, las tiras que unimos al alambre.
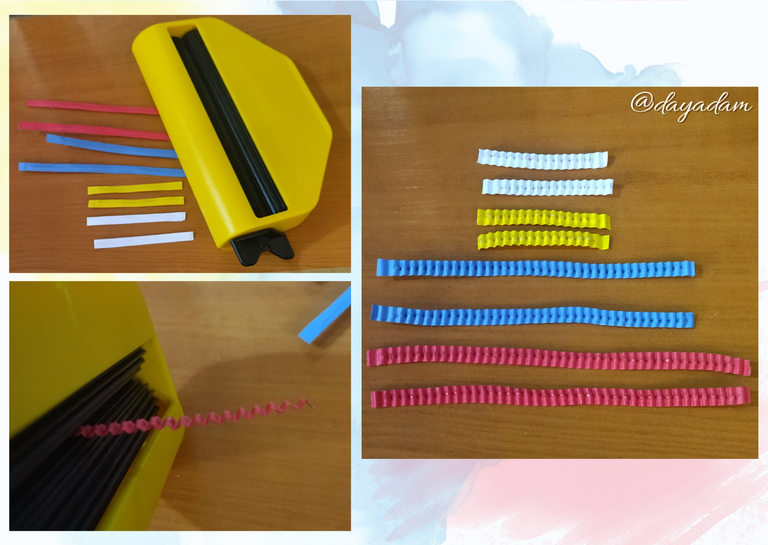
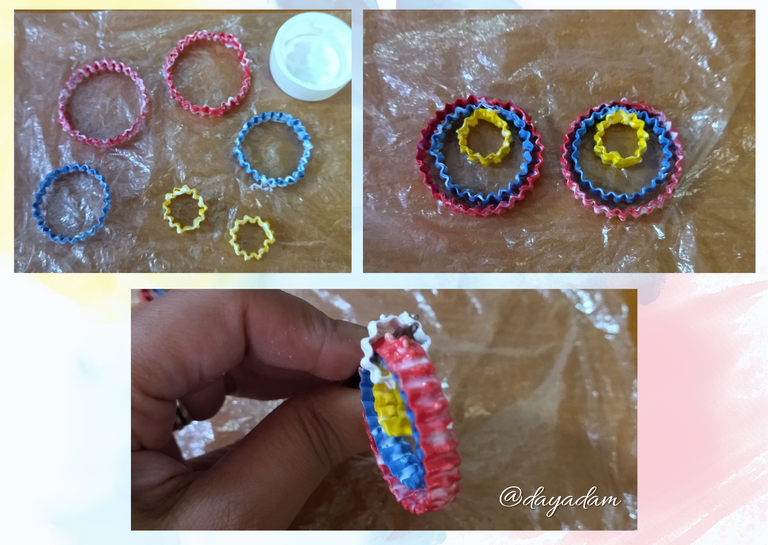
- Take each of the ribbons and run them through a paper corrugating machine, as you will see the ribbons will look zigzag shaped.
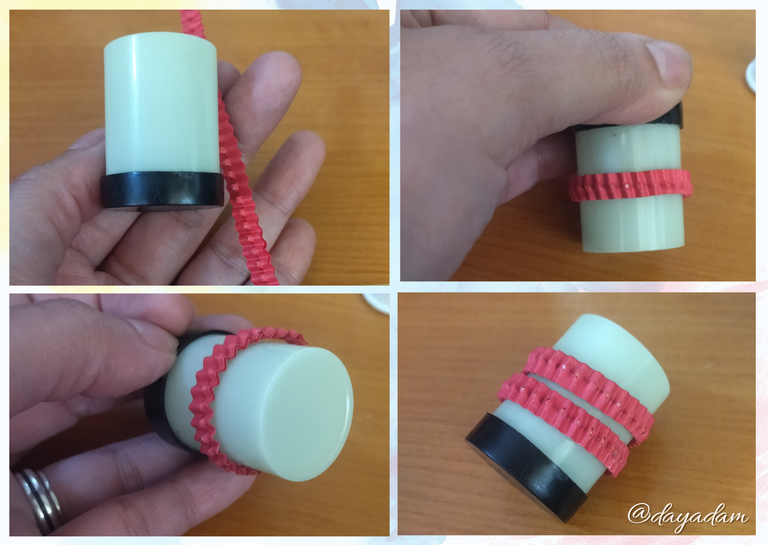
- I will mold my ribbons to give them the shape I want for the earrings, I will start by taking the red zigzag ribbons and put them around a small circular container with an approximate circumference of 28mm, we will seal them with a little glue. Use this container since I don't have the respective cone to mold ribbons.
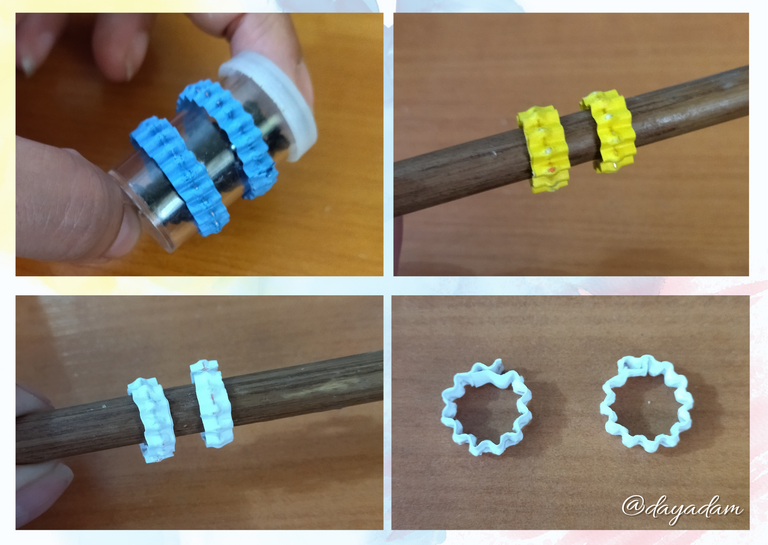
- Repeat the process with the blue and yellow ribbons on a base or any object with a smaller circumference than the previous one. You can use the measurements of your preference.
- The white ribbons we will also pass them through a circular object just to give it the shape, but we will not seal them.

• Tome cada una de las cintas y las pase por una maquina corrugadora de papel, como verán las cintas se verán en forma de zigzag.
• Moldeare mis cintas para darle la forma que deseo para los pendientes, comenzare tomando las cintas rojas en zigzag y las pasare alrededor de un pequeño envase circular con una medida aproximada de 28mm de circunferencia, sellamos con un poco de pega. Utilice este envase ya que no cuentos con el respectivo cono para moldear cintas.
• Repetiré el proceso con las cintas azules y amarillas en un en base o cualquier objeto de una circunferencia menor al anterior. Puedes usar las medidas de tu preferencia.
• Las cintas blancas las pasaremos también por un objeto circular solo para darle la forma, pero no las sellaremos.
- We are going to take all the resulting zigzag hoops and place their liquid protection (plasticized), we apply several layers of extra strong glue all over the hoop letting it dry between one layer and another.
- Taking advantage of the fact that the glue is a little wet, I joined them one inside the other as shown in the figure.
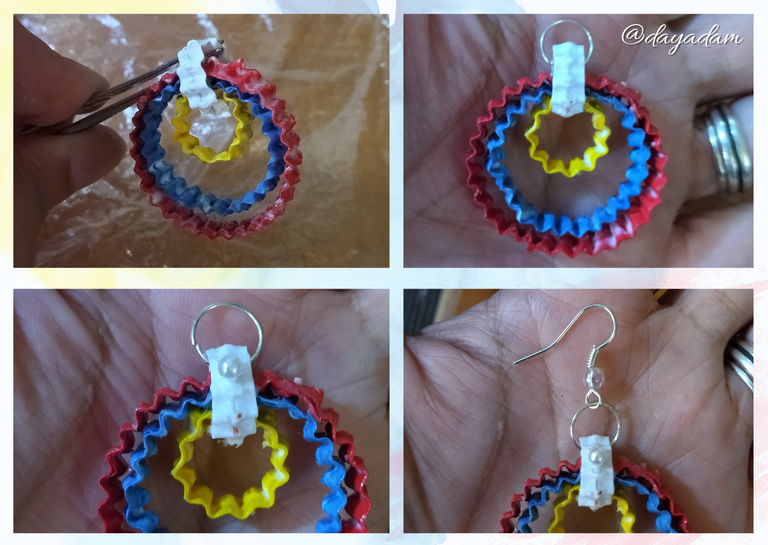
- We are going to take the white ribbon to which we gave a round shape and we are going to pass it over the three joined circles, we seal it with glue.
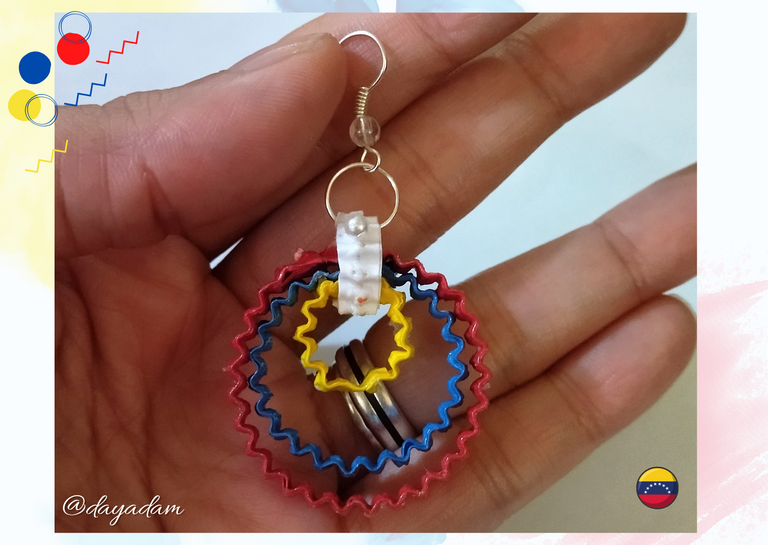
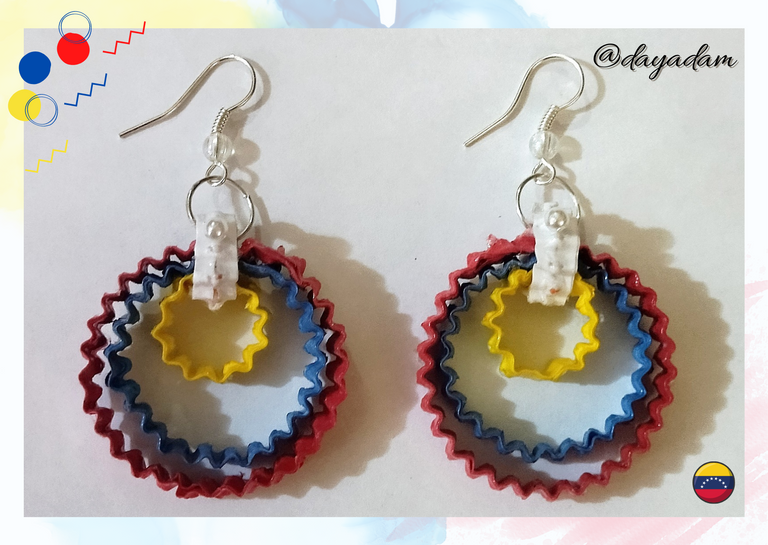
- We place a medium size costume jewelry ring in the white circle, add glue to protect it, add a small white pearl to decorate and finally we place its hanging base for tendrils (hook), to which we put a pearl of an iridescent tone to give it colorfulness. This way we have ready these creative circular earrings, molded in zigzag.

• Vamos a tomar todos los aros en zigzag resultantes y les colocaremos su protección liquida (plastificado), Aplicamos varias capas de pega extra fuerte en todo el aro dejando secar entre una capa y otra.
• Aprovechando que la pega está un poco húmeda los uní uno dentro de otro tan como muestra la figura.
• Vamos a tomar la cinta blanca a la que le dimos forma redonda y la vamos a pasar sobre los tres círculos unidos, sellamos con pega.
• Colocamos una argolla mediana de bisutería en el círculo blanco, agregamos pega para proteger, le agregue una pequeña perla blanca para decorar y por ultimo le coloque su base colgante para zarcillos (anzuelo), a la cual coloque una perla de una tonalidad tornasol para darle vistosidad. De esta manera tenemos listos estos creativos aretes circulares, moldeados en zigzag.

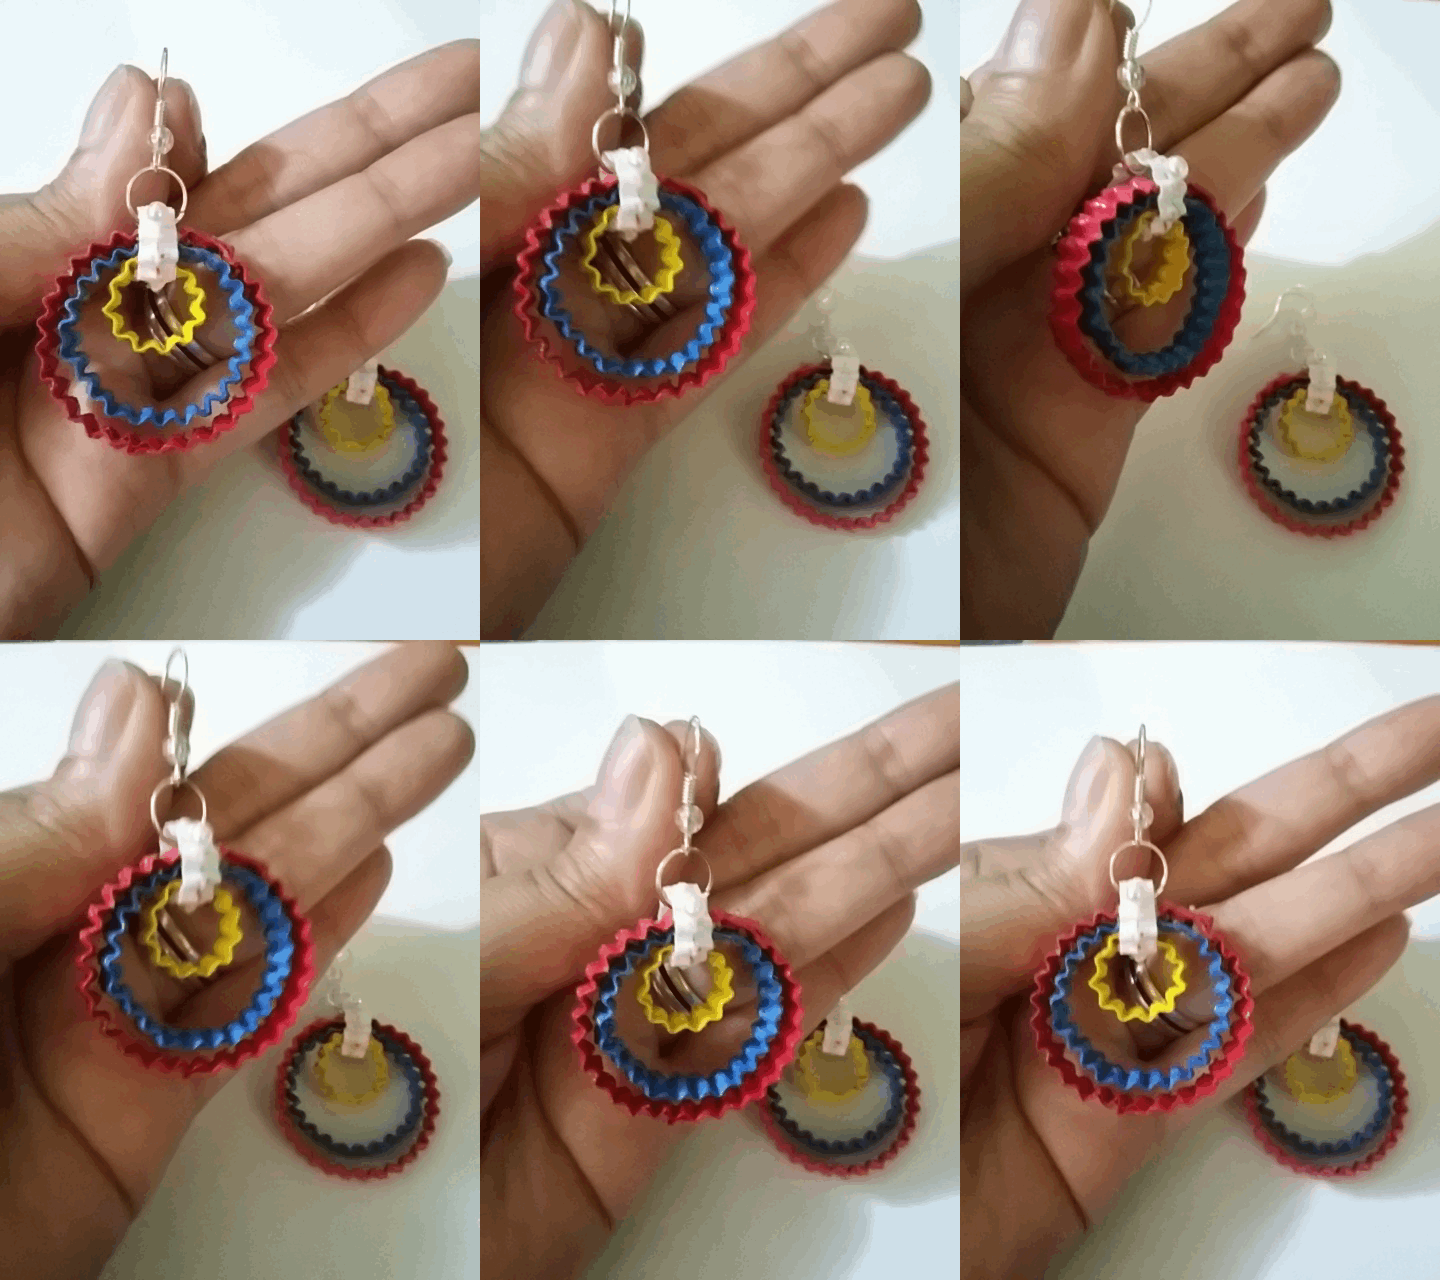
What did you think, did you like it?
I hope you did, I hope you liked my explanation, procedure and photos, I made them with love for you.
"Let out that muse that inspires you, and let your imagination fly".
Thank you all, see you next time. 💛💙❤️

¿Que les pareció, les gustó?
Espero que sí, que les haya gustado mi explicación, procedimiento y fotos, los hice con mucho cariño por y para ustedes.
"Deja salir esa musa que te inspira, y deja volar tu imaginación".
Gracias a todos, nos vemos en la próxima. 💛💙❤️

Todas las fotos usadas en este post son de mi autoría y han sido sacadas en mi celular personal un Redmi 9T y editadas Canva Banner y separador hecho por mí en Canva Traducido con la ayuda de DeepL

Muy hermoso amiga, como siempre un trabajo único y elegante, y resaltando nuestra bandera 😊
Gracias @emmaris . Me alegra mucho que te haya gustado el trabajo. Y te cuento que me encanta trabajar con nuestro tricolor, no lo hago mas, porque se va a ver muy repetitivo pero si fuera por mi seria constante, pero ya vendrán mas trabajos. Saludos mi linda... 💛💙❤️
Un trabajo sencillo y muy bonito, nos encanta esa máquina de corrugado, hace ver muy bien y bonito el papel, gran trabajo amiga @dayadam
Muchas gracias me alegra mucho que te haya gustado, apenas estoy empezando con la corrugadora, vamos a ver que otras cosas se me ocurren, este es el inicio 😂 Abrazos... 💛💙❤️
Amiga que talento! Wow! Me encanta las personas que llevan este don! Benditas manos, que Dios te las siga bendiciendo
Amen hermosa, agradecida por tus bellas palabras. Un abrazo y mil bendiciones para ti @hexagono6 💛💙❤️
Un trabajo muy lindo y el tutorial está muy completo. Felicitaciones estimada @dayadam. Un fuerte abrazo desde Maracay.
Muchísimas gracias amigo @irvinc, me alegra mucho que le haya gustado y haya pasado a disfrutar mi trabajo. Bendiciones y saluditos desde Caracas...
Sigue, contacta y se parte del testigo en: // Follow, contact and be part of the witness in:
Keychan - Hive.blog - Ecency - Peakd
Muchas gracias por el apoyo @hispapro 💛💙❤️
Me gusta tu post todo te quedo muy tricolor❤️😁
Muchas gracias me alegra que te gustara. 💛💙❤️
@tipu curate 2
Upvoted 👌 (Mana: 15/75) Liquid rewards.
Mil gracias por el apoyo 💛💙❤️
Gracias por el apoyo 💛💙❤️
Me encanta como te quedaron, sabes lo artesanal tiene mucho más valor, se siente que está hecho con amor, yo andaría feliz con un par de aretes así. Continúa con tu maravilloso trabajo. 💞
Gracias hermosa me alegra que te haya gustado este trabajo, aprecio que valores lo hecho a mano y artesanal ya que muchos no lo hacen. Que linda ojala podamos tener la oportunidad de hacerte llegar lo que desees con gusto lo harías o mejor aun te puedes decidir y elaborarlo tu misma. Gracias por tus palabras. Abrazos bella @enclassecu 💛💙❤️
Hermosa te quedaron genial
Gracias mi bella 💛💙❤️
Mi apreciada amiga @dayadam, estas innovando y poniendo una milla extra en tus grandes creatividades, que bonito que hayas tomado como referente los colores de nuestra bandera, espero continúes dejando volar tu creatividad y nos sigan dando esos bonitos colirios a nuestros ojos.
Saludos y muchas bendiciones amiga
Gracias mi bella amiga, para mi siempre es gratificante leer tus hermosas palabras hacia mi trabajo y mi persona.
Mientras este en mis manos seguiré innovando y dando lo mejor de mi, pido a Dios que me siga otorgando ideas y creatividad. Abrazos y bendiciones @sidalim88 💛💙❤️
https://leofinance.io/threads/dayadam/re-leothreads-2rdxfm3gh
The rewards earned on this comment will go directly to the people ( dayadam ) sharing the post on LeoThreads,LikeTu,dBuzz.
Thanks @poshthreads 💛💙❤️
Demasiado lindo el producto de todo ese proceso tan bien definido y explicado.
Un abrazo
!PIZZA
Gracias mi linda @alicia2022. Me alegro mucho que te gustara, y que hayas pasado a ver mi trabajo. Abrazos 💛💙❤️
$PIZZA slices delivered:
@alicia2022(4/15) tipped @dayadam
Thanks @pizzabot 💛💙❤️
Siempre sorprendiendonos con tus delicados y hermosos diseños de aretes para las orejas mi estimada. Un gran agrazo!
Gracias mi niño, me alegra que te gustara el trabajo, agradecida por pasar y tus lindas palabras. Un gran abrazo para ti @richjr 💛💙❤️
Que trabajo tan hermoso😍 , me gustó mucho, eres increíble y original en tus creaciones , impecable y bello 👌
!diy
Que linda querida amiga, muy complacida con tus palabras tan hermosas hacia mi trabajo. Mil gracias. Bendiciones infinitas para ti @lileisabel 💛💙❤️
You can query your personal balance by
!DIYSTATSMuy creativo tu diseño de aretes. Me gustan los aretes colgantes y estos aros se ven hermosos.
!DIY
You can query your personal balance by
!DIYSTATSCongratulations, your post has been upvoted by @dsc-r2cornell, which is the curating account for @R2cornell's Discord Community.
Enhorabuena, su "post" ha sido "up-voted" por @dsc-r2cornell, que es la "cuenta curating" de la Comunidad de la Discordia de @R2cornell.
Thanks for the support @dsc-r2cornell 💛💙❤️
Congratulations @dayadam! You have completed the following achievement on the Hive blockchain And have been rewarded with New badge(s)
Your next target is to reach 8500 replies.
You can view your badges on your board and compare yourself to others in the Ranking
If you no longer want to receive notifications, reply to this comment with the word
STOPCheck out our last posts:
Thanks @hivebuzz 💛💙❤️
That's great @dayadam! We're excited to see your accomplishments on Hive! Keep going!
Eres muy creativa
Contáctenos para saber más del proyecto a nuestro servidor de Discord.
Si deseas delegar HP al proyecto: Delegue 5 HP - Delegue 10 HP - Delegue 20 HP - Delegue 30 HP - Delegue 50 HP - Delegue 100 HP.