3D Bee Hive Charm Quilling Technique // Commemorating our PUD [Eng/Esp]
Hello everyone... ⚡️🐝⚡️💕
Hello to my dear Hivers and the beloved community of artists #DIYHub, as always very pleased and excited to be here again, showing you my work made with love and especially for you.
Today in our beloved #Hive, we celebrate being the 1st of the month another #PowerUpDay (PUD). In a few days I will be 18 months here and for the 16th month I am participating in this celebration making a small contribution to my HP to keep growing and thus help our beloved ecosystem to keep growing more and more.
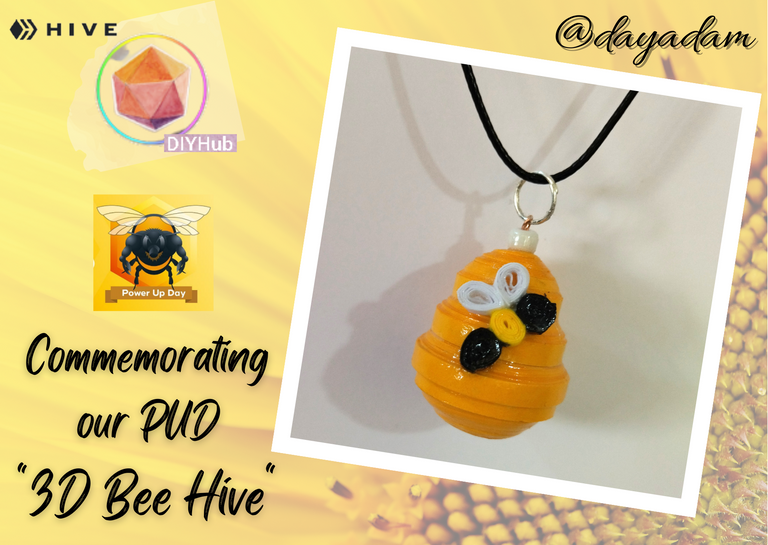
To commemorate this day and be part of it, not only making my respective powerup of the month, I want to give you the elaboration and step by step of a small 3D beehive pendant decorated with a little bee in the quilling technique, what more characteristic of this day or of our ecosystem than a little bee to wear with pride for being part of this wonderful world.
I recommend to all of you, that if you can participate and grow month by month as far as you can, do it, I also suggest you to see the post of our friends @traciyork @victorialab that encourage us to participate through a contest in the global and hispanic, offering many attractive and beneficial prizes for everyone, check the links I left, you will see that you will be very interested in participating. A special thanks to the people of @hivebuzz for their great work every day.
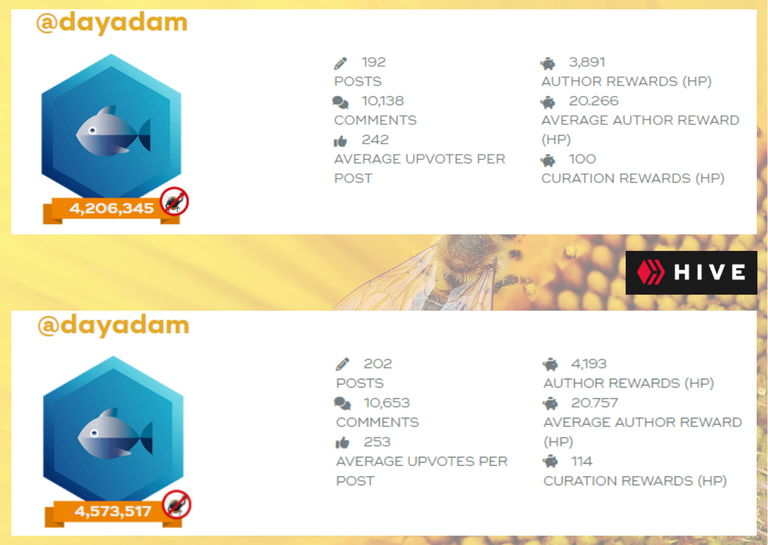
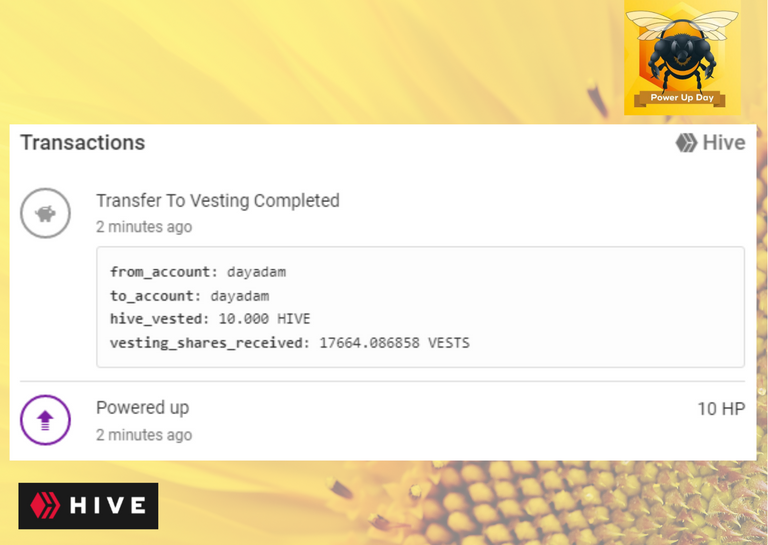
Below is an image of my progress this month in relation to last month, my respective PowerUp with a small contribution of 10 Hives.
Without further ado I leave you my creative process of this little tutorial, I hope you like it.
Let's get started:😃

Hola a Todos... ⚡️🐝⚡️💕
Hola a mis queridos Hivers y a la querida comunidad de artistas #DIYHub, como siempre muy complacida y emocionada de encontrarme por acá nuevamente, mostrándole mi trabajo hecho con mucho amor y especialmente para ustedes.
El día de hoy en nuestro querido #Hive, celebramos siendo 1ero de mes un #PowerUpDay (PUD) más. En unos días cumpliré ya 18 meses por acá de los cuales por mes numero 16 estoy participando en esta celebración haciendo un pequeño aporte a mis HP para seguir creciendo y así mismo ayudar a que nuestro querido ecosistema siga creciendo más y más.
Para conmemorar este día y ser parte de él, no solo realizando mi respectivo powerup del mes, quiero regalarles la elaboración y paso a paso de un pequeño dije en forma de colmena en 3D decorado con una abejita en la técnica de quilling, que más característico de este día o de nuestro ecosistema que una abejita para llevar con orgullo por ser parte de este maravilloso mundo.
Les recomiendo a todos, que si pueden participar y crecer mes a mes en la medida de sus posibilidades lo hagan, así mismo les sugiero ver los post de las amigas @traciyork @victorialab que nos incentivan a participar mediante un concurso en la parte global e hispana, ofreciendo muchos premios atractivos y beneficiosos para todos, revisen los link que les deje, verán que se interesaran mucho en participar. Un agradecimiento especial a la gente de @hivebuzz por su gran labor día a día
Más abajo les dejo una imagen de mi progreso de este mes con relación al anterior, mi respectivo PowerUp con un pequeño aporte de 10 Hives.
Sin más preámbulos les dejo mi proceso creativo de este pequeño tutorial, espero sea de su agrado.
Comencemos:😃

• Trozo de cartulina blanca.
• Cintas de quilling de diversas medidas de ancho amarillo primario, amarillo tostado, negro, blanco.
• Aguja para quilling.
• Alambre fino.
• Argolla mediana de bisutería.
• Perla blanca.
• Pega blanca extra fuerte (de carpintería).
• Tijera.
• Pincel.
• Collar de tu preferencia.
- Piece of white cardboard.
- Quilling ribbons of different widths primary yellow, yellow, black, white.
- Quilling needle.
- Fine wire.
- Medium size costume jewelry ring.
- White pearl.
- Extra strong white glue (carpentry glue).
- Scissors.
- Paintbrush.
- Necklace of your choice.

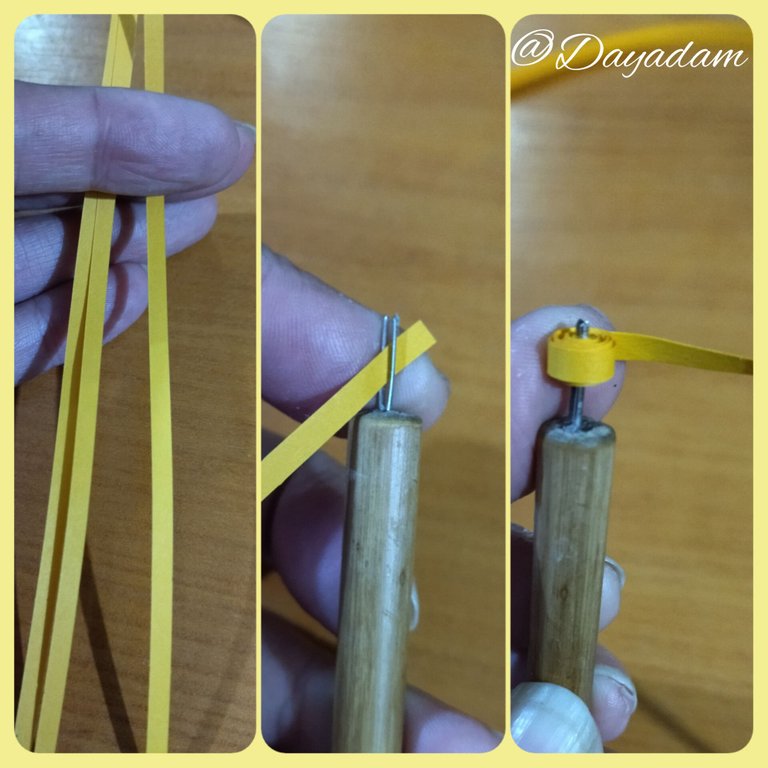
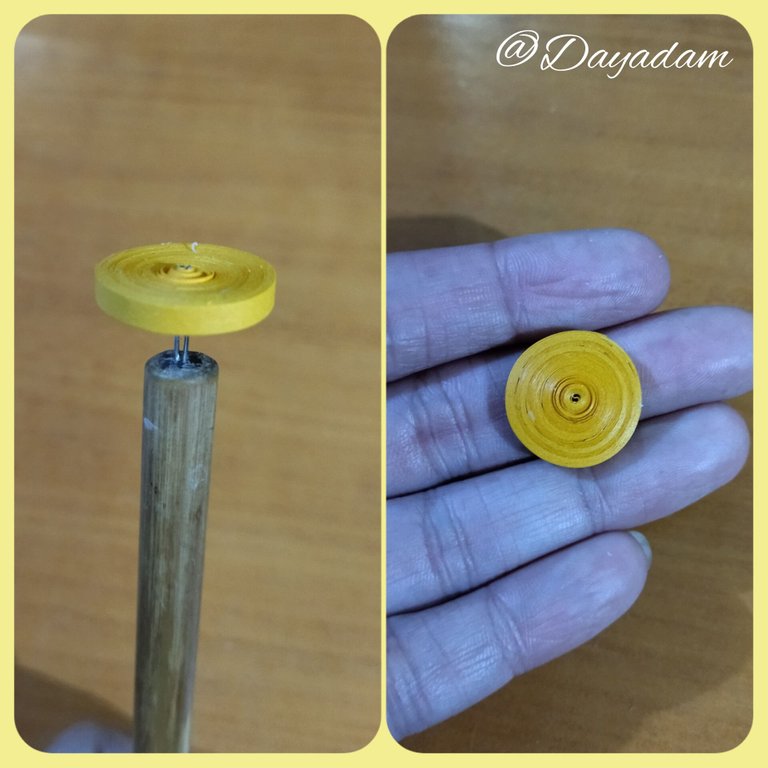
- We are going to start by taking quilling tape 3mm wide x 220cms long, with the quilling needle we are going to roll up to the end of the tape, seal with extra strong white glue to obtain a closed circle.
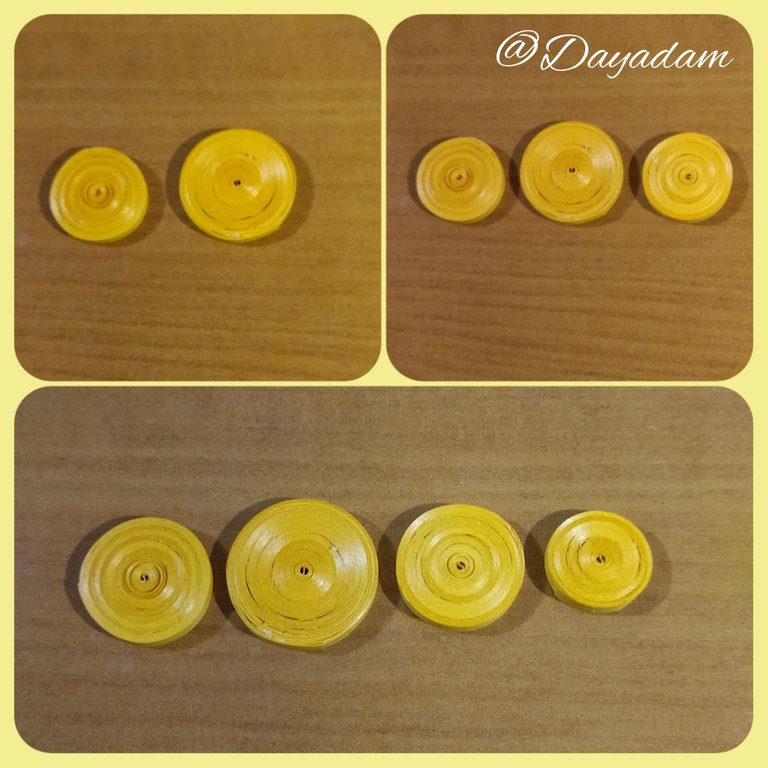
- Under the same previous circles with yellow tape we will make other circles with tape of 300cms long, another one of 220cms, and finally one with 140cms.
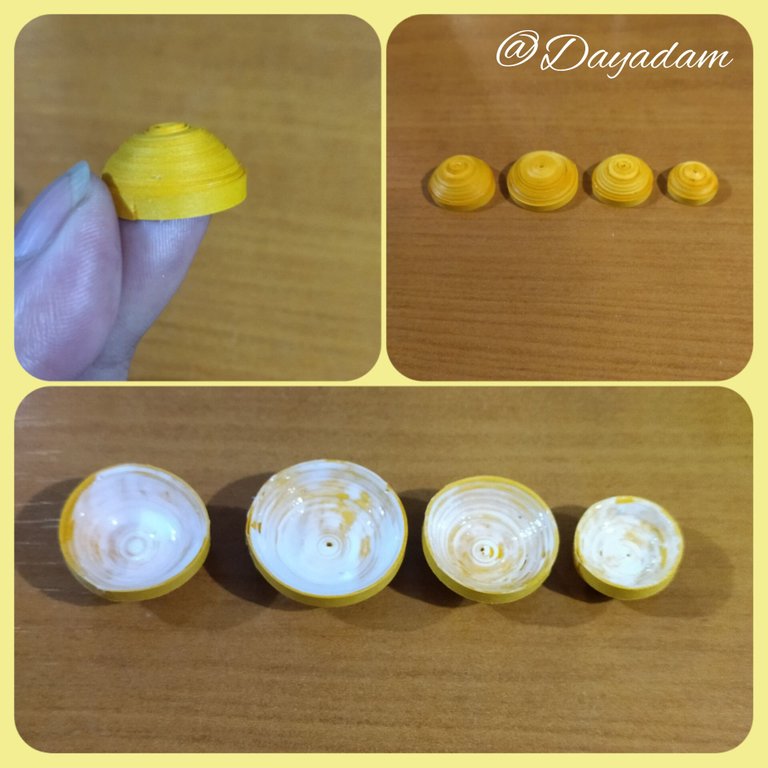
- Once all the circles are ready, we are going to mold them taking a little bit outwards, we will do the same with all the circles, then we will apply a little bit of glue on the hollow part and wait for them to dry, this is to avoid the piece to move or deform.

• Vamos a comenzar tomando cinta para quilling color amarillo tostado de 3mm de ancho x 220cms de largo, con la aguja para quilling vamos a enrollar hasta finalizar con la cinta, sellamos con pega blanca extra fuerte para obtener un círculo cerrado.
• Bajo los mismos para metros anteriores con cinta amarillo tostado haremos otros círculos con cinta de 300cms de largo, otro de 220cms, y por ultimo uno con 140cms.
• Listos todos los círculos vamos a moldear sacando un poco hacia afuera, haremos lo mismo con todos los círculos, luego por la parte hueca le aplicaremos un poco de pega y esperaremos que sequen, esto es para evitar que la pieza se mueva o se deforme.
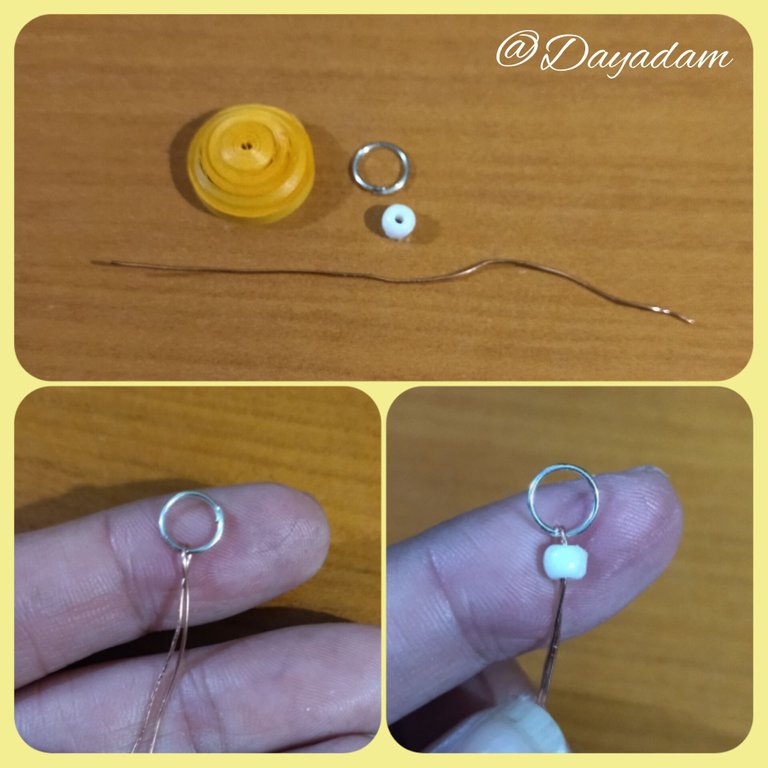
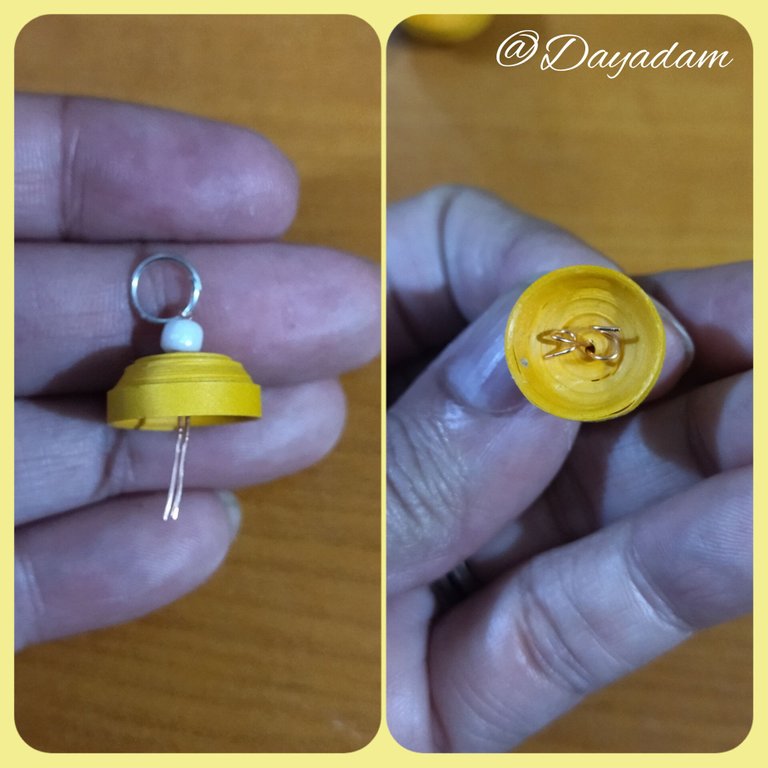
- We are going to take a small piece of fine wire, a white pearl and a costume jewelry ring, we will assemble them by placing the ring and the pearl on the wire, and we will introduce it in the center of the smaller circle, we will screw the wire so that it does not come out of the circle.
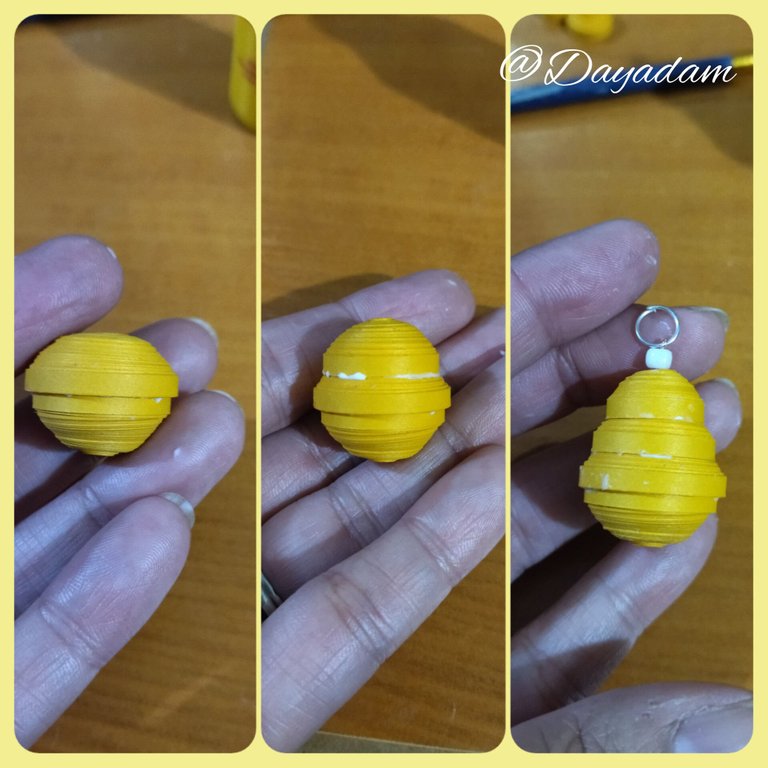
- In the same order that I mentioned to make them, we will glue them applying a little extra strong white carpentry glue, mounting one on top of the other with the only detail that the first one we will flip and glue inverted, all the others will go straight as you can see in the images, we will finish with the smallest one.

• Vamos a tomar un trocito de alambre fino, una perla color blanco y una argolla de bisutería, las ensamblaremos colocando la argolla y la perla en el alambre, y la introduciremos en el centro del círculo más pequeño, enroscaremos el alambre para que no se salga del círculo.
• En el mismo orden que mencione para elaborarlos, los pegaremos aplicando un poco de pega blanca extra fuerte de carpintería, montando uno encima de otro con el único detalle que el primero lo voltearemos y pegaremos invertido, todos los demás irán derechos como observan en las imágenes, finalizaremos con el más pequeño.
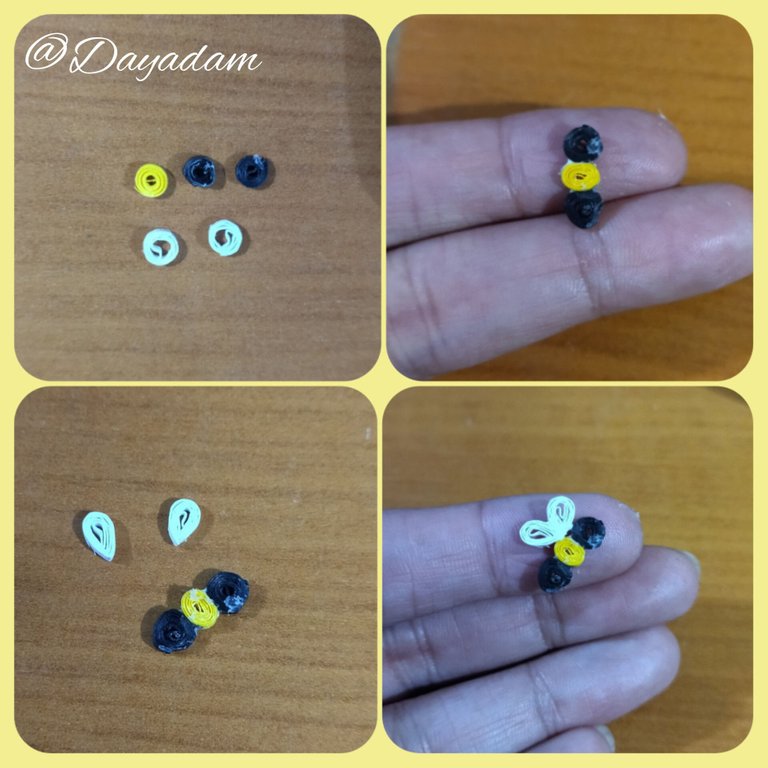
- We are going to take 2 small pieces of black ribbon, and 1 yellow primary ribbon of 3mm wide with the help of the quilling needle we will make a closed circle with each one.
- Now we will take two pieces of white ribbon and repeat the previous process, and we will make 2 circles this time a little loose.
- Once all the small circles are ready, we will join the black, the yellow and then the other black with a touch of glue.
- We will mold the white ones in the form of drops, we will join both and we will glue them to the other circles, in this way we will simulate a small bee.

• Vamos a tomar 2 pequeños trozos de cinta negra, y 1 amarillo primario de 3mm de ancho con ayuda de la aguja para quilling elaboraremos un círculo cerrado con cada uno.
• Ahora tomaremos dos trozos de cinta blanca repetiremos el proceso anterior, y realizaremos 2 círculos esta vez un poco sueltos.
• Listos todos los pequeños círculos uniremos con un toque de pega el negro, el amarillo y luego el otro negro.
• Los blancos los moldearemos en forma de gotas, uniremos ambos y los pegaremos de los otros círculos, de esta manera simularemos una pequeña abeja.
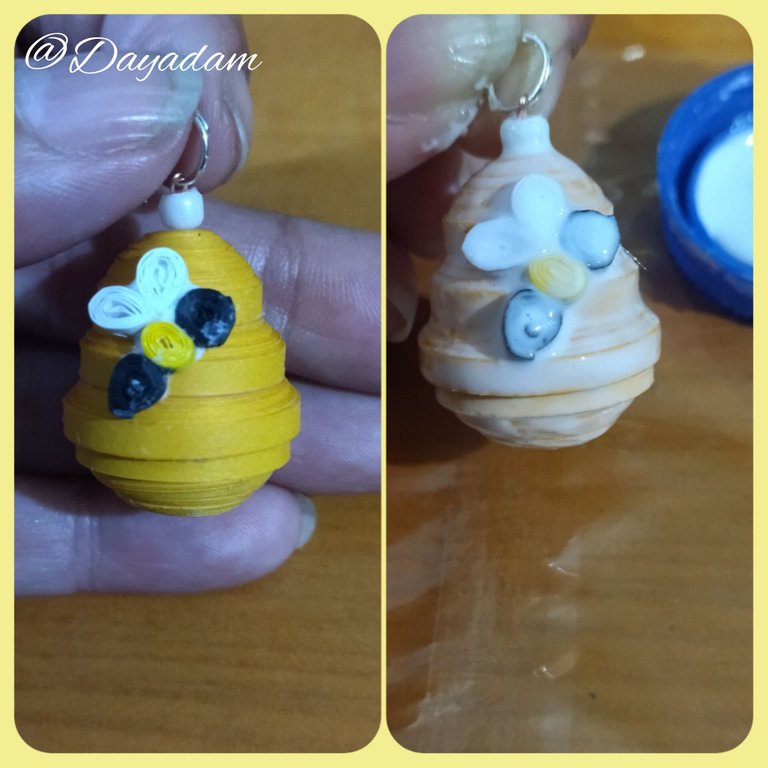
- We will take the small beehive we made and glue the bee in the middle.
- Finally we will apply its liquid protection (plasticized), applying several layers of glue, letting it dry between one layer and another.
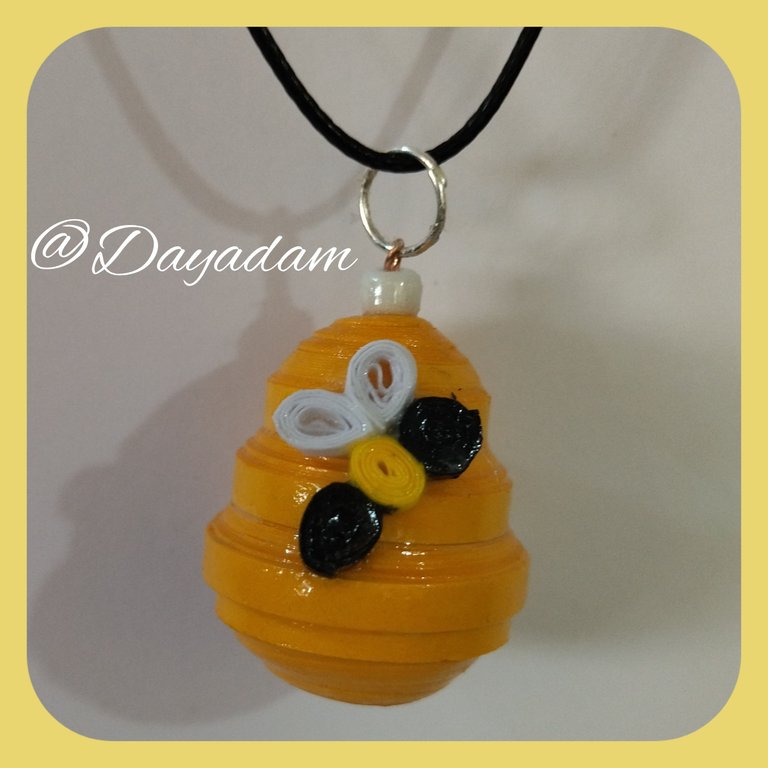
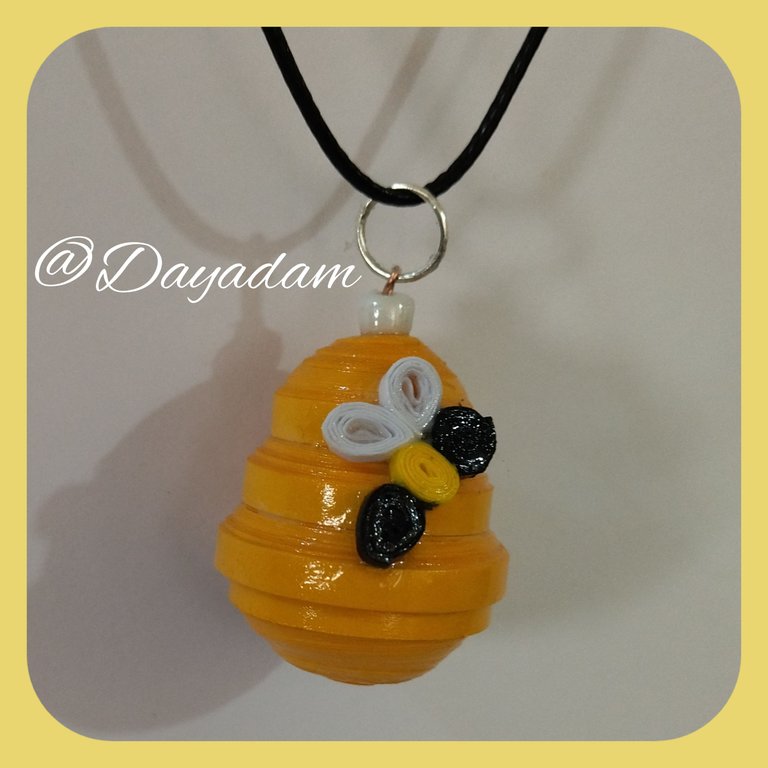
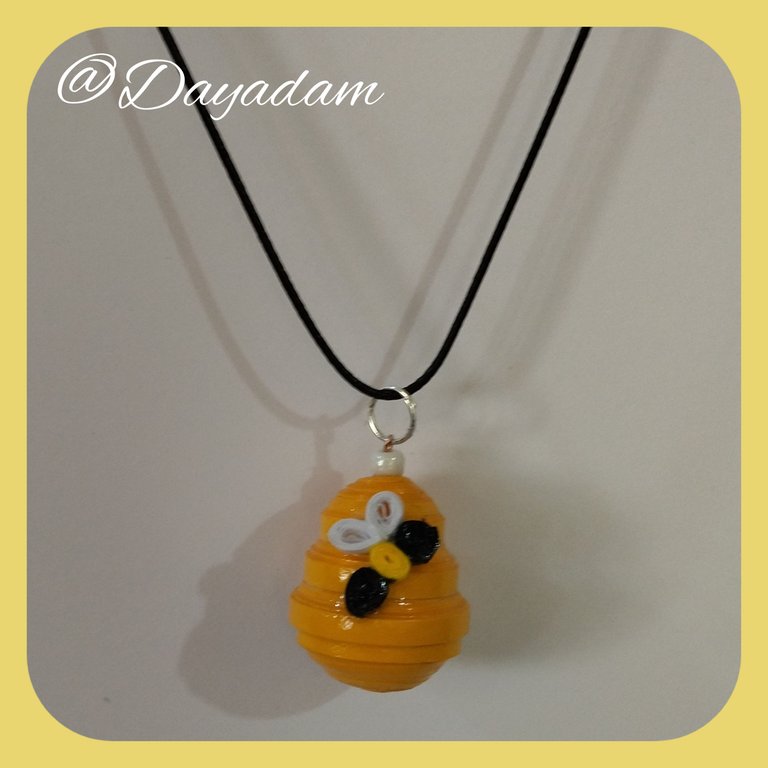
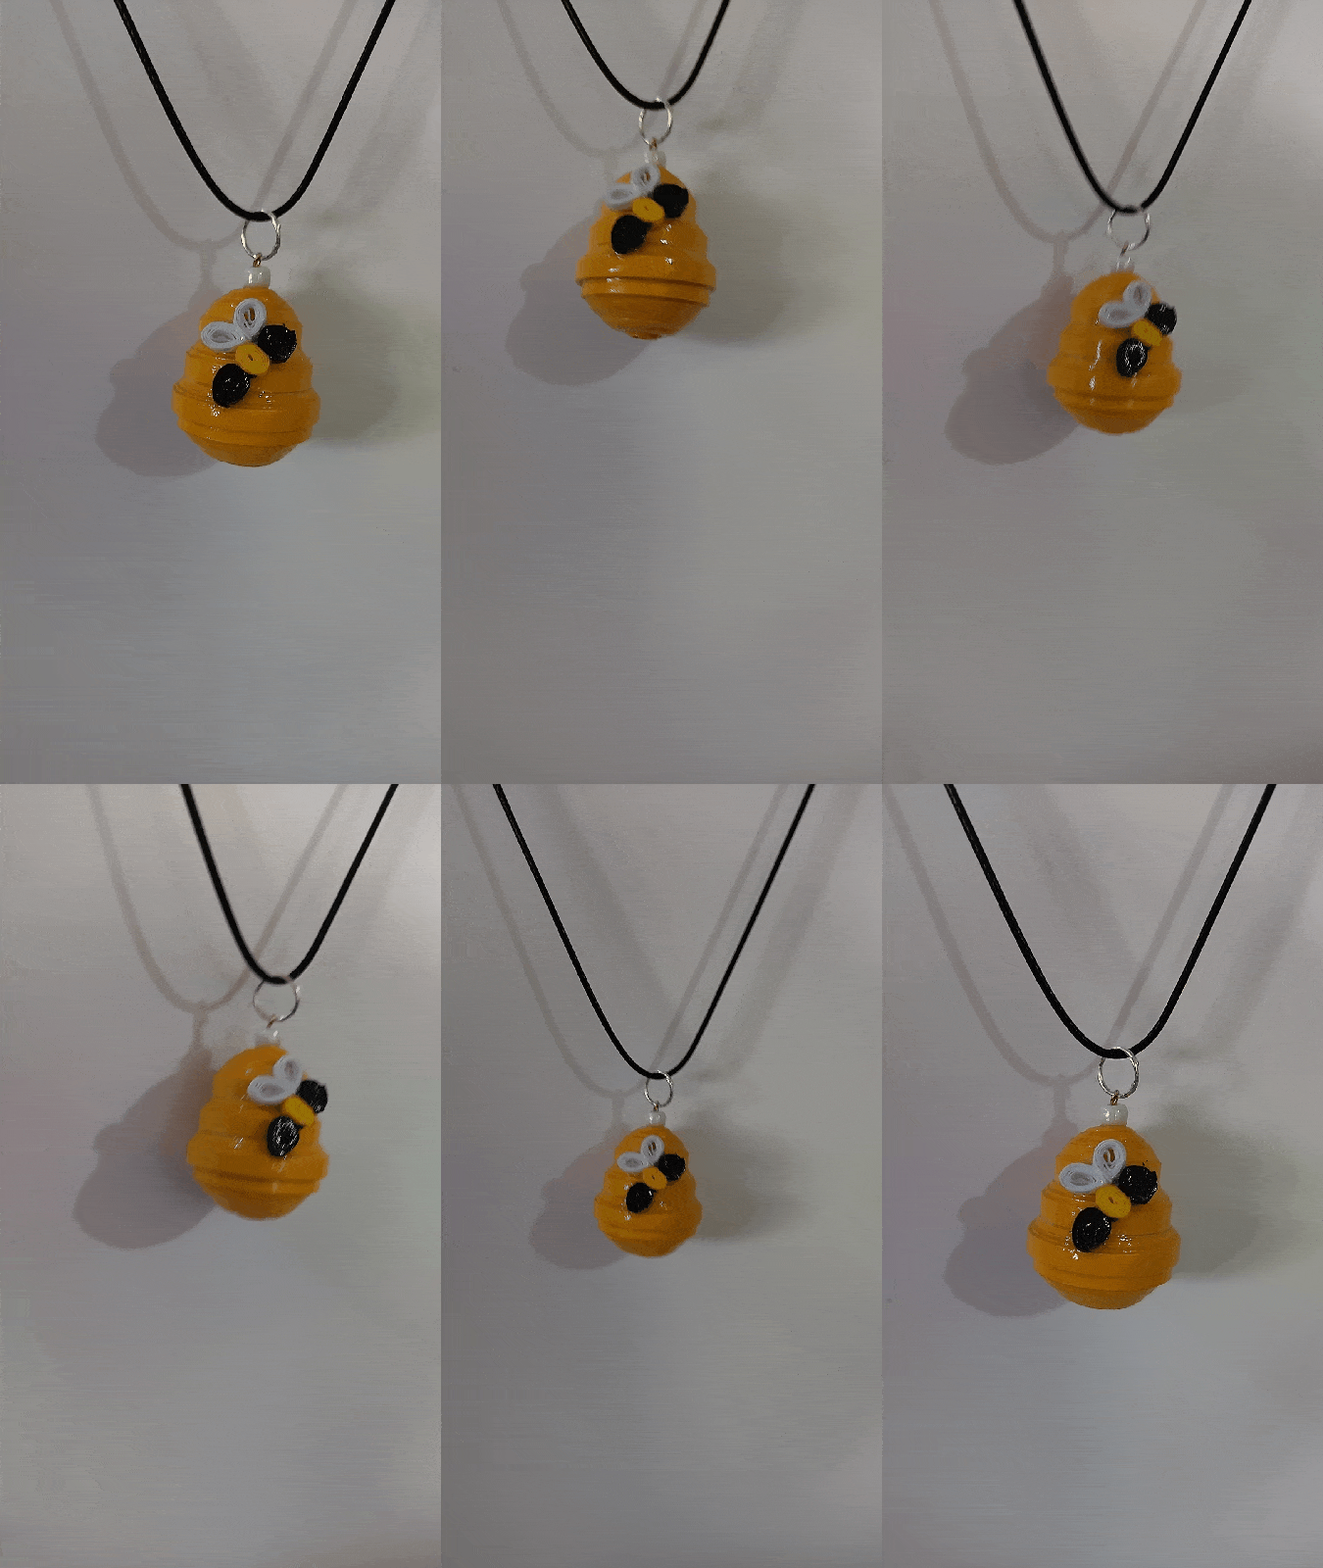
In this way we will have ready this small 3D honeycomb, which we can use with the necklace of our preference, which I made to commemorate our PowerUpDay this month.⚡️🐝⚡️

• Tomaremos la pequeña colmena que hicimos y pegaremos la abeja en el medio.
• Por ultimo le aplicaremos su protección liquida (plastificado), aplicando varias capas de pega dejando secar ente una capa y otra.
De esta manera tendremos lista este pequeño panal en 3D, que podemos usar con el collar de nuestra preferencia, el cual realice para conmemorar nuestro PowerUpDay de este mes.⚡️🐝⚡️

What did you think, did you like it?
I hope you did, I hope you liked my explanation, procedure and photos, I made them with love for you.
"Let out that muse that inspires you, and let your imagination fly".
Thank you all, see you next time. Happy PowerUpDay ⚡️🐝⚡️

¿Que les pareció, les gustó?
Espero que sí, que les haya gustado mi explicación, procedimiento y fotos, los hice con mucho cariño por y para ustedes.
"Deja salir esa musa que te inspira, y deja volar tu imaginación".
Gracias a todos, nos vemos en la próxima. Feliz PowerUpDay ⚡️🐝⚡️

Todas las fotos usadas en este post son de mi autoría y han sido sacadas en mi celular personal un Redmi 9T, editadas en InShot y Canva Banner y separador hecho por mí en Canva Traducido con la ayuda de DeepL

https://leofinance.io/threads/dayadam/re-leothreads-y5f1k6jb
The rewards earned on this comment will go directly to the people ( dayadam ) sharing the post on LeoThreads,LikeTu,dBuzz.
Thanks @poshthreads 🐝⚡️
Me encanta, esta muy preciosa la colmena con su abejita, me parece genial que incentives a la gente a subir su HP, sobre todo en estos tiempos bajistas, mantener el hp es muy importante para hacer más resistente nuestra moneda y lograr que suba. Un abrazo 🤗
Gracias por tus palabras amiga y me alegra que te haya gustado esta pequeña colmena.
Prácticamente desde que inicie, comencé con esta temática de crecimiento , ya que es en beneficio de nosotros y de nuestra querida Hive que tanto nos ha dado, a la vez siempre recalco su importancia y por supuesto como dices incentivo a los demás a hacerlo.
Abrazos @irenenavarroart 🐝⚡️
Congratulations @dayadam! You have completed the following achievement on the Hive blockchain And have been rewarded with New badge(s)
Your next target is to reach 60000 upvotes.
You can view your badges on your board and compare yourself to others in the Ranking
If you no longer want to receive notifications, reply to this comment with the word
STOPCheck out our last posts:
Thanks @hivebuzz 🐝⚡️
That's great @dayadam! We're excited to see your commitment to Hive! Keep it up!
Esto eta muy hermoso, te felicito Dayadam. Sigue adelante y creciendo tu cuenta en Hive.
Muchísimas gracias por tus palabras amigo. Sigamos creciendo, es muy importante para nosotros, y para nuestro querido Hive...
Me encantó tu pequeña colmena 🥺 está súper preciosa. No sabía sobre esta cinta y buscando un poco en internet sobre la cinta quilling encontré varias joyas con el mismo material. Me encantó tu trabajo.
Muchas gracias por pasar, y por tus lindas palabras, la verdad esta técnica es hermosa y muy versátil, me alegra que te hayas interesado y buscado, ojala la puedas poner en practica. Bello día para ti @carminasalazarte ✨
Solo falta que ese panal de miel, porque de resto es una belleza como todo lo que tus manos hacen chica ja ja ja.
Si mis gastos financieros me lo permitieran de seguro participaría en estas iniciativas, pero la verdad es imposible para mi.
Ojala en un futuro lo logre.
Muchísimas gracias amigo por tus lindas palabras hacia mi trabajo. Y bueno, se que la verdad no muchos pueden hacer el powerup, yo con mucho esfuerzo lo hago intentando crecer, pero soy comprensiva con la situación de los demás aunque la mía no es la mejor. Saludos @manclar 🐝⚡️
Que linda medalla relacionada a la colmena, siempre creando calidad amix
y el power up es importante para crecer, felicidades.
Gracias mi querida @wendyth16 🐝⚡️
Está muy hermosa tu abejita. Gracias por compartir el tutorial para incentivar la participación en el Power Up para fortalecer nuestro ecosistema. 😀
Muchísimas gracias amiga por pasar por mi blog, y por tus palabras. Que tengas un hermoso día @beaescribe 🐝⚡️
Muchas gracias por el apoyo @mayvileros 🐝⚡️
Congratulations @dayadam! You received a personal badge!
Participate in the next Power Up Day and try to power-up more HIVE to get a bigger Power-Bee.
May the Hive Power be with you!
You can view your badges on your board and compare yourself to others in the Ranking
Check out our last posts:
Thanks @hivebuzz 🐝⚡️
Kudos @dayadam! Your commitment to Hive growth is admirable.
Que esperas para unirte a nuestro trail de curación y formar parte del "proyecto CAPYBARAEXCHANGE", tu casa de cambio, rapida, confiable y segura
Gracias por el apoyo @capybaraexchange 🐝⚡️
Sigue, contacta y se parte del testigo en: // Follow, contact and be part of the witness in:
Keychan - Hive.blog - Ecency - Peakd
Gracias por el apoyo @hispapro 🐝⚡️
Excelente manera de invitarnos a hacer PowerUpDay amiga @dayadam, el que la hayas acompañado CON UNA MANUALIDAD LE DA ESE TOQUE ÚNICO DIGNO DE TUS MANUALIDADES.
Te quedo todo muy hermoso y como siempre nos dejas ver tu entrega y dedicación a través de tus manualidades. Un abrazo amiga bella
Gracias hermosa por tus bellas palabras. Un abrazo e infinitas bendiciones para ti @sidalim88 🐝⚡️
Your craft is beautiful, thanks for adding value to the platform. Thanks for the links, it's amazing seeing people power up and contribute to the sustainability of the platform
Thank you very much for your words towards my work, I'm glad you liked it. I hope you are encouraged to make the PowerUp to continue growing. Regards @adoore-eu 🐝⚡️
Perfect tutorial very detailed thanks
Thank you very much for your words. Greetings @aries12 🐝⚡️
You're welcome, I hope to be healthy always and wait for the next tutorial from you
Click on the badge to view your board.
Thank you to our sponsors. Please consider supporting them.
Check out our last posts:
Excelente trabajo, quedó muy hermosa, es bello el trabajo que vienes haciendo. Saludos
Muchísimas gracias amigo. Saludos @darknapol 🐝⚡️
Un precioso trabajo ...me alegra mucho ver tus creaciones preciosas y diminutas. Te admiro por esa creatividad y perfeccionamiento de tu técnica. Un abrazo infinito 😘💜
!VSC
@chacald.dcymt has sent VSC to @dayadam
This post was rewarded with 0.1 VSC to support your work.
Join our photography communityVisual Shots
Check here to view or trade VSC Tokens
Be part of our Curation Trail
@chacald.dcymt ha enviado VSC a @dayadam
Éste post fue recompensado con 0.1 VSC para apoyar tu trabajo.
Únete a nuestra comunidad de fotografía Visual Shots
Consulte aquí para ver o intercambiar VSC Tokens
Se parte de nuestro Trail de Curación
Hermosa creación, como siempre!!!
!PIZZA
!PGM
BUY AND STAKE THE PGM TO SEND A LOT OF TOKENS!
The tokens that the command sends are: 0.1 PGM-0.1 LVL-0.1 THGAMING-0.05 DEC-15 SBT-1 STARBITS-[0.00000001 BTC (SWAP.BTC) only if you have 2500 PGM in stake or more ]
5000 PGM IN STAKE = 2x rewards!
Discord
Support the curation account @ pgm-curator with a delegation 10 HP - 50 HP - 100 HP - 500 HP - 1000 HP
Get potential votes from @ pgm-curator by paying in PGM, here is a guide
I'm a bot, if you want a hand ask @ zottone444
Muchas gracias mi linda 🐝⚡️
!HUG
I sent 1.0 HUG on behalf of @dayadam.
(2/3)
$PIZZA slices delivered:
@alicia2022(6/15) tipped @dayadam
Very creative work you've shared with us.
Thanks for the supported @diyhub 🐝⚡️
Beautiful work:) @tipu curate 8
Upvoted 👌 (Mana: 0/75) Liquid rewards.
Thank you very much for your support @sharminmim. I'm really glad you liked it. This was a special work to commemorate our PowerUpDay, to praise our platform, and especially for all those who make life in Hive. Regards 🐝⚡️
Regards.
la verdad si me gustó mucho!
Gracias bella. Me alegra que te gustara 🐝⚡️