FINGER PIN CUSHION. [Esp-Eng]
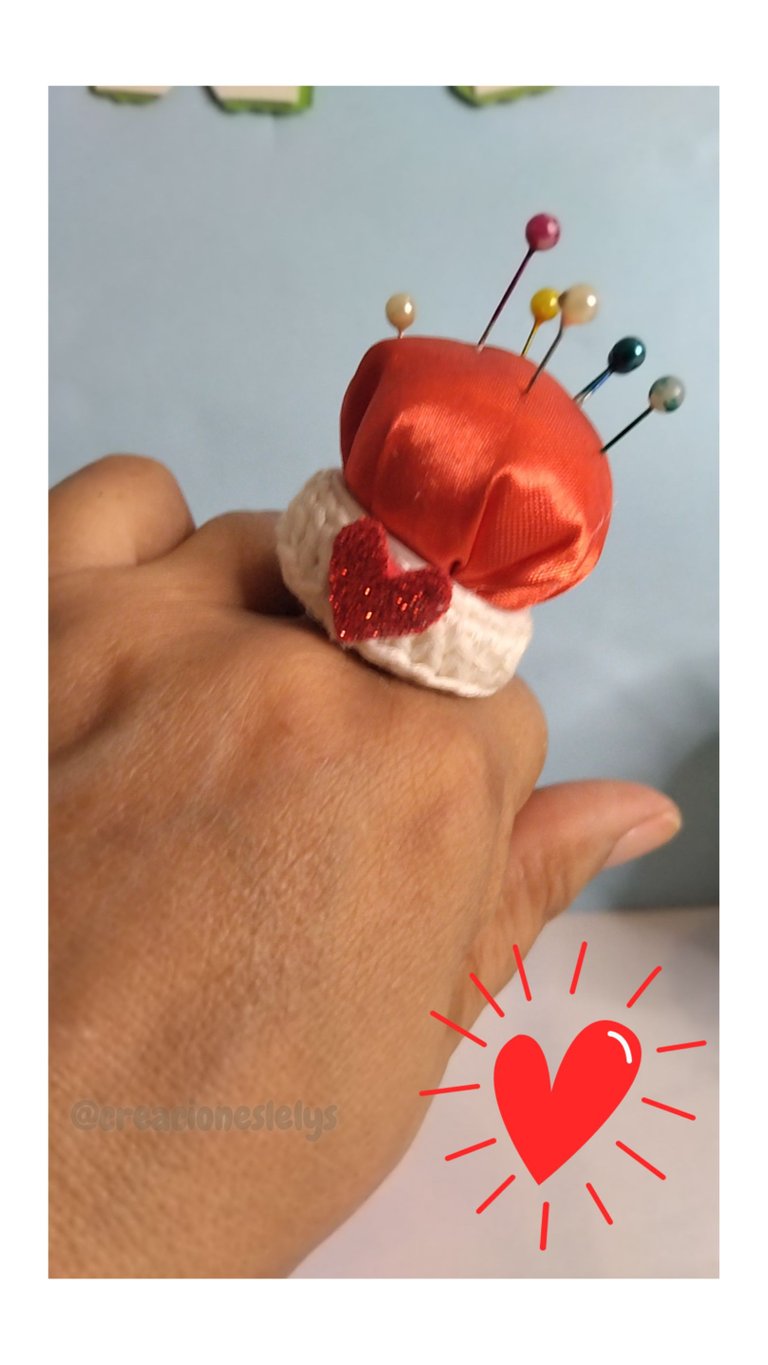
Hola a todos mis queridos amigos artesanos, siempre es un gusto pasar por aquí para observar tantas hermosas creaciones. En estos días hemos estado activos con los tips mediante los Threads de leofinance, en uno de estos tips leí sobre la antigüedad de las agujas, me divertí con la creadora @linita ya que hasta nos acordamos de las caricaturas y sus personajes. Este momento me inspiró y de inmediato me fui a la mesa de trabajo a crear.
Hello to all my dear friends crafters, it is always a pleasure to come by here to see so many beautiful creations. In these days we have been active with the tips through the Threads of leofinance, in one of these tips I read about the antiquity of the needles, I had fun with the creator @linita since we even remembered the cartoons and their characters. This moment inspired me and I immediately went to the work table to create.
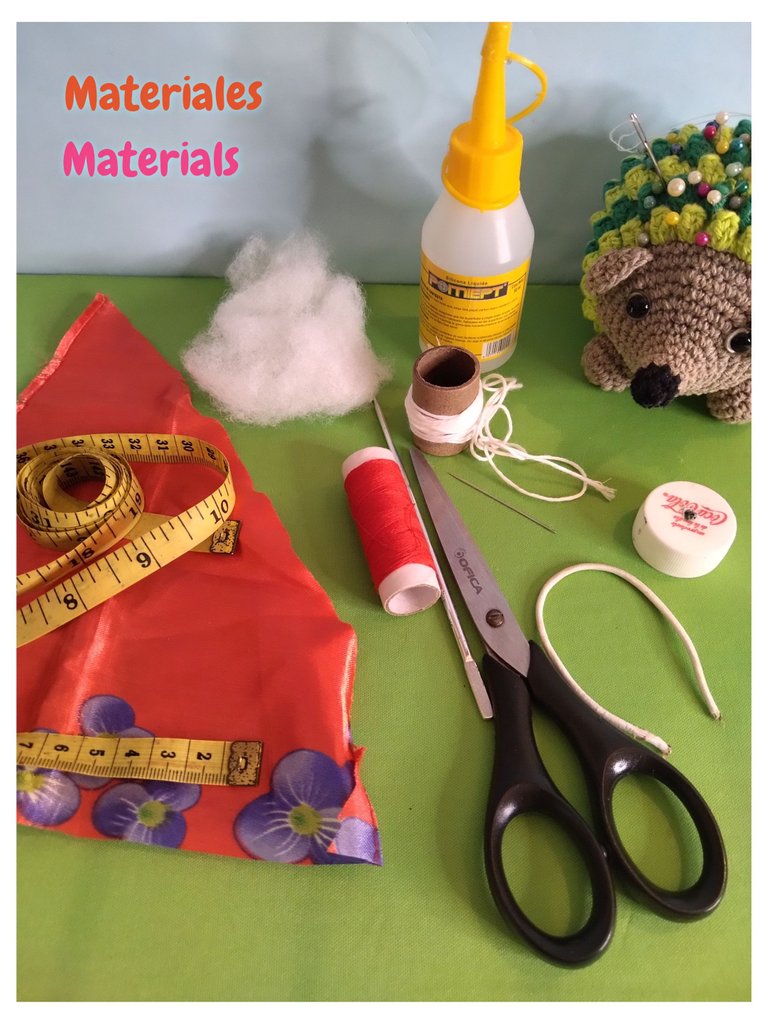
Me encanta cuando al momento de la inspiración puedo contar con todos los materiales que necesito, me preocupaba no tener una tapa plástica, pero no importa dejar una botella sin tapa 🤦
- Tapa plástica de botella.
- Silicón caliente.
- Pistola para Silicón.
- Tela estampada.
- Algodón para rellenar.
- Aguja de coser.
- Hilo de coser.
- Cordón elástico.
- Hilo pabilo.
- Aguja de crochet de 2,25mm.
- Tijeras.
- Cinta métrica.
USED MATERIALS:
I love it when at the moment of inspiration I can have all the materials I need, I was worried about not having a plastic cap, but never mind leaving a bottle without a cap 🤦.
- Plastic bottle cap.
- Hot Silicone.
- Silicone gun.
- Patterned fabric.
- Cotton for stuffing.
- Sewing needle.
- Sewing thread.
- Elastic cord.
- Thread wick.
- Crochet needle of 2,25mm.
- Scissors.
- Measuring tape.
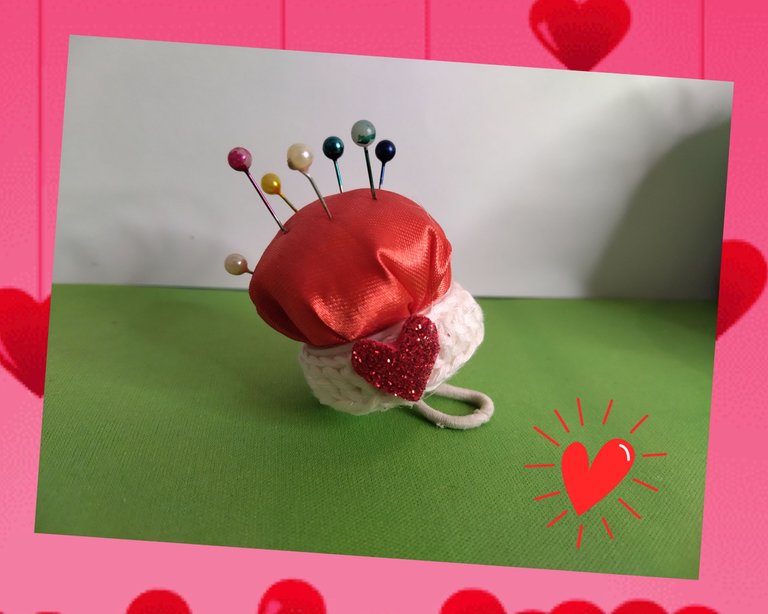
El procedimiento es bastante sencillo. Este proyecto me parece ideal para obsequiar a nuestros amigos costureros y a los participantes en talleres y/o cursos que dictemos. Por supuesto que este, el primero será para mí porque siempre que se me caen las agujas y los alfileres los pierdo rápidamente. De este modo los tendré más cerca del proyecto y habrá menos posibilidad de pérdida.
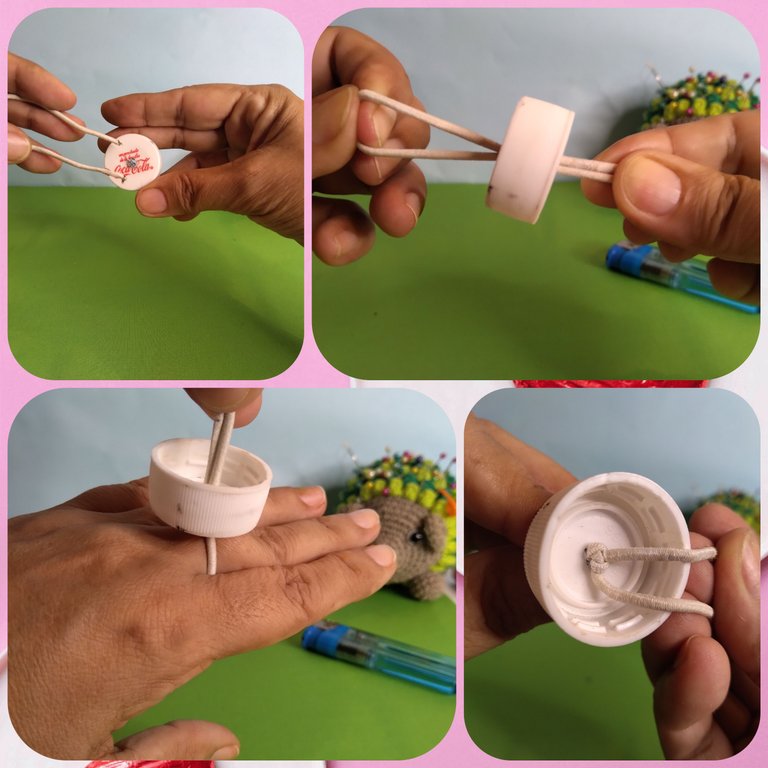
- Empezamos abriendo un pequeño orificio en el centro de la tapa. Para ello calentamos un clavo grande de acero y presionamos justo en el medio. Luego limamos para eliminar el plástico que se ve alrededor del orificio.
- Tomamos unos centímetros de cordón elástico, juntamos ambas puntas y las pasamos desde afuera por el orificio. Tomamos la medida de nuestro dedo para luego hacer un nudo y evitar que se salga la elástica.
The procedure is quite simple. I think this project is ideal to give as a gift to our sewing friends and to the participants in workshops and/or courses that we give. Of course this one, the first one will be for me because whenever I drop my needles and pins I lose them quickly. This way I will have them closer to the project and there will be less chance of losing them.
- We start by opening a small hole in the center of the lid. To do this we heat a large steel nail and press right in the middle. Then we file to remove the plastic that shows around the hole.
- We take a few centimeters of elastic cord, put both ends together and pass them through the hole from the outside. We take the measurement of our finger and then tie a knot to prevent the elastic from coming out.
- Tomamos el trozo de tela estampada o unicolor, medimos más o menos entre 9cm y 11cm de diámetro para formar un círculo. Cortamos.
- Ensartamos la aguja con el hilo de coser color de la tela y basteamos por todo alrededor sin rematar al final. Lo que haremos es fruncir la tela para cerrarla un poco. Allí dentro colocamos un poquito de algodón y después halamos el hilo, cerramos y rematamos bien.
- We take the piece of printed or unicolor fabric, measure more or less between 9cm and 11cm in diameter to form a circle. We cut.
- We thread the needle with the sewing thread color of the fabric and we baste all around without finishing at the end. What we will do is to gather the fabric to close it a little. Inside we place a little bit of cotton and then we pull the thread, close and finish it off well.
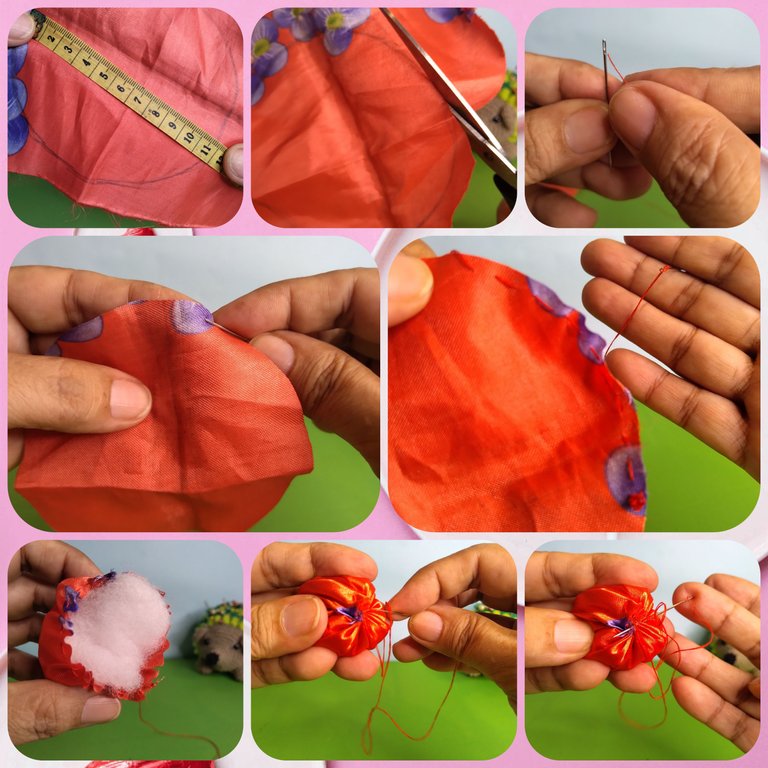
- Esta tela estampada ya cerrada la vamos a pegar adentro de la tapa procurando que todas las costuras queden bien adentro.
- Luego si lo deseas puedes decorar la tapa. Yo lo hice con un tejido de puntos altos realizado con hilo pabilo color blanco perlado. Una vez tejido el largo que necesito para cubrir la tapa cerré con punto deslizado y corté el sobrante de hilo. Usé silicón caliente para fijarlo en la tapa. También decoré con un pequeño corazón de foami que tenía ya elaborado.
- This printed fabric already closed, we are going to glue it inside the lid, making sure that all the seams are well inside.
- Then, if you wish, you can decorate the lid. I did it with a high stitch fabric made with pearly white thread. Once I had knitted the length I needed to cover the lid, I closed it with a slip stitch and cut the excess thread. I used hot silicone to attach it to the lid. I also decorated with a small foami heart that I had already made.
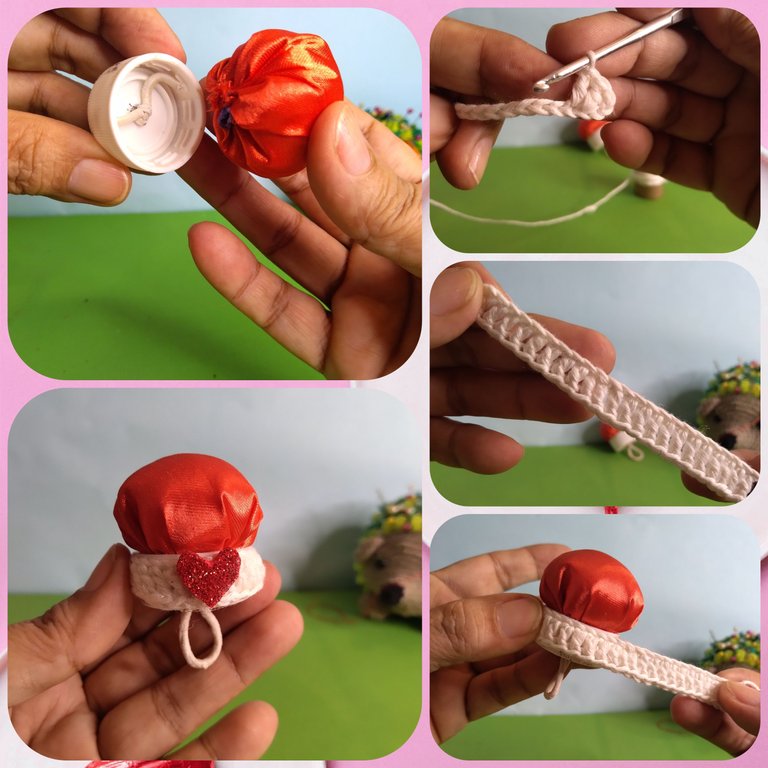
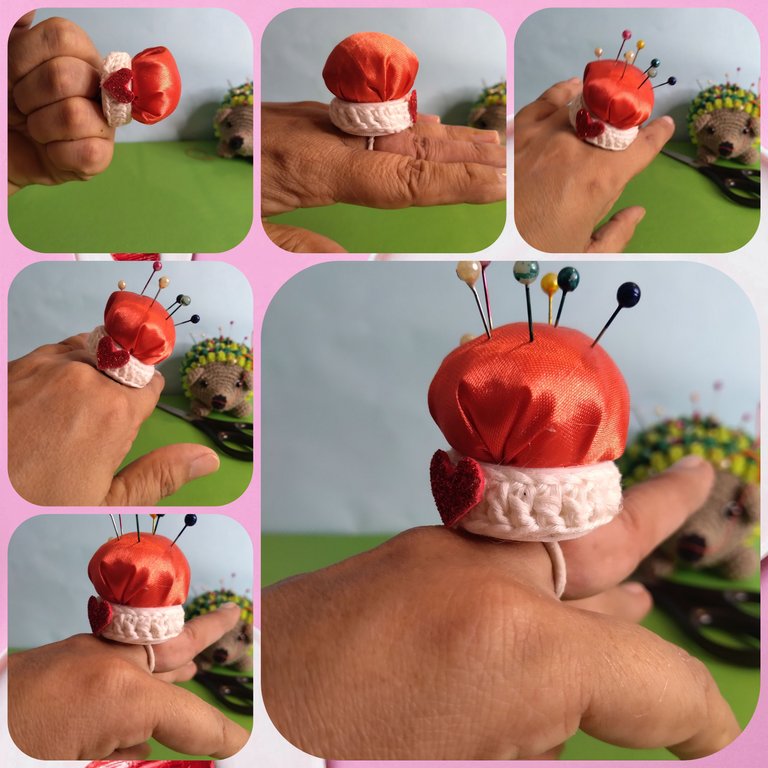
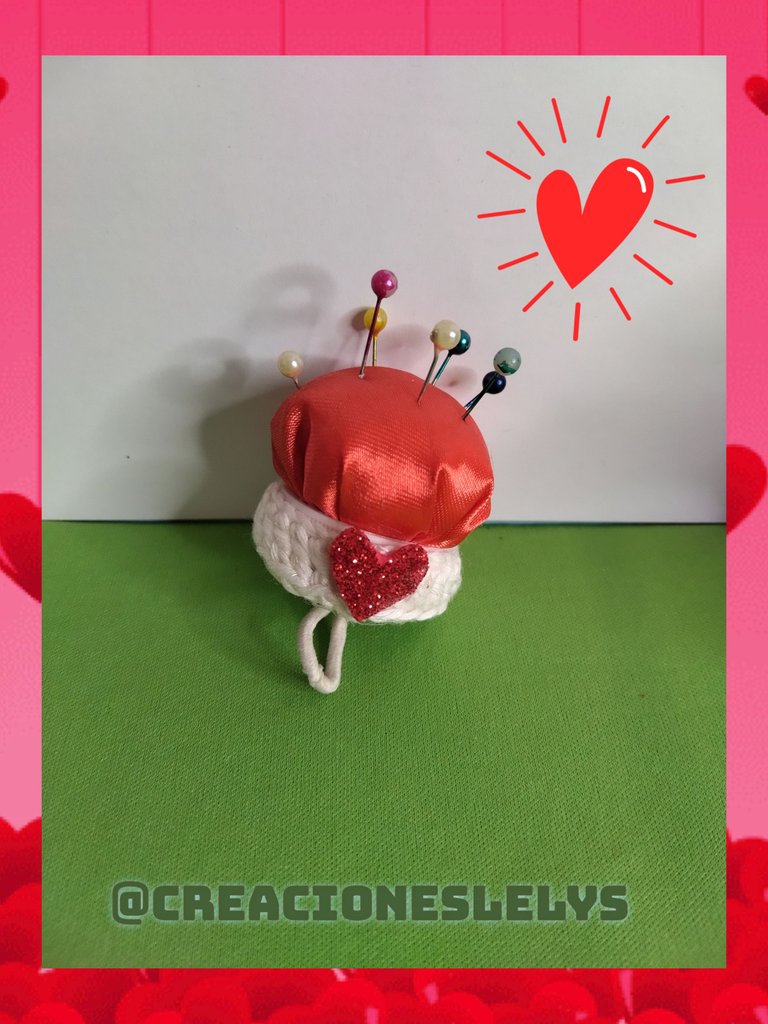
💞 Como pueden apreciar este bello costurero me quedó justo al tamaño de mi dedo. Es muy cómodo y no se mueve para nada. Espero usarlo con frecuencia, aunque no coso muy seguido. Espero que se motiven a hacerlo y de este modo sacar provecho de materiales que nos van quedando.
💞 As you can see, this beautiful sewing box is just the right size for my finger. It is very comfortable and doesn't move at all. I hope to use it often, although I don't sew very often. I hope you will be motivated to make it and in this way take advantage of the materials we have left.
Muchísimas gracias por tu apoyo. Todas las fotos son de mi propiedad. Edité con FotoGrid. Usé el traductor de Deepl. No olvides seguirme en mis redes. Hasta pronto.
Thank you very much for your support. All photos are my property. I edited with FotoGrid. I used Deepl translator. Don't forget to follow me on my networks. See you soon.


Excelente idea, amiga @creacioneslelys, así se ahorra tiempo y accidentes 🌹🌷🌼🌺🌻💐🌸💮🏵️☘️
Excellent idea, friend @creacioneslelys, this saves time and accidents 🌹🌷🌼🌺🌻💐🌸💮🏵️☘️
Hola. Feliz día. Sobre todo los accidentes, a veces paso horas buscando una aguja o alfiler que se ha caído 😊
🌹🌷
No sólo es hermoso sino que además es muy útil, práctico y finísimo Lelys, hermoso trabajo!❤️
Hola. Lindo día. A mí me encantó. 🤭💖🙋 Espero ya no perder tantas agujas.
jajaja es un buen método, lo importante es que no caigan al suelo y te pinches!
Gracias amiga.
Se me antojan unas donas...ojalá pueda conseguir dónde comprarlas. En esta ciudad no las hacen tan buenas.
No como mucho de eso, pero cuando estaba en Argentina comía facturas que delicia!!
Me cuentan que son deliciosas las facturas. Yo amo el hojaldre, deben ser divinas.
Mira... acá en España no encuentro nada igual, un día te paso una receta de las argentinas argentinas
Amiga una creativa y excelente idea, además te quedo súper lindo y cuchi ese pequeño alfiletero. Que tengas un hermoso día cargado de bendiciones @creacioneslelys 🌈
!DIY
Amén. Igualmente para ti y los tuyos. Abrazos.
This is cute and funny that I can wear something else on my finger that is not a wedding ring.
Its creative and very useful.
Thanks for sharing dear.
Thanks you 😃
#hive #posh #diy #needle
https://twitter.com/obo2004/status/1691409912889217024?t=18md6BVlSr_b-ddZ_Vp2SQ&s=19
Ha quedado fantástico y además es muy útil cuando se está haciendo un trabajo de costura 👍
Hola. Gracias, además es muy cómodo.
Very good idea using recyclable materials. Thanks for sharing in our community // Muy buena idea a partir de materiales reciclables. Gracias por compartir en nuestra comunidad
Muchísimas gracias por el apoyo con su comentario.
You can query your personal balance by
!DIYSTATSCongratulations, your post has been upvoted by @dsc-r2cornell, which is the curating account for @R2cornell's Discord Community.
Hello. Thank you very much for supporting my content. I appreciate it.
Bu n día @creacioneslelys, bello, delicado y único necesito uno así..gracias por compartir amiga. Suerte.
Hola. Me alegro que te guste. Son muy fáciles de hacer. Feliz día 😘
Thanks for the support.
Te ha ha quedado muy bien amiga. A mi hermana le gustaría mucho este tutorial. Saludos
Hola. Me alegro que le haya gustado. Un placer. Saludos.