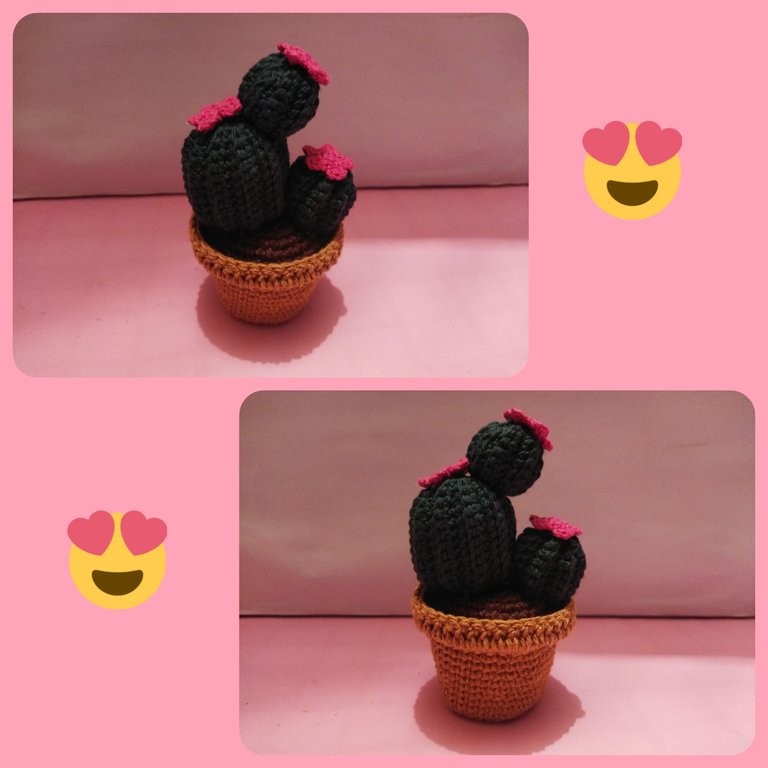
Decorating rooms with CROCHET. Knitted cactus. 🌵 Decorando los ambientes con CROCHET. Cactus tejido.
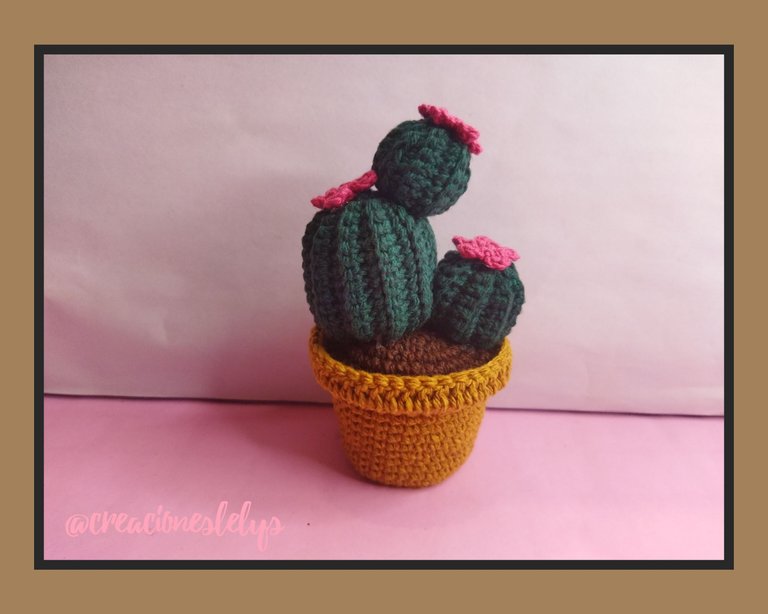
Hola 🌷 por aquí yo nuevamente presentando un nuevo proyecto. De verdad que he pasado unos días muy animada tejiendo y tejiendo. Necesito NO pensar en las consecuencias que ha dejado en mi país el paso de las ondas tropicales recientes, muchísima lluvia ha afectado estados centrales de manera terrible.
Concentrándome un poco recordé un patrón muy lindo para hacer cactus redondos. Hacía bastante que no tejía este tipo de plantas. Por un momento pensé que debía ver un tutorial, pero no fue necesario, solo le di tiempo a mi memoria hasta que llegó el recuerdo. Yo antes tejia sin escribir los patrones, les recomiendo que siempre escriban sus propios diseños para que no se vuelvan locos después buscándolos en su mente.
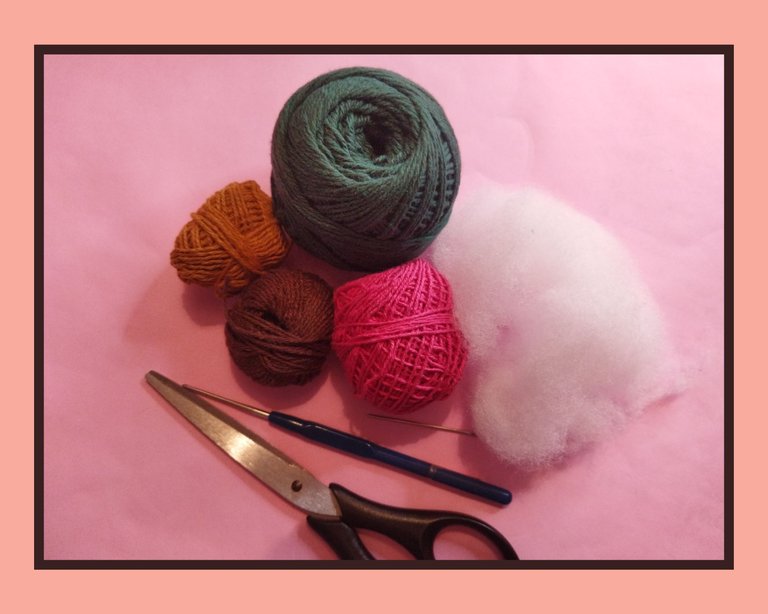
Para hacer este precioso modelo de cactus solo necesité mis hilos pabilos, aguja de crochet de 2,25 mm y la de 1,60 mm, aguja lanera, tijeras, algodón para rellenar y un poco de pegamento.
Elaborarlo fue bastante sencillo amigos. Se inicia tejiendo la base desde un am de 6pb, lo hice crecer hasta la vuelta de 5pb-1aum. Después empecé a subir con solo pb tomando solo la hebra de atrás en la primera vuelta de subida, en las demás se toma el punto completo. Así tejí cuatro vueltas, después hice una con 4pb-1aum, volví a tejer cuatro vueltas sin aumentos. Ya finalizando hice otra vuelta de aumentos 5pb-1aum hasta terminar con una vuelta de pb y la que sigue de solo puntos altos, esta vuelta se teje desde la parte interna de la maceta.
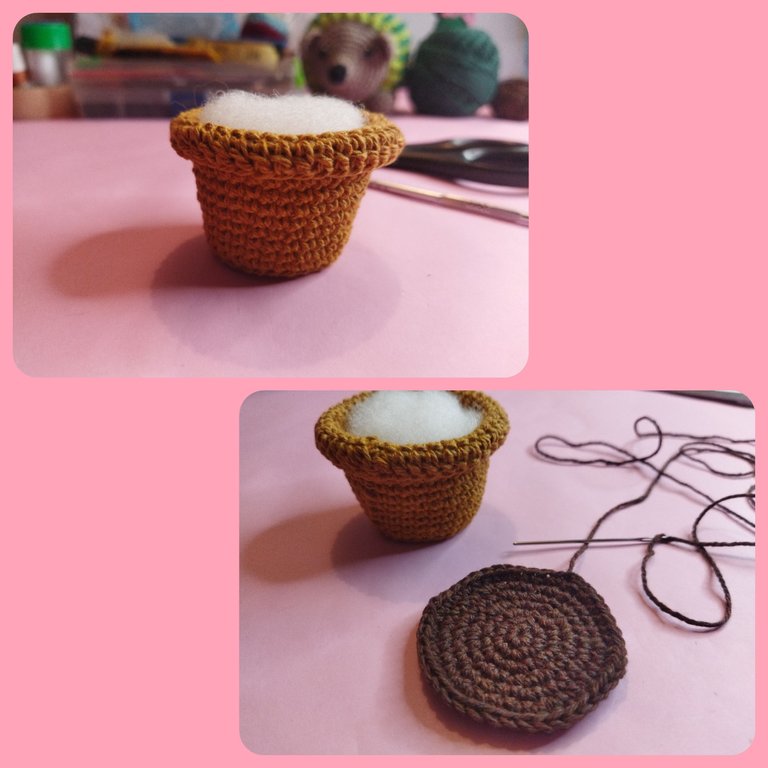
Para simular la tierra de la planta inicié con 6pb en am, lo hice crecer hasta la vuelta de 5pb-1aum. Coloqué algodón dentro de la maceta, después cosí con la aguja lanera la tierra a la maceta tomando los puntos internos que se ven al doblar la última vuelta de puntos altos.
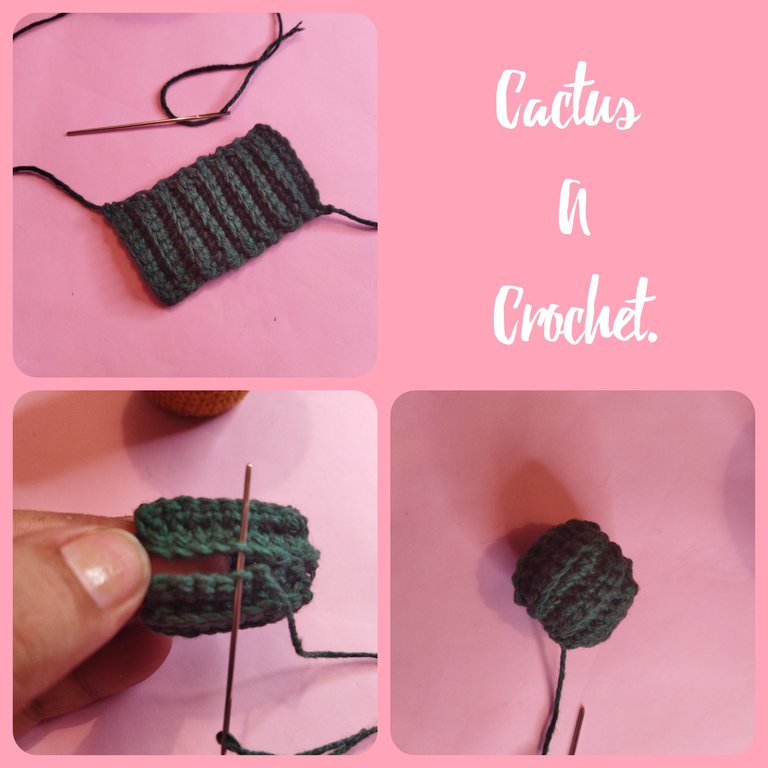
Hacer esta planta me hizo sentir muy feliz porque lo que recordé me funcionó de maravilla, solo tardé un poquito precisando el tamaño que tendrían los cactus para ordenarlos en la maceta. Hacerlos también es bastante sencillo, solo vamos a tejer una cadena que nos dará el alto del cactus y tejeremos hacia arriba de la cadena solo tomando la hebra de atrás siempre, hasta lograr el ancho de la labor, esta medida nos dará el volúmen del cactus, o sea lo gordito que quedará.
Al lograr las medidas unimos con costura los dos extremos y después cerramos un orificio tomando los puntos y halando la hebra con la aguja. Se coloca el relleno y luego se cierra el otro orificio.
Para darle la forma deseada a la planta organizamos los cactus y los cosemos a la tierra. Después decoramos con unas florecitas de cinco pétalos. Me encanta como se ve. Espero que me haya dado a entender para que hagan muchos de estos. Lo estoy haciendo pequeño porque es para colocar en una repisa y debe medir no más de 11 cm. Son lindos para decorar los ambientes como oficinas, bibliotecas, mesas de rincón y otros cálidos lugares de nuestro entorno.
Muchas gracias por tu visita 🤗 Todas las fotos son de mi propiedad. Edité con Polish. Usé el traductor de DeepL 😉 Será hasta la próxima publicación. Bendiciones.
English.

Hello 🌷 here I am again presenting a new project. I really have spent a few days in high spirits knitting and knitting. I need to NOT think about the consequences that the recent tropical waves have left in my country, lots and lots of rain has affected central states in a terrible way.
Concentrating a bit I remembered a very nice pattern to make round cactus. It had been quite a while since I had this type of plant. For a moment I thought I should watch a tutorial, but it wasn't necessary, I just gave my memory time until the memory came. I used to knit without writing the patterns, I recommend that you always write your own designs so that you don't go crazy later looking for them in your mind.

To make this lovely cactus pattern I only needed my pabilos yarns, 2.25 mm crochet needle and 1.60 mm crochet needle, wool needle, scissors, cotton for stuffing and some glue.
Making it was pretty easy folks. You start by knitting the base from a 6pb am, I made it grow to the 5pb-1aum round. Then I started to go up with only bp taking only the back strand in the first row, in the other rows you take the whole stitch. In this way I knit four rows, then I knit one row with 4pb-1aum, I knit four rows again without increases. At the end I knit another round of increases 5pb-1aum until I finished with a round of purl and the next one with only double crochet, this round is knitted from the inside of the pot.
To simulate the soil of the plant I started with 6pb in am, I made it grow to the 5pb-1aum round. I placed cotton inside the pot, then I sewed with the wool needle the soil to the pot taking the internal stitches that you see when you fold the last round of high stitches.

Making this plant made me feel very happy because what I remembered worked great, it just took me a little while to figure out the size of the cactus to arrange them in the pot. Making them is also quite simple, we are only going to weave a chain that will give us the height of the cactus and we will weave up the chain only taking the back strand always, until we get the width of the work, this measure will give us the volume of the cactus, that is, how fat it will be.
Once the measurements are obtained, we sew the two ends together and then close a hole by taking the stitches and pulling the thread with the needle. Place the stuffing and then close the other hole.

To give the desired shape to the plant we arrange the cacti and sew them to the ground. Then we decorate with some little flowers with five petals. I love the way it looks. I hope you have given me a hint to make a lot of these. I am making it small because it is to place on a shelf and should measure no more than 11 cm. They are cute for decorating environments like offices, libraries, corner tables and other warm places in our environment.

Thank you very much for your visit 🤗 All photos are my property. I edited with Polish. I used DeepL translator 😉 It will be until the next post. Blessings.
Congratulations @creacioneslelys! You have completed the following achievement on the Hive blockchain and have been rewarded with new badge(s):
Your next target is to reach 5250 replies.
You can view your badges on your board and compare yourself to others in the Ranking
If you no longer want to receive notifications, reply to this comment with the word
STOPhttps://twitter.com/131481196/status/1584124931050119171
https://twitter.com/164005493/status/1584157803299876864
https://twitter.com/1422413915275812864/status/1584369164571271168
The rewards earned on this comment will go directly to the people( @yolimarag, @mariajcastro28 ) sharing the post on Twitter as long as they are registered with @poshtoken. Sign up at https://hiveposh.com.
This post has been manually curated by @steemflow from Indiaunited community. Join us on our Discord Server.
Do you know that you can earn a passive income by delegating to @indiaunited. We share 100 % of the curation rewards with the delegators.
Here are some handy links for delegations: 100HP, 250HP, 500HP, 1000HP.
Read our latest announcement post to get more information.
Please contribute to the community by upvoting this comment and posts made by @indiaunited.
Thanks you ☺️
Thank you for sharing this post on HIVE!
Your content got selected by our fellow curator tibfox & you received a little thank you upvote from our non-profit curation initiative. Your post will be featured in one of our recurring curation compilations which is aiming to offer you a stage to widen your audience within the DIY scene of Hive.
Next time make sure to post / cross-post your creation within the DIYHub community on HIVE and you will receive a higher upvote!
Stay creative & hive on!
Hello. Thanks you 🤗
Hola @creacioneslelys, te quedó hermoso el cactus, está perfecto para decorar la biblioteca y la mesa de coser, tengo muy poco conocimiento del Amigurumi, pero me encantan las obras de arte que realizan con esa técnica, disfruto viendo y leyendo esas creaciones en la comunidad.
Feliz y bendecido día 🤗
Hola. Amiga, hacer amigurumi es muy divertido. Estoy segurísima que te quedarían hermosos. Gracias por apreciar este bello arte.
Thank you 🤗
Your content has been voted as a part of Encouragement program. Keep up the good work!
Use Ecency daily to boost your growth on platform!
Support Ecency
Vote for new Proposal
Delegate HP and earn more
Thank you 🤗
Me encanta este hermoso cactus 🌵 para un espacio de la casa, felicidades por tu gran arte amiga.
Hola. Que bueno que te gusten. Son un lindo adorno. Saludos. 😉
Congratulations, your post has been upvoted by @dsc-r2cornell, which is the curating account for @R2cornell's Discord Community.
Hello 🙋 Thank you 🤗 🙏🤗
Hermosos captus para decorar, quedaron muy lindos, la felicito, por un momento al ver la foto pensé que era tejido a dos agujas, de verdad quedó muy bien, mucha suerte y bendiciones para usted 🤗
Hola. Muchas gracias 🌷 me alegra que te gusten los cactus, son tejidos con mucho cariño. Feliz noche.
Que cosita más adorable, estoy segura que ese no se me secará jaja Está bellisimo, quedaría lindo hasta en mi mesita de noche, me encanta! ♥️
that looks so good well done
Thank you 🤗
Wow!! qué bonitos!! La verdad es que los cactus le dan un toque bastante fresco a las decoraciones. Te felicito por este trabajo!!💐💐
Hola @imena muchas gracias por tu comentario. Así es los cactus son un tipo de planta que aporta frescura al ambiente.
Te quedó muy hermoso, sí mi mamá lo ve de seguro le va a encantar. Y es que te quedó bellísimo. Gracias por compartir. Feliz inicio de semana ✨️
Hola. Gracias a ti por visitar mi blog. Seguro podrás hacer de estos cactus para ella. Son fáciles de crear. Saludos 🤗
wowww esto ha quedado muy nice. se ve lindísimo.
Muchas gracias. Pronto haré un robot. 🤭🙋🤗
heeee que fino, estaré pendiente :D
Hay una dapp de HIVE llamada ecency, es muy buena. Te envía todas las notificaciones que necesitas ver. Además puedes ganar puntos usándola. También está por aquí el señor Héctor Ayala. Su contenido es muy bueno. Que estés bien y sigue adelante. 🙋