Lapicero decorado con una flor[Esp-Eng]
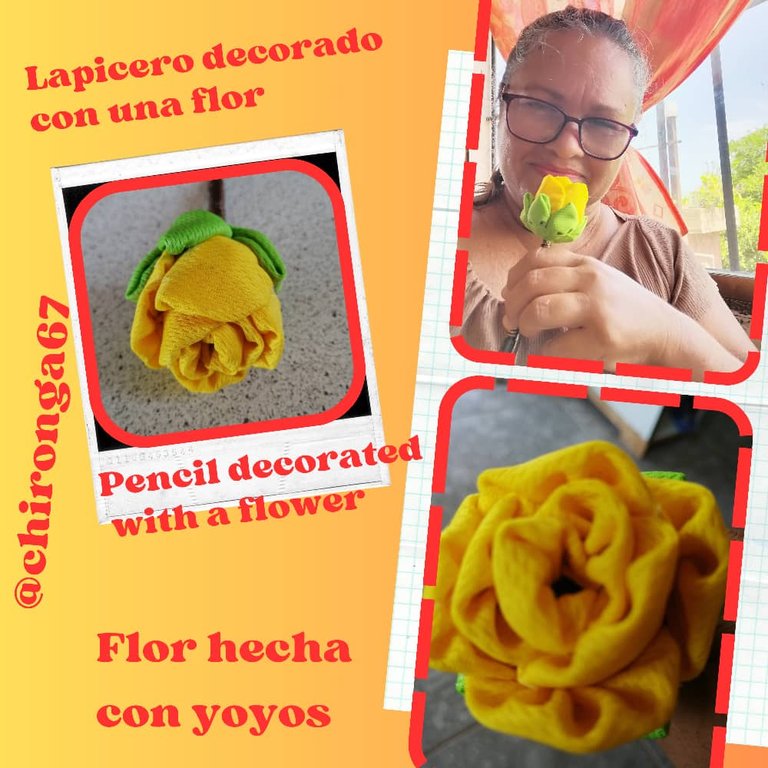


Happy afternoon my creative friends of this beautiful community of NeedleeWorkMonday I hope this week is very successful, today I bring you a pencil decorated with a rose made with yoyos, I like to recycle and when I have scraps of fabric I like to give it utility, every time I work on a project I would like to be a source of inspiration for others who are encouraged to create and give their personal touch to each project I do, it is very satisfying that from a piece of fabric or any other material we can make ornaments for our home, to give away or to sell and have a source of extra income, crafts also serve as therapy for stress, anxiety or simply to distract us, in this case I cut circles to make this beautiful rose that I hope will be liked by everyone who sees it because it is very beautiful, without more to say step to the materials and step by step.

Retazos de tela amarillo y verde
Cinta marrón o verde
Pistola de silicon
Una barra de silicone
Aguja
Hilo
Tijera
Lapicero con tapa
Yellow and green fabric scraps
Brown or green ribbon
Silicone gun
Silicone stick
Needle
Thread
Scissors
Pen with lid
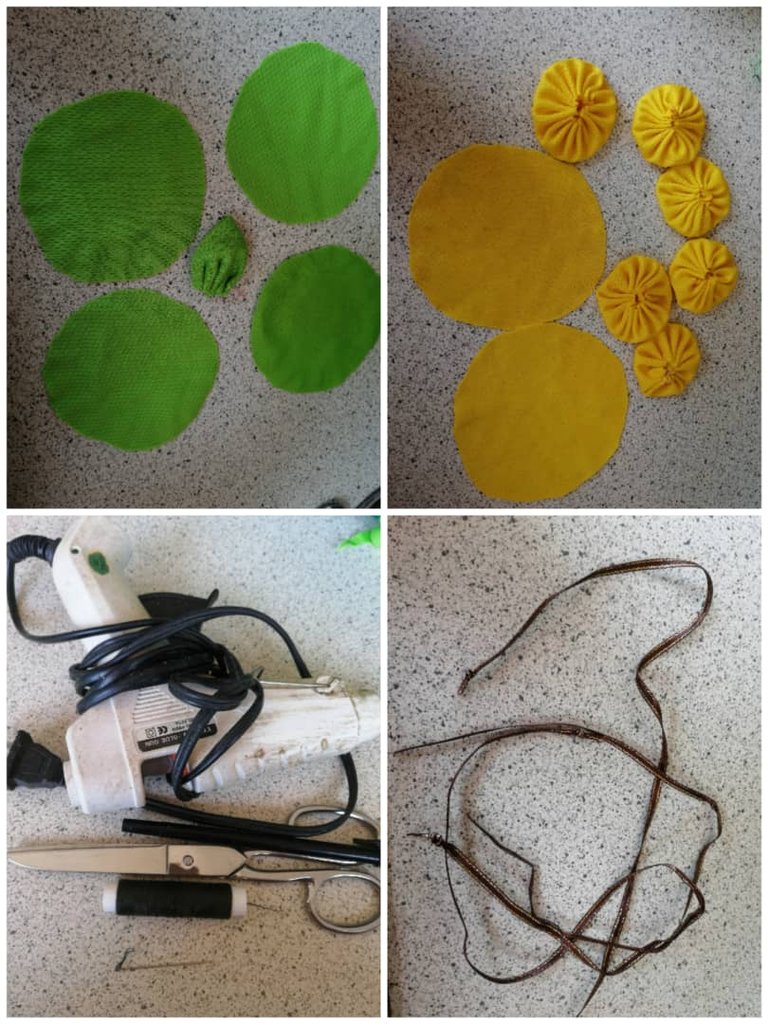

Empiezo cortando 8 círculos amarillos de 10 centímetros de diámetro y 5 verdes de 6 centímetros de diámetro.
I start by cutting 8 yellow circles of 10 centimeters in diameter and 5 green circles of 6 centimeters in diameter.
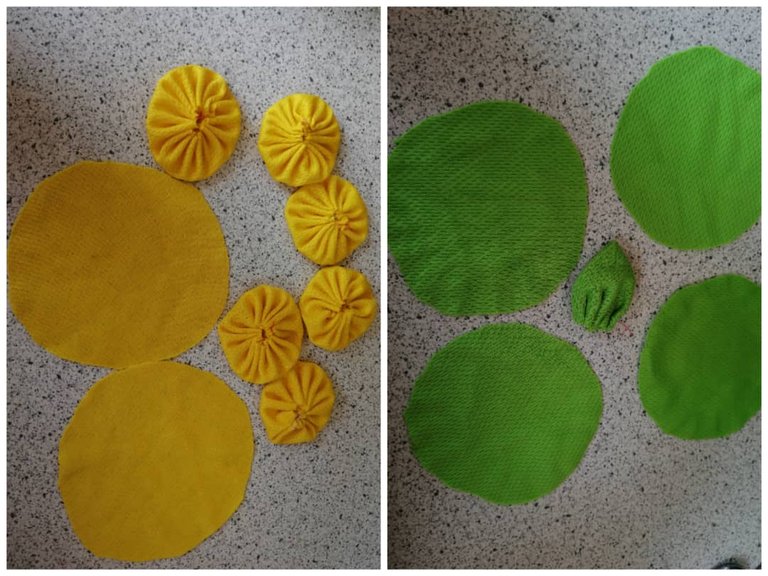
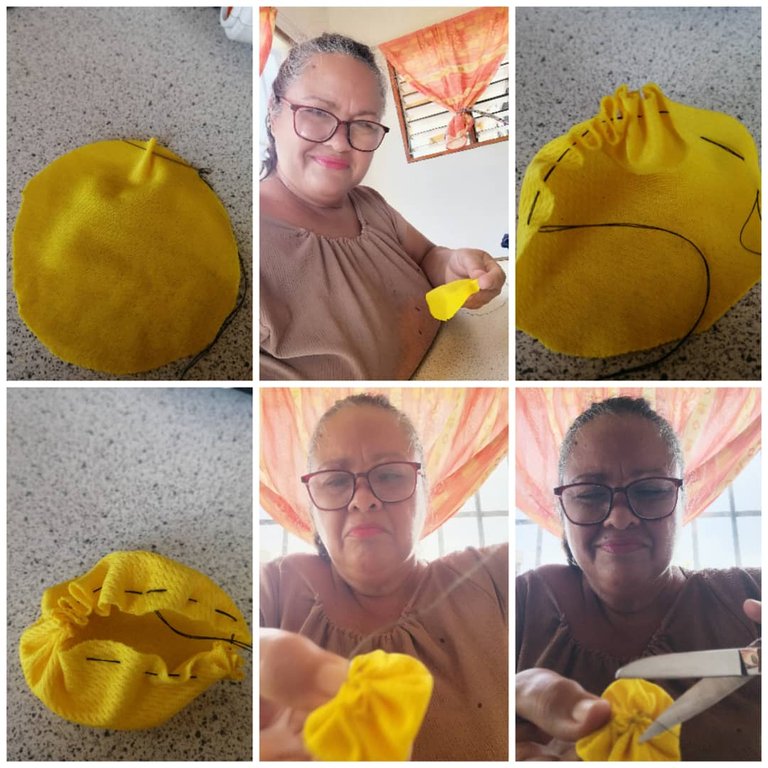
Coso el círculo alrededor y al finalizar halo el hilo para fruncir el círculo y así formar el yoyo, hago este mismo procedimiento con los 7 círculos restantes.
I sew the circle around and at the end I pull the thread to gather the circle and thus form the yoyo, I do the same procedure with the remaining 7 circles.
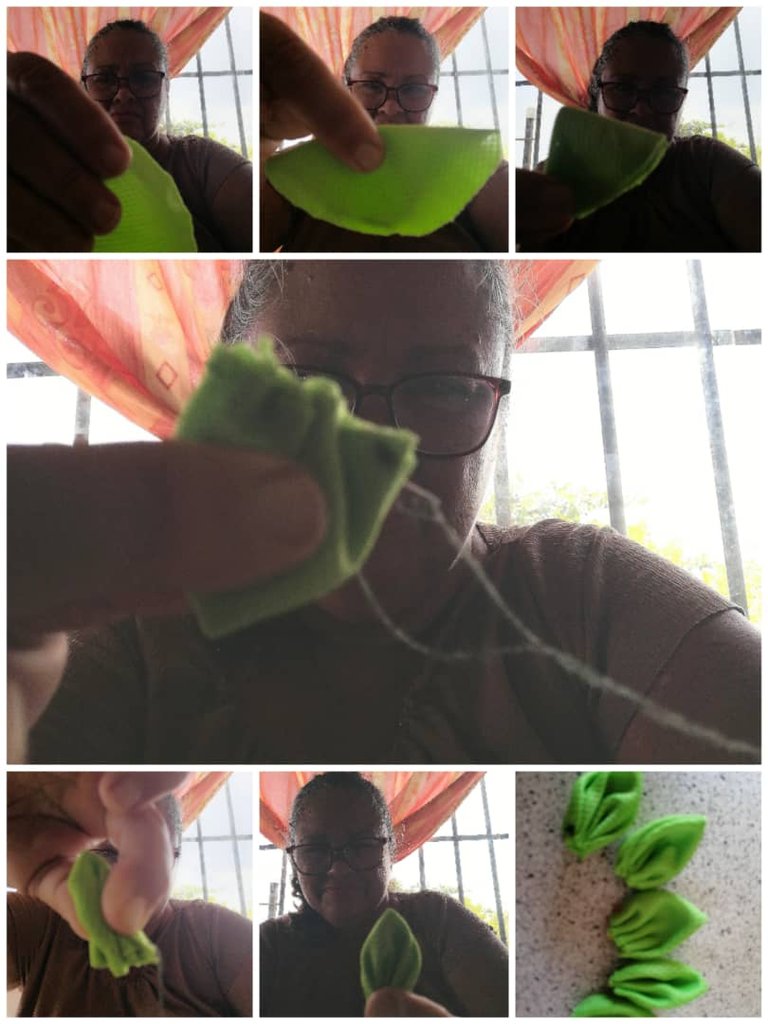
Luego paso a formar las hojas con los 5 círculos verdes , primero lo doblo a la mitad y después otra vez a la mitad y queda como un triangulo al que cosí por el borde, hale el hilo y frunci, asegure, corte el hilo y así forme la hoja, hice lo mismo con los 4 círculos restantes, cuando los tuve listo los uní con la aguja e hilo hasta unir los cinco y los cerre, remate y corte el hilo y así forme las 5 hojas de la rosa.
Then I form the leaves with the 5 green circles, first I fold it in half and then in half again and it looks like a triangle that I sewed along the edge, pull the thread and friction, secure, cut the thread and thus form the leaf, I did the same with the remaining 4 circles, when I had them ready I joined them with the needle and thread to unite the five and close them, finish and cut the thread and thus form the 5 leaves of the rose.
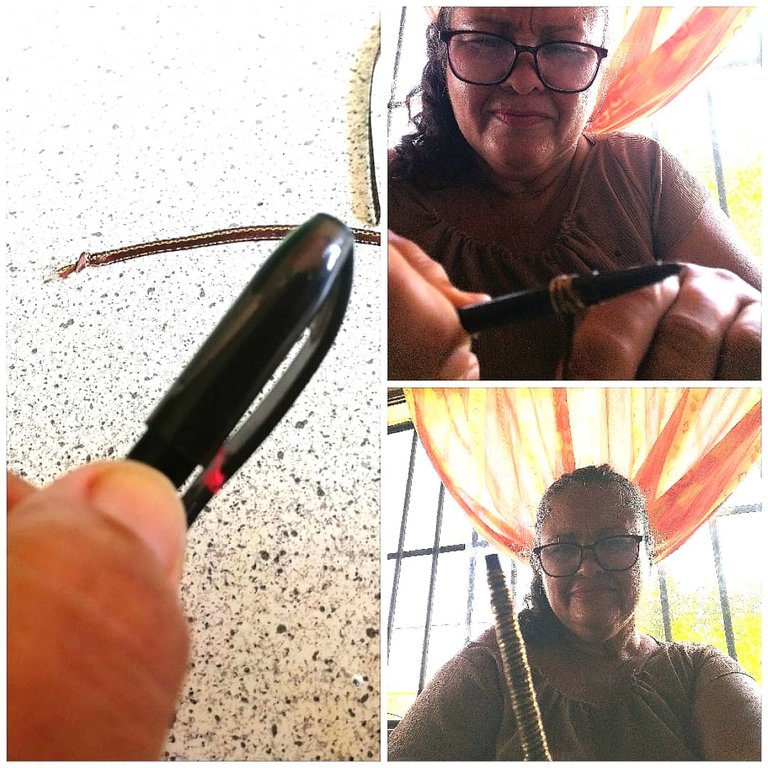
Forre el lapicero con la cinta marrón, le echo un poquito de silicon en la punta de la cinta y la pego en el lapicero, empezando de abajo hacia arriba donde termina la tapa o si es más cómodo para usted lo puede hacer de arriba hacia abajo siempre pendiente de terminar o empezar donde termina la tapa y al terminar asegura la cinta con un poquito de silicon en la punta.
Line the pen with the brown ribbon, put a little bit of silicone on the tip of the ribbon and stick it on the pen, starting from the bottom up where the cap ends or if it is more comfortable for you you can do it from the top down always making sure to finish or start where the cap ends and when you finish secure the ribbon with a little bit of silicone on the tip.
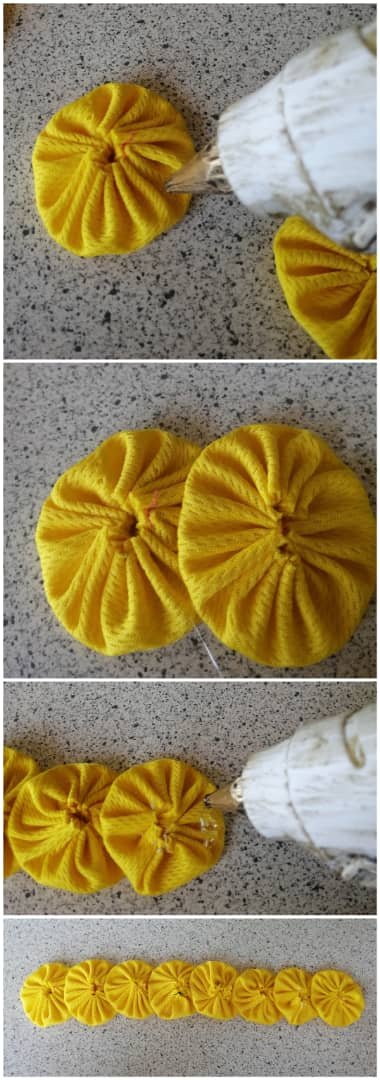
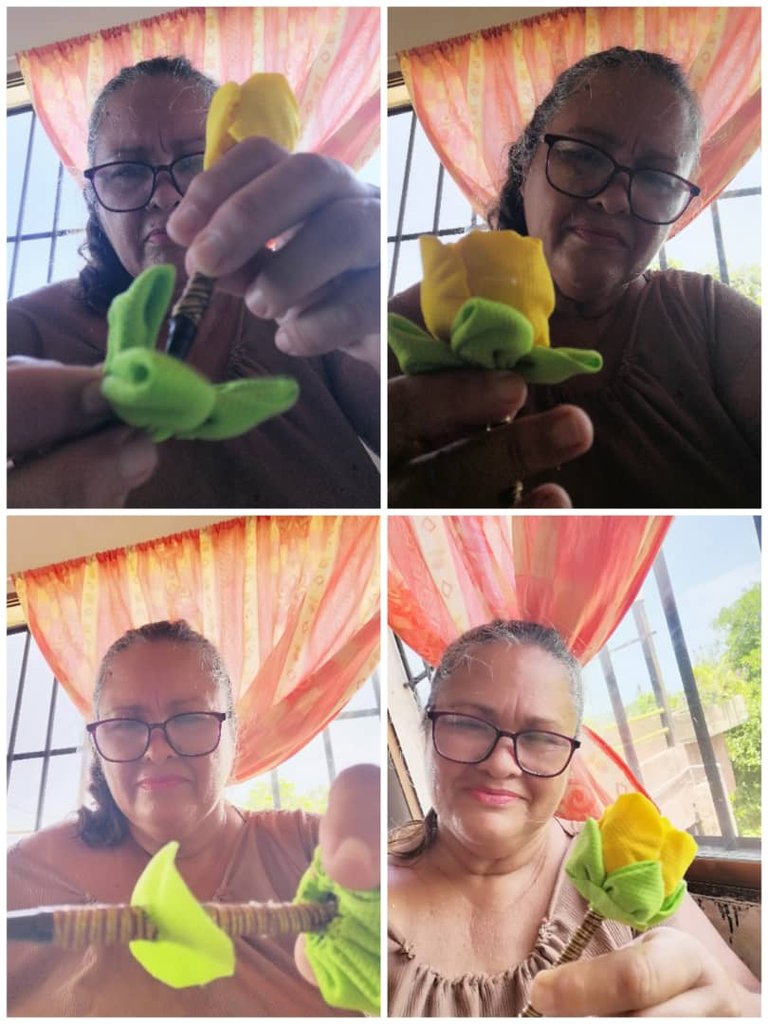
Echo esto procedo a unir los yoyos por un lado con silicon hasta unir los 8 yoyos por el lado que esta fruncido, le echo silicone en un borde y empiezo a enrollar alrededor del lapicero (esto se hace en la punta de arriba) hasta formar la rosa.
I then proceed to join the yoyos on one side with silicone until I join the 8 yoyos on the side that is puckered, I put silicone on one edge and start wrapping around the pen (this is done at the top end) to form the rose.
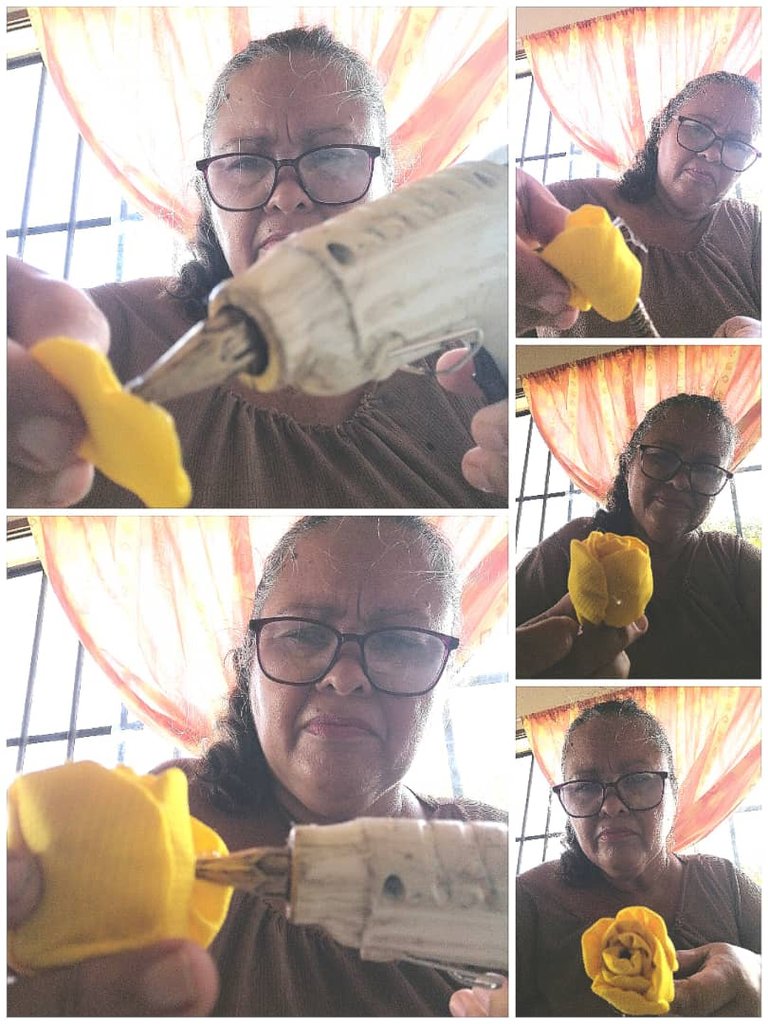
Luego por la punta de abajo del lapicero se meten las hojas y se aseguran con silicon.
Se corta un redondo de 4 centímetros de diámetro, se dobla a la mitad y se le hace un hueco en el centro y se mete la punta de abajo del lapicero y se lleva hasta arriba, se le echa silicone y se pega a la flor y listo.
Then, through the bottom end of the pen, insert the leaves and secure them with silicone.
Cut a round of 4 centimeters in diameter, fold it in half and make a hole in the center and insert the bottom tip of the pen and take it to the top, pour silicone and glue it to the flower and that's it.
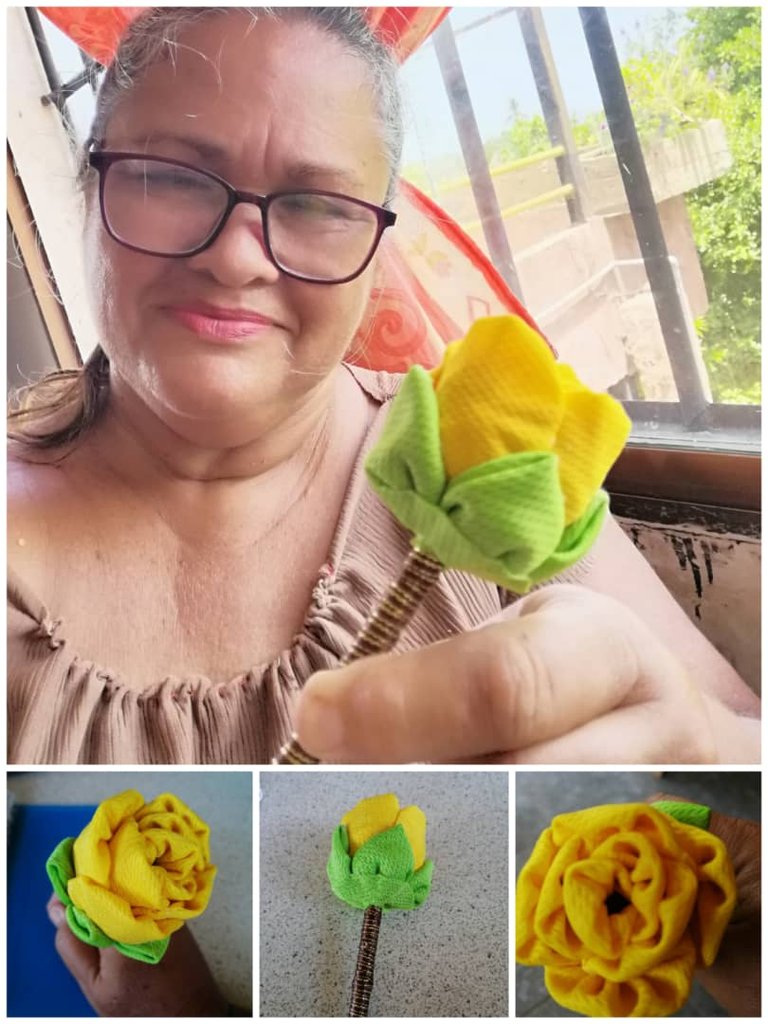
Ya tenemos lista una linda flor echa con retazos y un lapicero adornado con una linda flor, que puede ser un bonito detalle para una maestra, una amiga, nuestra mamá o para iniciar un emprendimiento.
Espero les guste y se animen a realizarla y les quede muy hermosa, gracias por su visita y apoyo.
We already have ready a nice flower made with scraps and a pencil decorated with a pretty flower, which can be a nice gift for a teacher, a friend, our mom or to start a business.
I hope you like it and I encourage you to make it and it is very beautiful, thank you for your visit and support.
Las fotos aquí utilizadas fueron tomadas por mi con mi celular huawei mate lite20, use Deelp traductor, imagen editada en canva, use cool text, baner realizado en canva.
The photos used here were taken by me with my cell phone huawei mate lite20, use Deelp translator, image edited in canva, use cool text, banner made in canva.

Totalmente, reciclar y diseñar con material reutilizable tiene un buen impacto no solo en el medio ambiente, sino también en nuestros bolsillos. Por otro lado, ver que algo que pudo ser desechado, tiene una nueva oportunidad nos da una satisfacción sin igual.
Tu flor quedó hermosa. Gran idea.
Gracias, si queda bien linda, gracias por tu visita y comentario
Wow, this is so lovely, the decoration is beautiful, you have a nice skill ma'am, I love it, keep it up ma'am, more Grace
Than you 🤗
Te quedó hermoso el lapicero amiga, Dios Bendiga tus manos y creatividad, es maravilloso todo lo que se le pueda dar un segundo uso. Gracias por compartir ☺️ Saludos y Bendiciones 🙏
Amén,gracias, saludos y bendiciones para ti también 🤗
Beautiful and talented skills. You have made this rose a beautiful one. Thanks for sharing your ideas.
Gracias ☺️