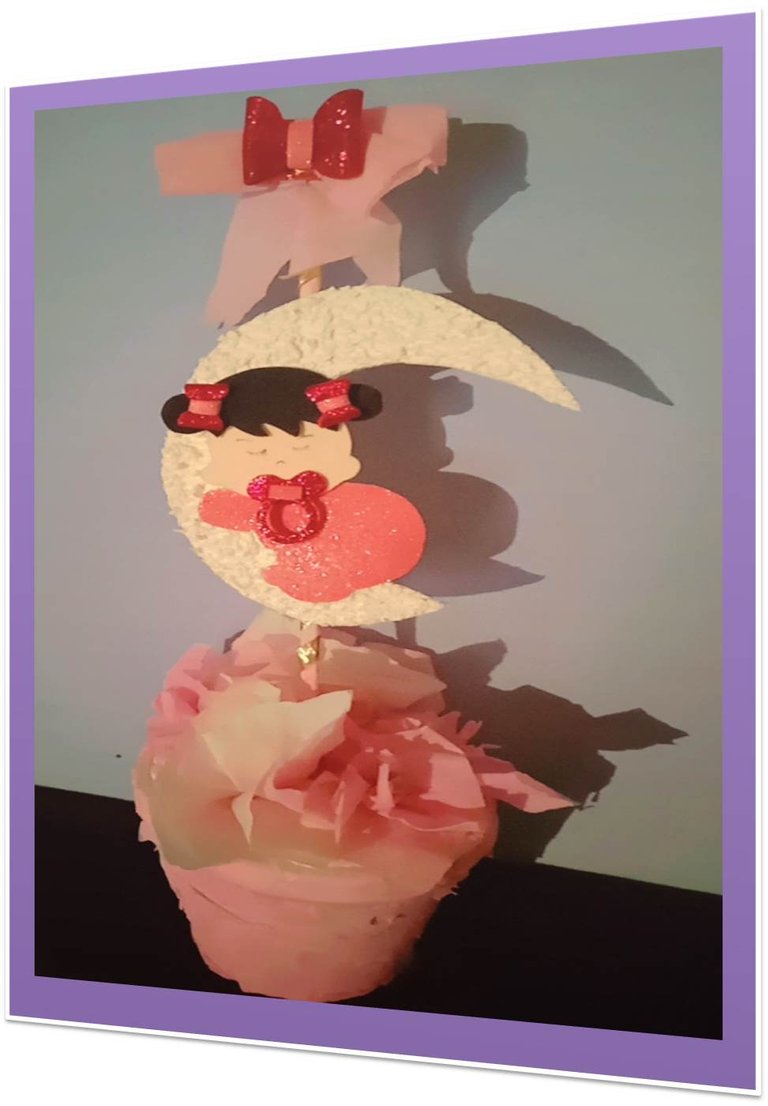
[Eng / Esp] Centerpiece, for Baby Shower, Baby in the Moon - Centro de Mesa, para Baby Shower, Bebe en la Luna
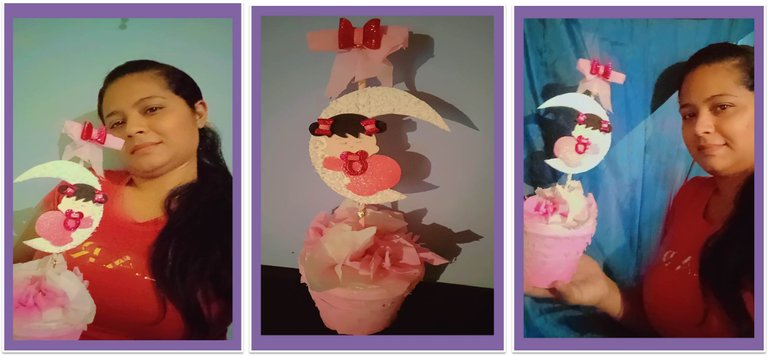
Greetings and a hug to everyone in this beautiful community, here I am to participate in this contest, and for them I took the idea of making a centerpiece, special idea for the arrival of a baby, for a Baby Shower, I hope you like it, I will show you the step by step below.
Un saludo y un abrazo para todos de esta hermosa comunidad, aquí estoy para participar en este concurso, y para ellos tomé la idea de hacer un centro de mesa, idea especial para la llegada de un bebe, para un Baby Shower, espero que les guste, les mostraré el paso a paso a continuación.
COMENZAMOS
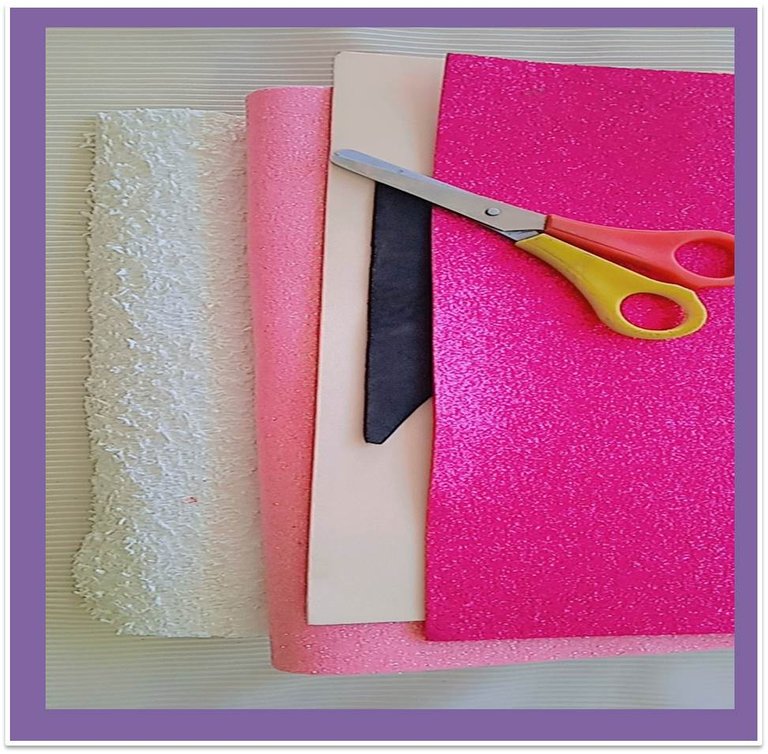
Materials:
Pink and fuchsia frosted foami.
Flesh-colored foami.
White foami with fluffy texture.
Black foami.
Grepe paper.
Base container for the centerpiece.
Sticks of height.
Silicon and scissors.
Foami Rosado y fucsia escarchado.
Foami de color carne.
Foami blanco con textura pelusa.
Foami negro.
Papel grepe.
Envase de base para el centro de mesa.
Palitos de altura.
Silicon y tijera.
Paso 1:
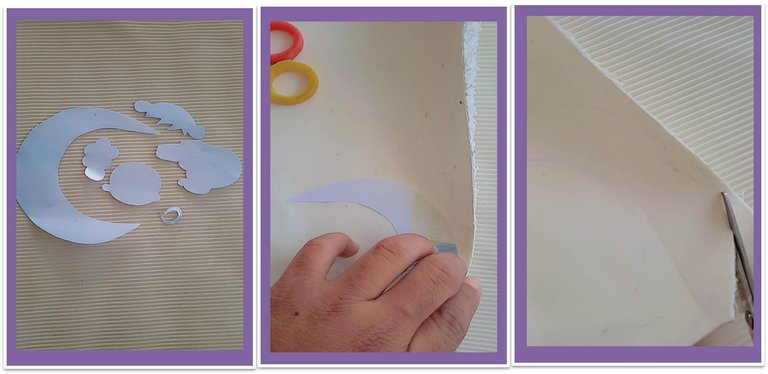
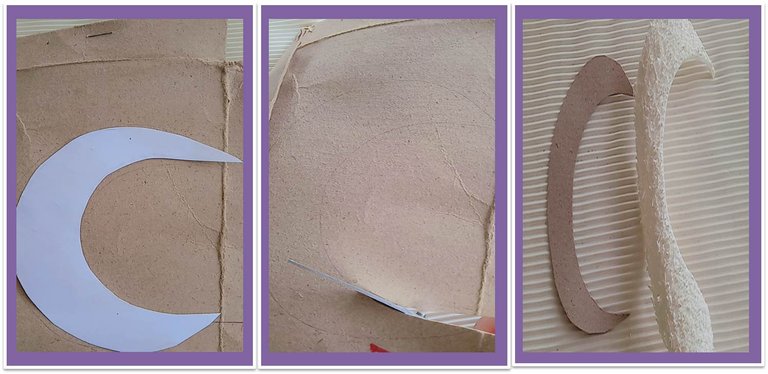
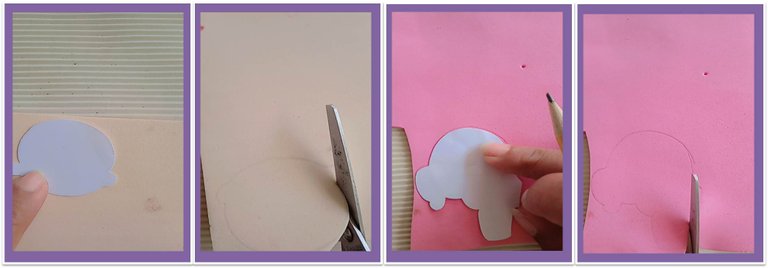
First, I previously made my pattern of the figures, using white paper and a pencil, when I had it ready I began to mark the moon in white foami that has a comfortable fluffy texture for the baby to sleep peacefully, hehehehe. In the same way, using a thin cardboard I marked another moon that will be the base for it to stand on, I cut out my pieces.
En primer lugar, realice previamente mi patrón de las figuras, usando hoja blanca y un lápiz, al tenerlo listo comencé a marcar la luna en foami blanco que tiene una textura de pelusa cómodo para que él bebe durmiera tranquilamente, jejeje. De igual forma, usando un cartón fino marque otra luna que será la base para que se sostenga, recorte mis piezas.
Paso 2:
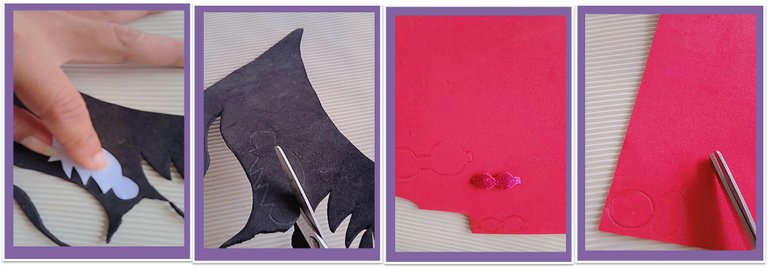
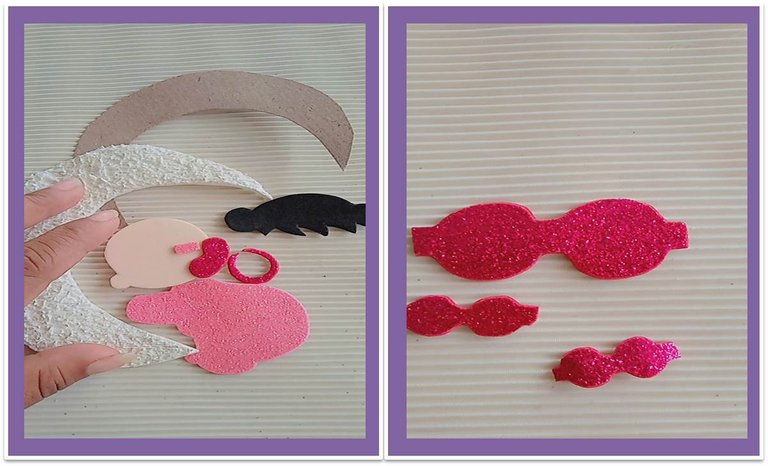
The second step I did was to outline the baby's head in the flesh-colored foami, as well as her outfit, but for this I used the pink frosted foami on the back so that when I turned it over it would have a shiny side.
Also, I drew our baby's hair and two little bows to decorate her fur, and I couldn't miss her pacifier.
Below you can see the images.
El Segundo paso que realice fue remarcarla cabeza del bebe en el foami de color carne, así como su traje pero para esto use el foami rosado escarchado colocando de la parte de atrás que al darle vuelta quedara con el lado brillante.
Asimismo, dibuje el cabello de nuestra bebe y dos lacitos para adornar su pelaje, y no podía faltar su chupón.
A continuación pueden observar las imágenes.
Paso 3:
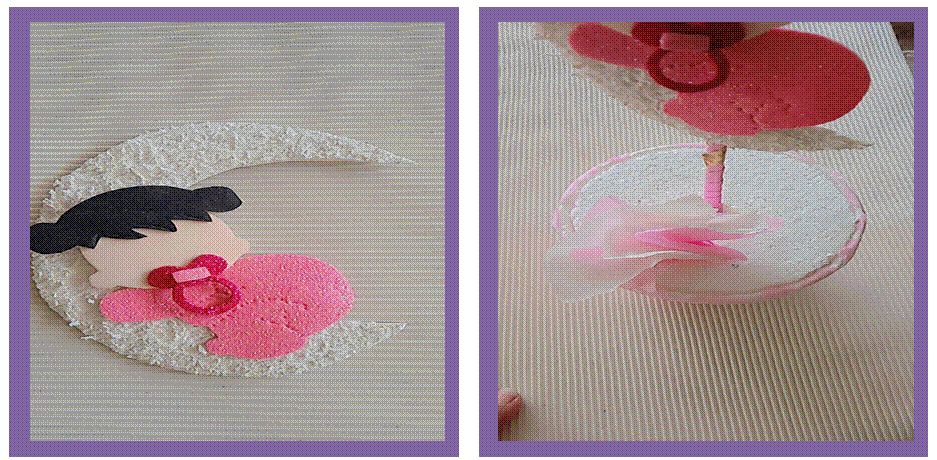
Finally, I started with my presentation to glue each piece to assemble my detail, I decorated the container where the detail of the baby on the moon is with greaseproof paper.
Por último, comencé con mi presentación a pegar cada pieza para armar mi detalle, adorne el envase donde está el detalle de la bebe en la luna con papel grepe.
All photos are my property taken with my Redmi 9c Smartphone.📷
🌺 My number is @Brindyschi 🌺
Until a future opportunity
Success for all 👊
Saludos @brindyschi, te quedó muy lindo el centro de mesa,los detalles para bebés me encantan.
Bendiciones!
gracias bella @belkyscabrera
Thank you for sharing this post in the DIYHUB Community!
Your content got selected by our fellow curator semarekha & you just received a little thank you upvote from us for your great work! Your post will be featured in one of our recurring compilations which are aiming to offer you a stage to widen your audience within the DIY scene of Hive. Stay creative & HIVE ON!
Please vote for our hive witness <3
Creativity can show great skill in creating anything, you did it brilliantly.
glad you liked it @semarekha