🖤[ESP-ENG] Smoke eye paso por paso | Smoke eye step by step🖤
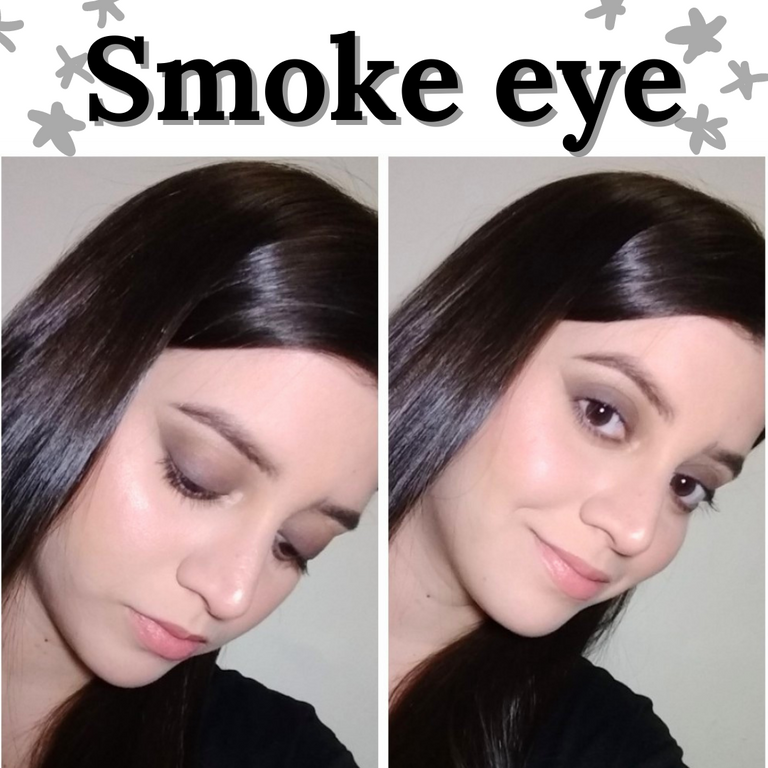
Hola, amigos de Hive. Es un placer saludarlos nuevamente. El día de hoy les explicaré como realizar un smoke eye sencillo, paso por paso.
Hello, friends of Hive. It's a pleasure to greet you again. Today I will explain you how to make a simple smoke eye, step by step.
El smoke eye es una técnica que consiste en aplicar dos tonos, uno oscuro y otro más claro, para lograr un efecto degradado. Es sencillo de realizar e ideal para acompañar a un look de noche, ya que le da intensidad y dramatismo a la mirada. Se puede realizar en cualquier tono, pero los más comunes son en tonos marrones.
The smoke eye is a technique that consists of applying two shades, one dark and the other lighter, to achieve a gradient effect. It is simple to perform and ideal to accompany an evening look, as it gives intensity and drama to the look. It can be done in any shade, but the most common are brown tones.
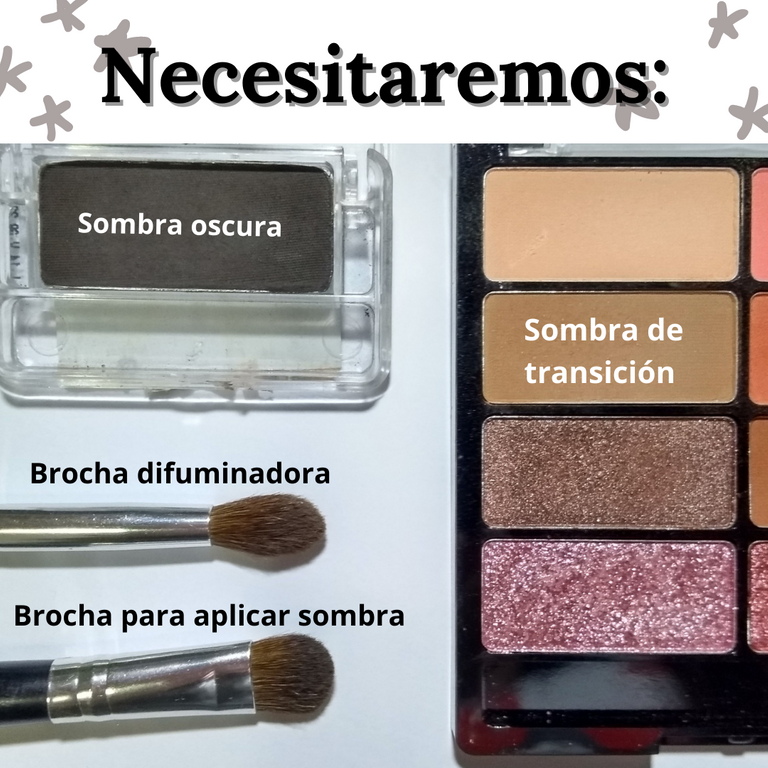
• Una sombra oscura.
• Una sombra mate más clara, conocida como tono de transición.
• Una brocha difuminadora.
• Una brocha plana, chata o cualquier brocha que sirva para aplicar sombra.
We will need:
• A dark shade.
• A lighter matte shadow, known as a transition shade.
• A blending brush.
• A flat, flat brush or any brush that works for applying shadow.
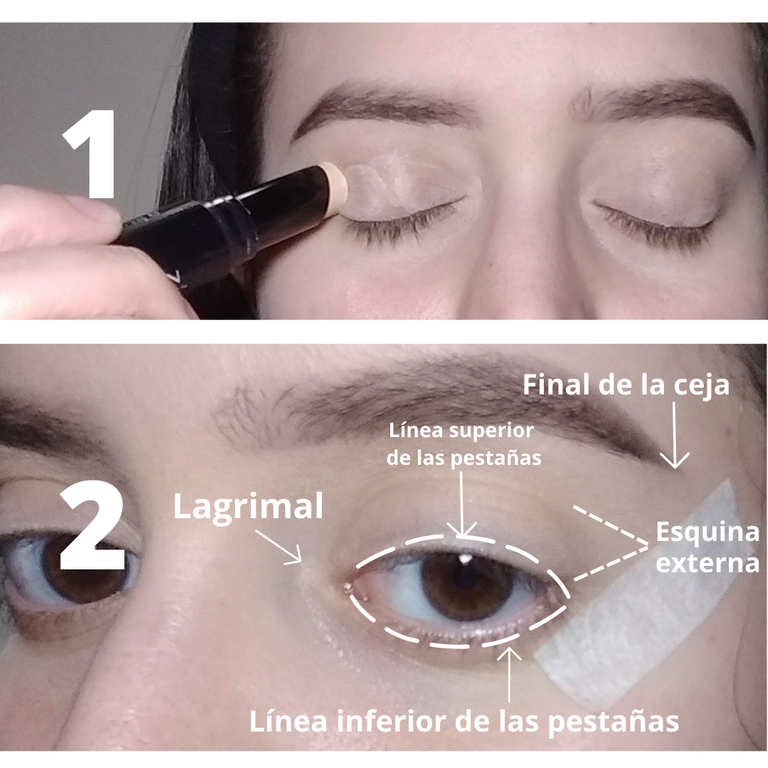
2-Colocamos cinta adhesiva debajo de la esquina externa del ojo, entre la porción más externa de la línea inferior de las pestañas y el final de nuestra ceja. Este paso es opcional. En lo personal me gusta porque ayuda a tener una terminación más limpia y a extender y levantar la forma del ojo. Debemos asegurarnos de colocarla simétricamente en ambos lados.
Steps:
1-Prepare the eyelids: with the eye clean, apply concealer or foundation and blend well. This step is very important and should always be done before applying eye makeup, because commonly we have darker areas than others or with small imperfections in the eyelids and this allows us to unify or even the tone, make the shadows pigment better and can be fixed and last longer.
2-Place masking tape under the outer corner of the eye, between the outermost portion of the lower lash line and the end of our eyebrow. This step is optional. I personally like it because it helps to have a cleaner finish and to extend and lift the shape of the eye. We must make sure to place it symmetrically on both sides.
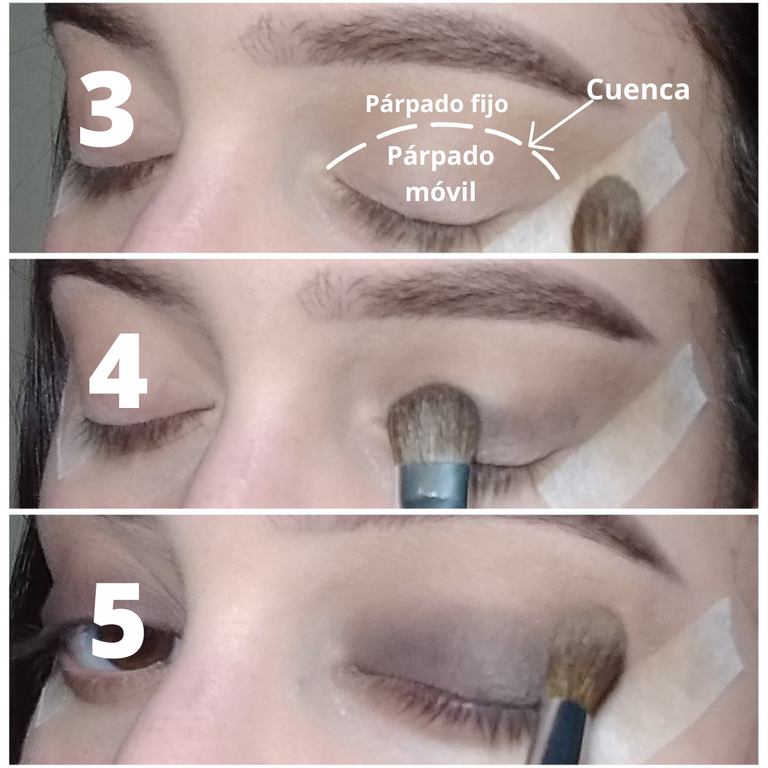
4-Con la brocha chata aplicamos el tono oscuro en todo el parpado móvil con toquecitos, cubriendo bien la línea superior de las pestañas. Este tono será el predominante, de él dependerá la intensidad del maquillaje (mientras más oscuro más intenso). En este caso yo utilice una sombra marrón oscura mate.
5-Con la brocha difuminadora integramos los dos tonos donde se unen, de ser necesario aplicamos un poco más de la sombra de transición.
3-With the blending brush we apply the transition shade in the socket and in the outer corner of our eye, blending well making circular movements with our brush. The greatest intensity of the shadow should be in the outer corner, not towards the tear trough. I used a light brown shadow.
4-With the flat brush we apply the dark shade all over the eyelid with small touches, covering well the upper lash line. This shade will be the predominant one, the intensity of the make-up will depend on it (the darker the more intense). In this case I used a dark brown matte shadow.
5-With the blending brush we integrate the two tones where they meet, if necessary we apply a little more of the transition shadow.
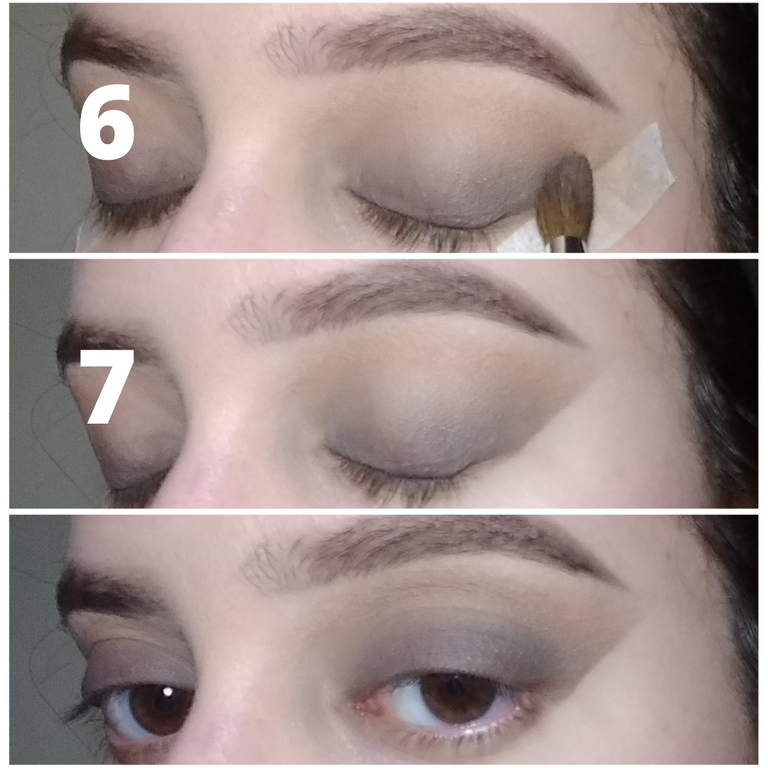
7-Retiramos la cinta adhesiva.
6-To achieve the gradient effect it is important to blend well.
7-Remove the adhesive tape.
9-Difuminamos con la sombra de transición.
10-Para complementar la intensidad de la mirada aplicamos iluminador o una sombra brillante en el lagrimal y rímel o mascara de pestañas.
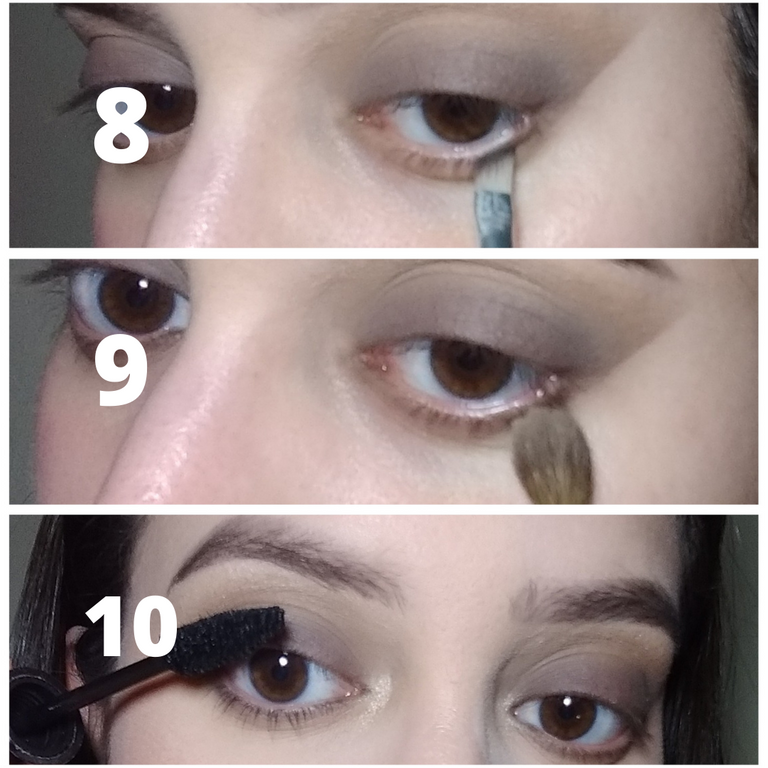
8-With a flat brush, apply a little of the dark shadow on the lower lash line.
9-Fade with the transition shadow.
10-To complement the intensity of the look we apply highlighter or a bright shadow on the eyelid and eyelash mascara.
Ready, we finished the smoke eye! It was very easy, wasn't it?
To accompany our look we apply a lipstick in a tone that is not intense like nude, pink, peach or gloss, so as not to overload the makeup. In this case I used a gloss in a peach tone.
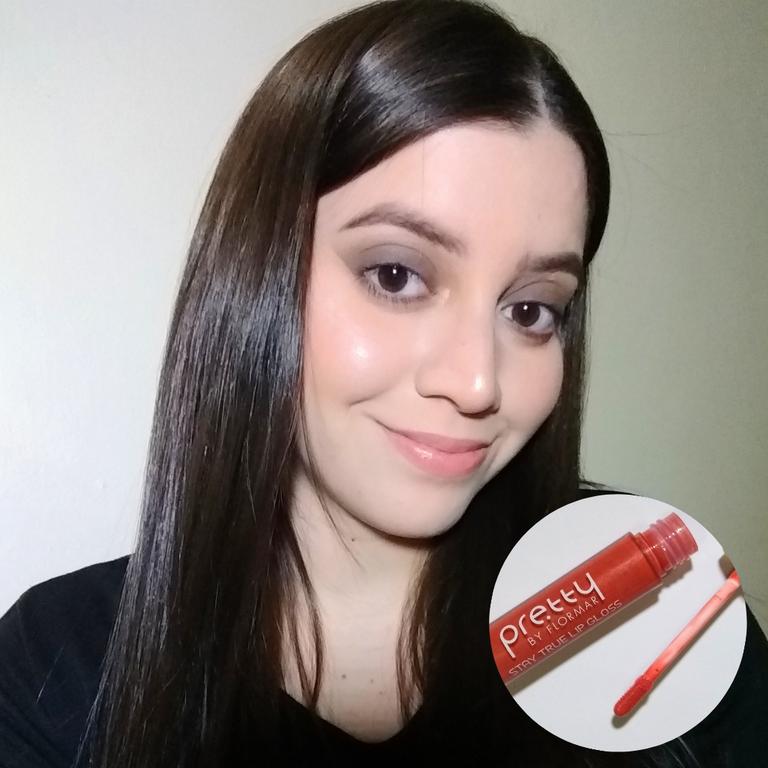
This was my first post about makeup, I wanted to start with the smoke eye because it is a very easy and quick makeup to do, it doesn't require many materials and gives a dramatic but sophisticated look where the look is the main protagonist 😏 I hope you liked it and you are encouraged to do it, see you in the next post! Best regards. 💕
Tomadas por mi teléfono Motorola G5.
Editadas en Canva y en Nocrop Photo Editor.
Traducción hecha en DeepL Translate.
All photographs are my property.
Taken by my Motorola G5 phone.
Edited in Canva and in Nocrop Photo Editor.
Translation done in DeepL.

Congratulations, your post has been upvoted by @dsc-r2cornell, which is the curating account for @R2cornell's Discord Community.
Congratulations @belbeauty! You have completed the following achievement on the Hive blockchain and have been rewarded with new badge(s):
Your next payout target is 50 HP.
The unit is Hive Power equivalent because post and comment rewards can be split into HP and HBD
You can view your badges on your board and compare yourself to others in the Ranking
If you no longer want to receive notifications, reply to this comment with the word
STOPCheck out the last post from @hivebuzz:
Support the HiveBuzz project. Vote for our proposal!
Esoo, excelente!