How to fix Joy-con drift permanently? [GUIDE] [SWITCH] [ENG/PL]
ENGLISH VERSION
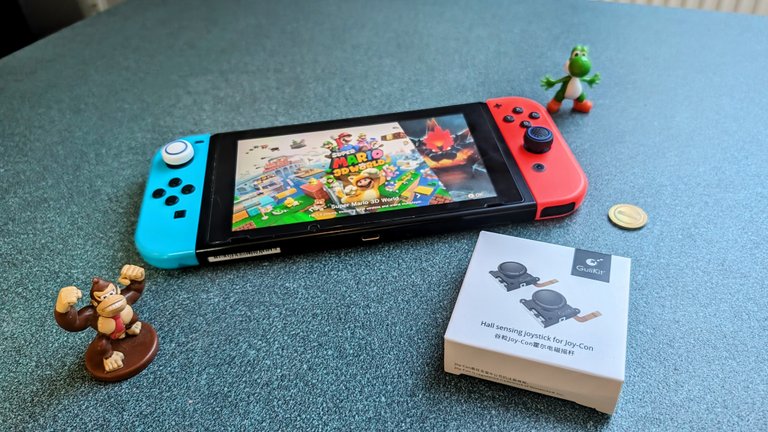
Every console I know of must have scored some controversy. My guess is that this is dictated by clicks on technology portals, after all, it is fodder for people from the other camp of gaming (Pc, PS, Xbox, etc.). What is undeniable, however, is that for Nintendo the issue of defective Joy-cones was very stressful. Stressful enough that the company allows free repair of these controllers, although I could not find information on repair in Poland. The issue here, of course, is the notorious Joy-con drift, which causes the knob to move on its own when we don't even have a finger on the knob. This is a very common problem among controllers, and the price of a new controller is high. In spite of these problems, the company Gulikit is again coming out with an idea, releasing control sticks for the Nintendo Switch with Hall Effect technology. These are knobs that use electrical conductors and magnets and are superior to regular, standard analogs. Neutral position and durability are on the side of the Gulikit product, but the manufacturer also claims lower power consumption. But is it worth investing in? 🤔
Box contents
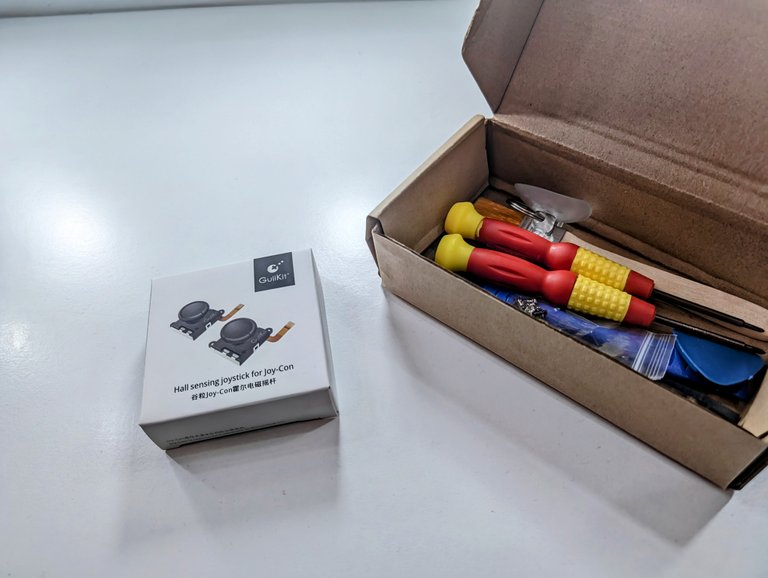
In the box itself we are provided with the analogs themselves. If we don't have the tools to take the joycons apart, I recommend buying along with the necessary screwdrivers and accessories. Joycons use small tri-wing (“Y00”) screws, so not everyone has such screwdrivers. I bought my kit on Amazon. Of course, it doesn't boil down to the highest quality here, but it does the job. The kit even comes with screwdrivers, in case you lose yours.
Disassembly and repair
Now there is nothing left to do but to take the Joy-Cons apart. In my opinion, this is not particularly complicated, although we must be careful not to break any plastic or break any cable or tape. The most difficult here may be the ribbon from the analog. It is best to just be patient and not do anything here by force. You should, of course, at first start by detaching the battery.
I will not describe the whole process here, because there are YouTube videos showing it better than if I wrote here. If you don't feel up to such things, it's best to turn it over to a more experienced person. For a more detailed description, I recommend the ifixit website. I add the links here:
https://www.ifixit.com/Guide/Left+Joy-Con+Joystick+Replacement/113182
https://www.ifixit.com/Guide/Right+Joy-Con+Joystick+Replacement/113185
Calibration
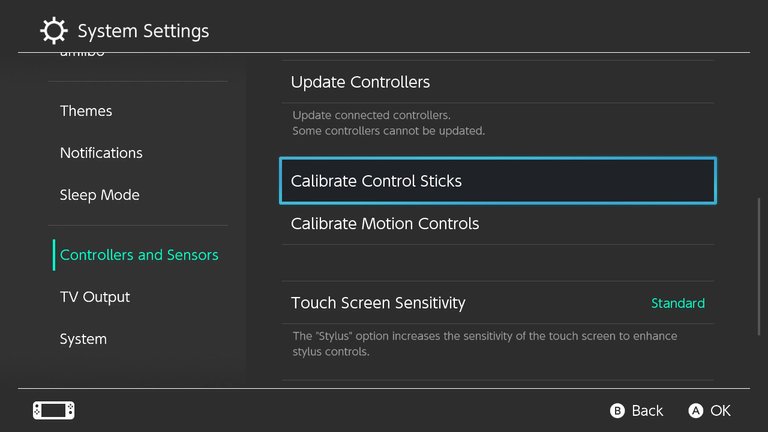
After a successful replacement, the new analogs must be calibrated in the system. You do this by going to Options > Controllers and Sensors > Calibrate Control Sticks, and then after selecting one knob, press the X (Calibrate) button. I've included a graphic of the options here:
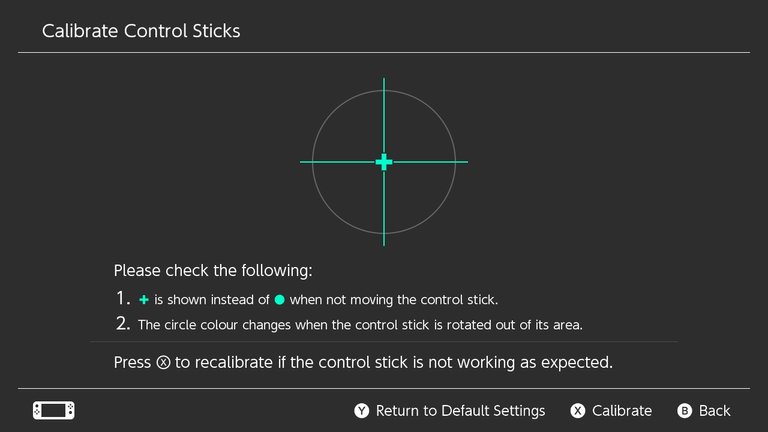
After successful calibration, we can enjoy the entertainment without drifting (of course, if we are not playing Mario Kart at the time)!
Alternative repair method (not recommended)
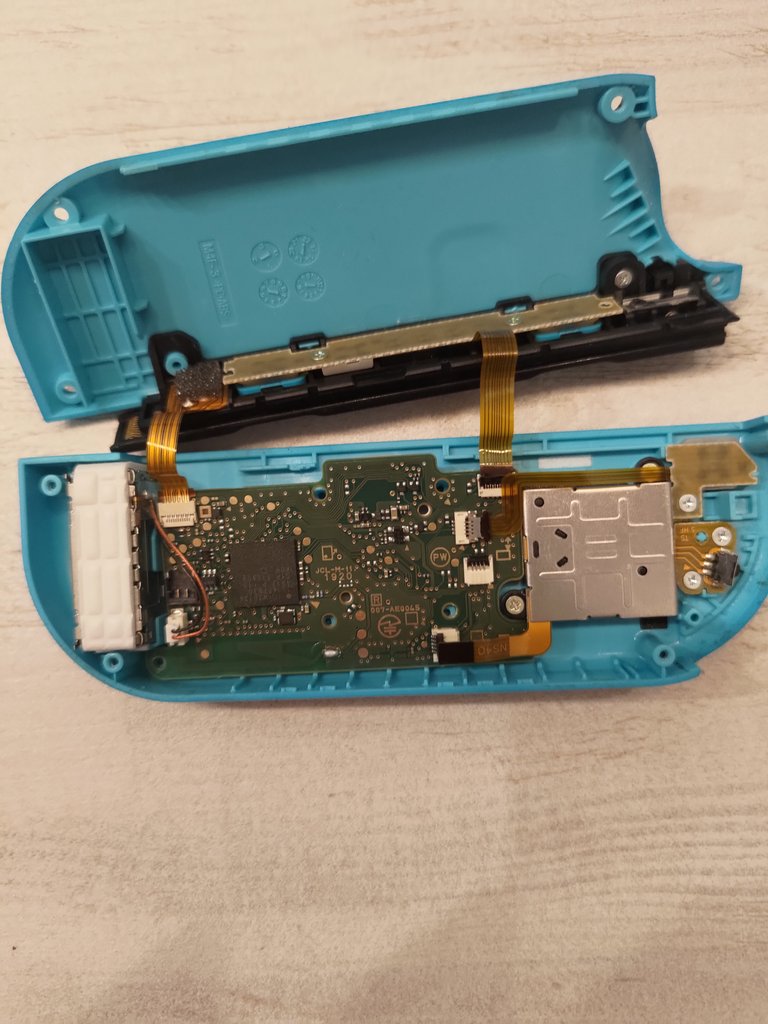
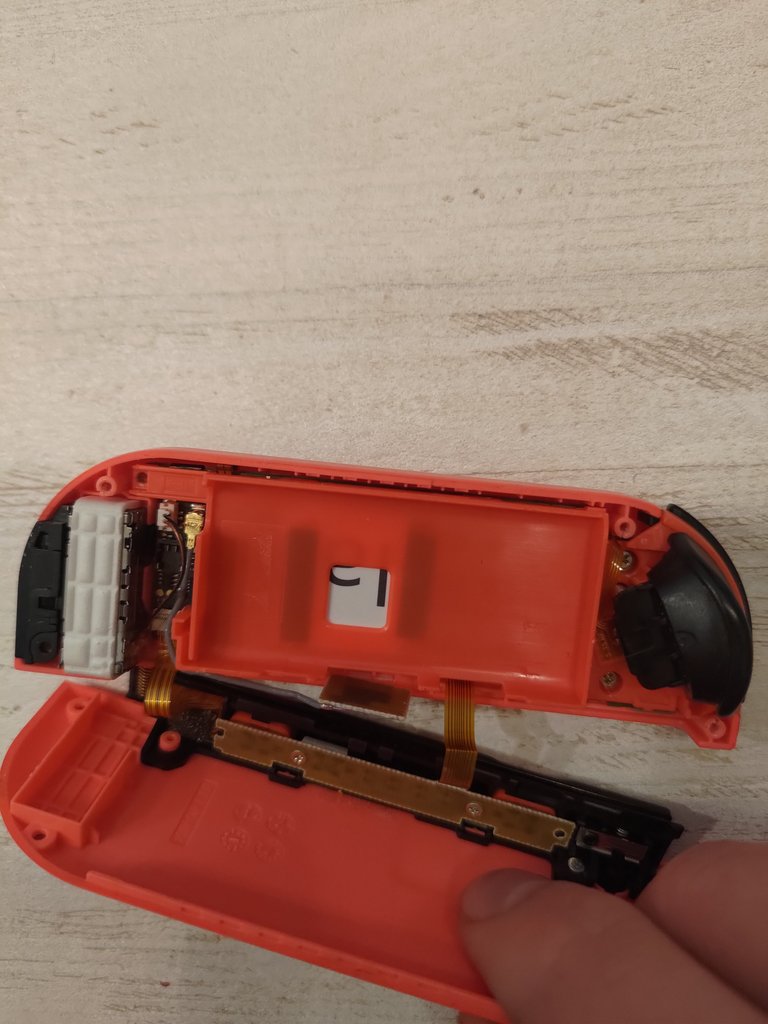
There is also another method of repair, which involves inserting something like plastic / paper between the bottom of the joystick and the assist plastic. I do not recommend this method, because after using such a problem disappeared for a short time, and then I also did not have the home button working (not sure why). I am posting here a graphic showing from the inside such a repair. As you can see, this white plastic presses on the joystick from the bottom, and because of this, unfortunately, the whole joycon structure does not hold together.
Price and summary
The price of the product together with the repair kit on my Amazon is 139 PLN (35 USD). In my opinion, this is a great investment, because replacing the joy-cons with new ones beats such a price by two or even three times! We also get analog caps for the analogs in the set, so we will also improve our grip. I can't imagine playing without the caps, because my finger often slipped on the factory rubber band. After more than a year of use, I still don't experience any problems with the knob moving on its own. Inputs and the click itself also work flawlessly. What do you guys think about such a repair? Please let me know! 😅❤️
POLISH VERSION
Każda znana mi konsola musiała zaliczyć pewną kontrowersje. Domyślam się, że jest to podyktowane kliknięciami na portalach o technologiach, w końcu jest to pożywka dla ludzi z innego obozu gamingu (Pc, PS, Xbox etc.). Niewątpliwym jednak jest to, że dla Nintendo sprawa wadliwych Joy-conów była bardzo stresująca. Na tyle stresująca, że firma umożliwia darmową naprawę owych kontrolerów, chociaż na terenie Polski nie znalazłem informacji na temat naprawy. Chodzi tutaj oczywiście o sławny Joy-con drift, który powoduje samoczynny ruch gałki kiedy nawet nie mamy palca na gałce. Jest to bardzo popularny problem wśród kontrolerów, a cena nowego kontrolera jest wysoka.Na przekór owych problemów z inicjatywą wychodzi znowu firma Gulikit, która wypuściła na rynek gałki do Nintendo Switch z technologią Hall Effect. Są to gałki, które używają przewodniki elektryczne i magnesy i są lepsze od zwykłych, standardowych analogów. Neutralna pozycja i trwałość są po stronie produktu Gulikit, ale również producent chwali się niższym poborem energii. Ale czy warto w to inwestować? ;)
Zawartość pudełka
W samym pudełku mamy do dyspozycji same analogi. Jeżeli nie mamy narzędzi do rozebrania joy-conów, zalecam kupno razem z niezbędnymi śrubokrętami i dodatkami. Joycony wykorzystują małe śrubki tri-wing ("Y00"), a więc nie każdy posiada takie śrubokręty. Ja swój zestaw kupowałem na Amazon. Oczywiście nie kipi tutaj najwyższą jakością, aczkolwiek spełnia swoją funkcje. Do zestawu dołączone są nawet śrubeczki, w razie jakbyśmy zgubili swoje.
Rozebranie i naprawa
Teraz pozostaje nic innego, jak rozebrać Joy-Cony. Według mnie nie jest to szczególnie skomplikowane, aczkolwiek musimy uważać, aby nie połamać żadnego plastiku bądź nie zerwać żadnego kabelka lub tasiemki. Najtrudniejsze tutaj może okazać się tasiemka od analogu. Najlepiej po prostu być cierpliwym i nie robić niczego tutaj na siłę. Należy oczywiście na początku zacząć od odepnięcia baterii.
Nie będę opisywał tutaj całego procesu, ponieważ istnieją filmiki na Youtube ukazujące to lepiej niż jakbym tutaj napisał. Jeżeli nie czujemy się na siłach w takich sprawach, najlepiej jest oddać to osobie bardziej doświadczonej. Do dokładniejszego opisu polecam stronę ifixit. Dodaję tutaj linki:
https://www.ifixit.com/Guide/Left+Joy-Con+Joystick+Replacement/113182
https://www.ifixit.com/Guide/Right+Joy-Con+Joystick+Replacement/113185
Kalibracja
Po udanej wymianie należy w systemie skalibrować nowe analogi. Robimy to wchodząc do opcji > Controllers and Sensors > Calibrate Control Sticks, a następnie po wyborze jednej gałki nacisnąć przycisk X (Calibrate). Grafiki opcji zamieszczam tutaj:
Po udanej kalibracji możemy cieszyć się rozrywką bez driftowania (oczywiście, jeżeli wtedy nie gramy w Mario kart)!
Alternatywna metoda naprawy (niezalecana)
Istnieje również inna metoda naprawy, która zakłada włożenie czegoś w rodzaju plastiku / papieru pomiędzy dołem joysticka a plastikiem asekurującym. Nie polecam tej metody, ponieważ po zastosowaniu takiej problem zanikał na krótko, a wtedy też nie działał mi przycisk home (nie wiadomo czemu). Umieszczam tutaj grafikę ukazującą od środka taką naprawę. Jak można zauważyć, ten biały plastik naciska na joysticka od dołu, a przez to niestety cała konstrukcja joycona nie trzyma się kupy.
Cena i podsumowanie
Cena produktu razem z zestawem naprawczym na moim Amazon to 139 PLN (35 USD). W mojej opinii jest to świetna inwestycja, ponieważ wymiana joy-conów na nowe przebija taką cenę dwu, albo i nawet trzykrotnie! Do zestawu również dostajemy nasadki na analogi, więc poprawimy również swój grip. Nie wyobrażam sobie granie bez nasadek, ponieważ palec często mi się ślizgał po fabrycznej gumce. Po ponad roku używania nadal nie odczuwam żadnych problemów z samoistnie ruszającą się gałką. Inputy i sam klik również działają bez zarzutów. A wy, co sądzicie o takiej naprawie? Dajcie znać. 😅❤️
My kids would want me to upvote and read this post, so I have done that. 😉 Have a great day!
❤️❤️❤️🤗🤗
Hello barreloflaughs!
It's nice to let you know that your article will take 12th place.
Your post is among 15 Best articles voted 7 days ago by the @hive-lu | King Lucoin Curator by polish.hive
You receive 🎖 0.1 unique LUBEST tokens as a reward. You can support Lu world and your curator, then he and you will receive 10x more of the winning token. There is a buyout offer waiting for him on the stock exchange. All you need to do is reblog Daily Report 321 with your winnings.
Buy Lu on the Hive-Engine exchange | World of Lu created by szejq
STOPor to resume write a wordSTART