Tutorial : Atuendo de Sirenita Ariel / Little Mermaid Ariel outfit [ESP-ENG]
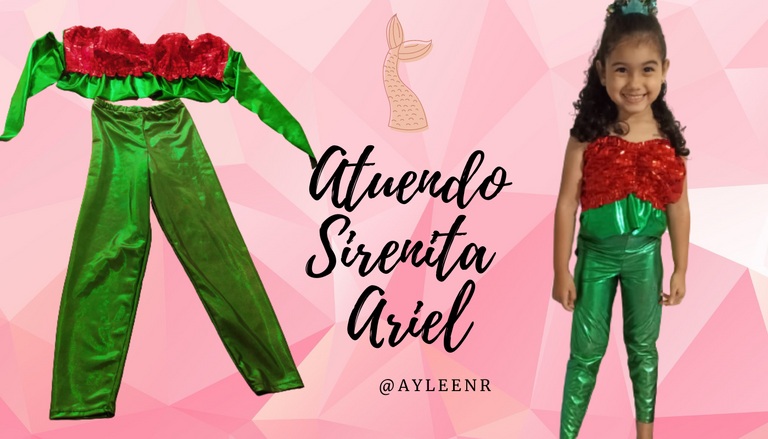
Fue gratificante ver a mi hija feliz, llenó mi corazón de mucho amor. Como toda madre nos gusta complacer a nuestros hijos, así que aquí les traje el paso a paso de lo que fue la confección.
It was gratifying to see my daughter happy, it filled my heart with lots of love. As every mother we like to please our children, so here I brought you the step by step of what was the confection.

Comenzaré con decirle los materiales que utilicé:
- Hojas o papel bond para dibujar el patrón
- Lápiz
- Regla
- Máquina de coser
- Tela lycra metalizada verde
- Tela lycra rojas (Para forrar el top de sirena)
- Tela de lentejuela rojas
- 1 metro de elástico de 2 centímetros de ancho.
- 1 metro de elástico de 0.5 centímetros de ancho.
- Alfileres
- Patrón para el Leggins (Realizado según medidas)
- Patrón para el top de sirena ( según medidas)
- Hilo verde y rojo
I'll start with telling you the materials I used:.
- Sheets or bond paper for drawing the pattern
- Pencil
- Ruler
- Sewing machine
- Green metallic lycra fabric
- Red rash guard fabric (For lining the mermaid top)
- Red sequin fabric
- 1 meter of elastic 2 centimeters wide.
- 1 meter of elastic of 0.5 centimeters wide.
- Pins
- Pattern for the Leggins (Made according to measurements)
- Pattern for mermaid top (according to measurements)
- Green and red thread

Paso a Paso del leggins / Leggins Step by Step
Paso a Paso del leggins / Leggins Step by Step
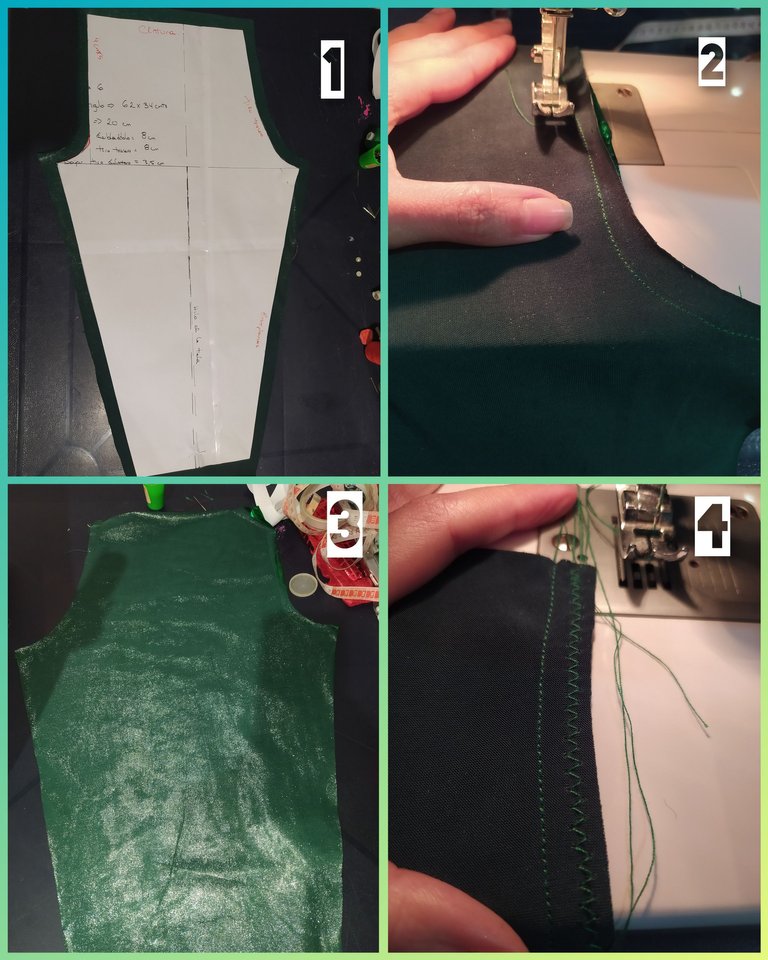
Paso 1
Transferí el patrón a la tela de Lycra metalizada verde, corté 2 piezas iguales, las cosí uniendo ambas piezas con costura recta y luego zigzag.
Antes de cortar las piezas es necesario utilizar alfileres para que el corte quede lo más derecho posible.
Step 1.
I transferred the pattern to the green metallic Lycra fabric, cut 2 equal pieces, sewed them by joining both pieces with straight stitching and then zigzag stitching.
Before cutting the pieces it is necessary to use pins to make the cut as straight as possible.
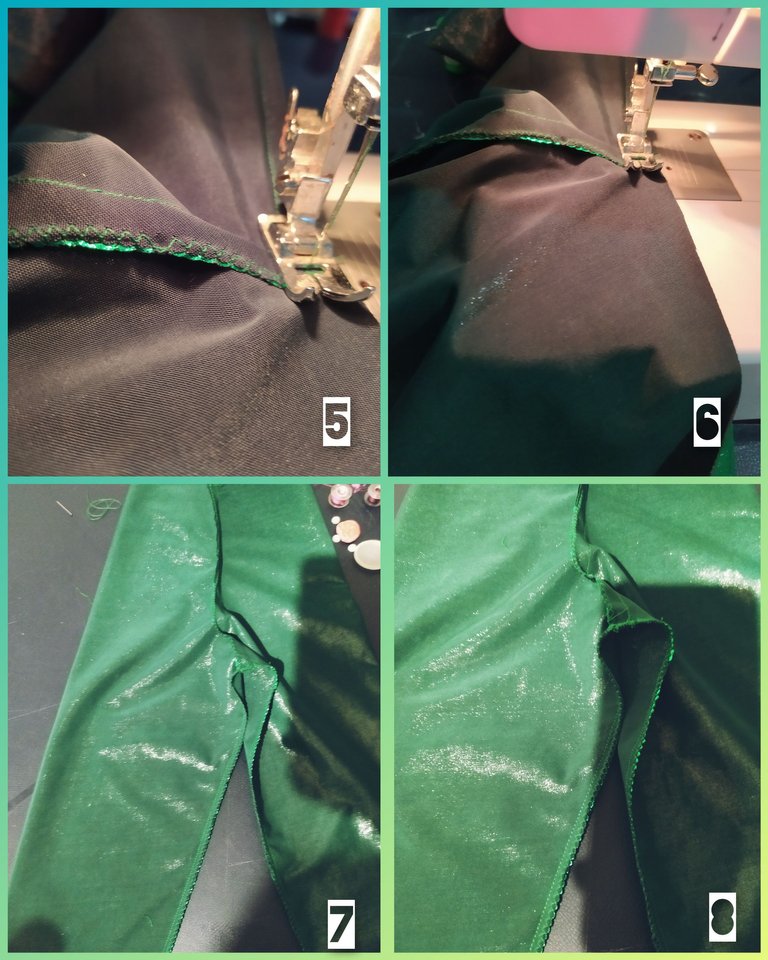
Paso 2
Uní las piezas con alfileres, cosí por las entrepiernas cuidando de que la costuras queden al mismo nivel, primero realicé costura recta a medio centímetro de la costura y luego zigzag por el borde de la tela.
Step 2.
I joined the pieces with pins, sewed along the crotch taking care that the seams are at the same level, first I made straight stitching half a centimeter from the seam and then zigzag along the edge of the fabric.
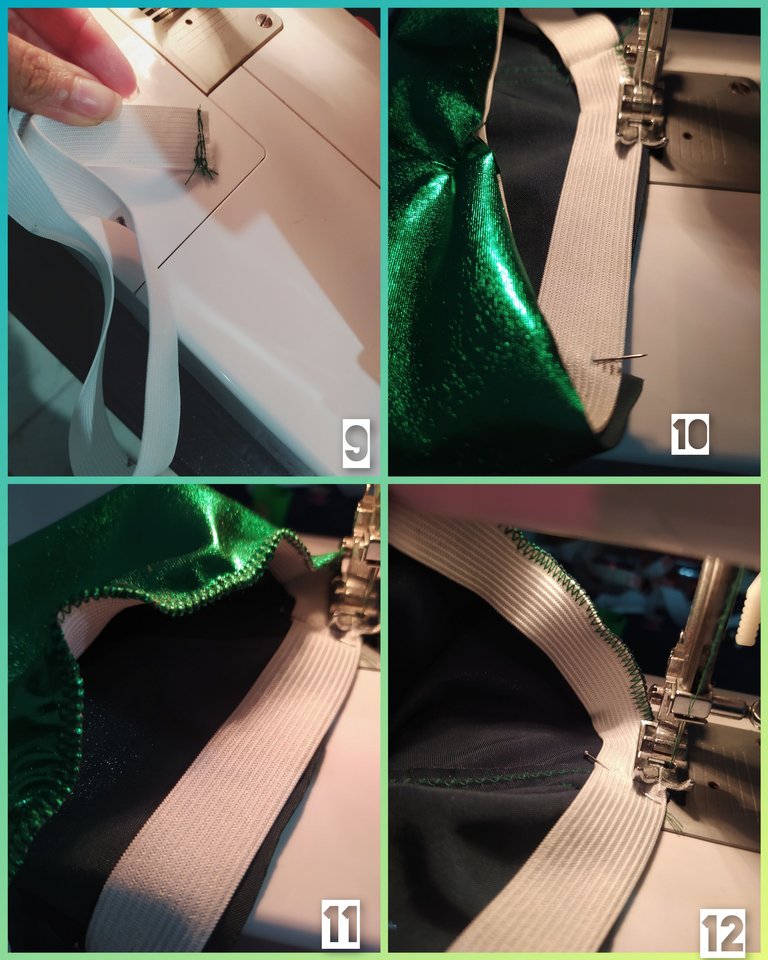
Paso 3
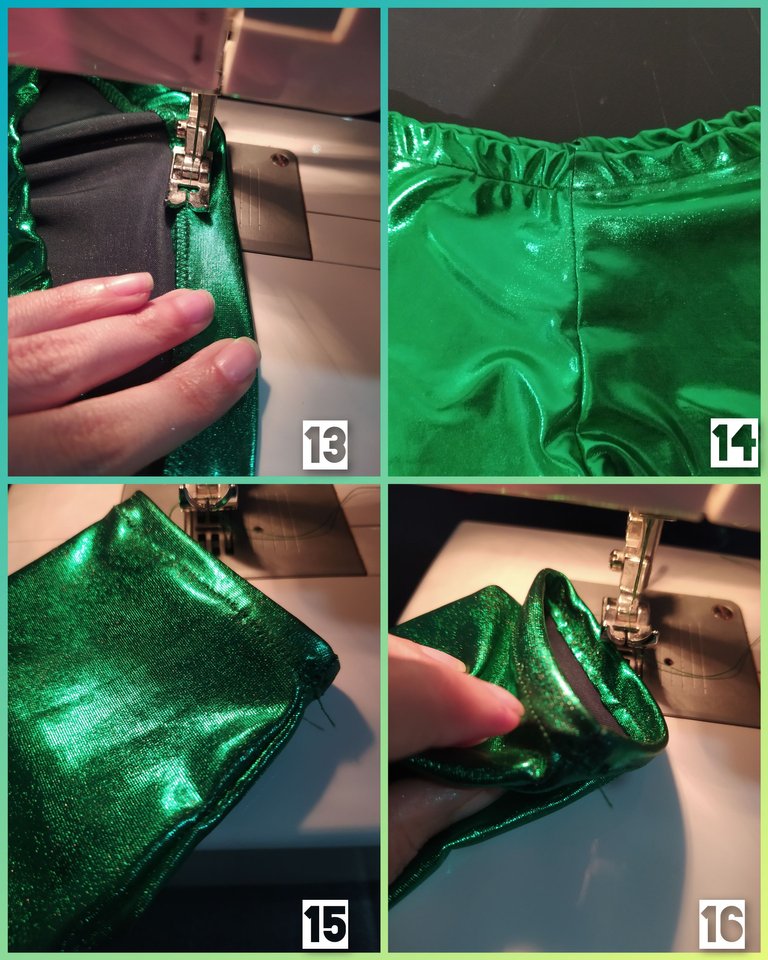
Corté el elástico (2 centímetros de ancho), antes de cortarlo lo mide quitando 3 centímetros según medida de la cintura. Uní al leggins con costura zigzag al borde, estirándolo suavemente, los alfileres los coloqué en cada extremo antes de coser para que me sirviera de guía.
Step 3.
I cut the elastic (2 centimeters wide), before cutting it I measure it by removing 3 centimeters according to waist measurement. I joined the leggings with zigzag stitching to the edge, stretching it gently, I placed the pins at each end before sewing to serve as a guide.
Paso 4
Por último doble el borde cubriendo el elástico, de esta manera cosí con puntada recta hasta culminar la costura, realicé remate desde el comienzo hasta el final. Para finalizar utilicé costura recta para los ruedos.
Step 4.
Finally I folded the edge covering the elastic, in this way I sewed with a straight stitch until the seam was finished, I sewed a bar tack from the beginning to the end. To finish I used straight stitching for the hems.

Paso a Paso del top sirena / Step by step of the mermaid top
Paso a Paso del top sirena / Step by step of the mermaid top
Paso 1
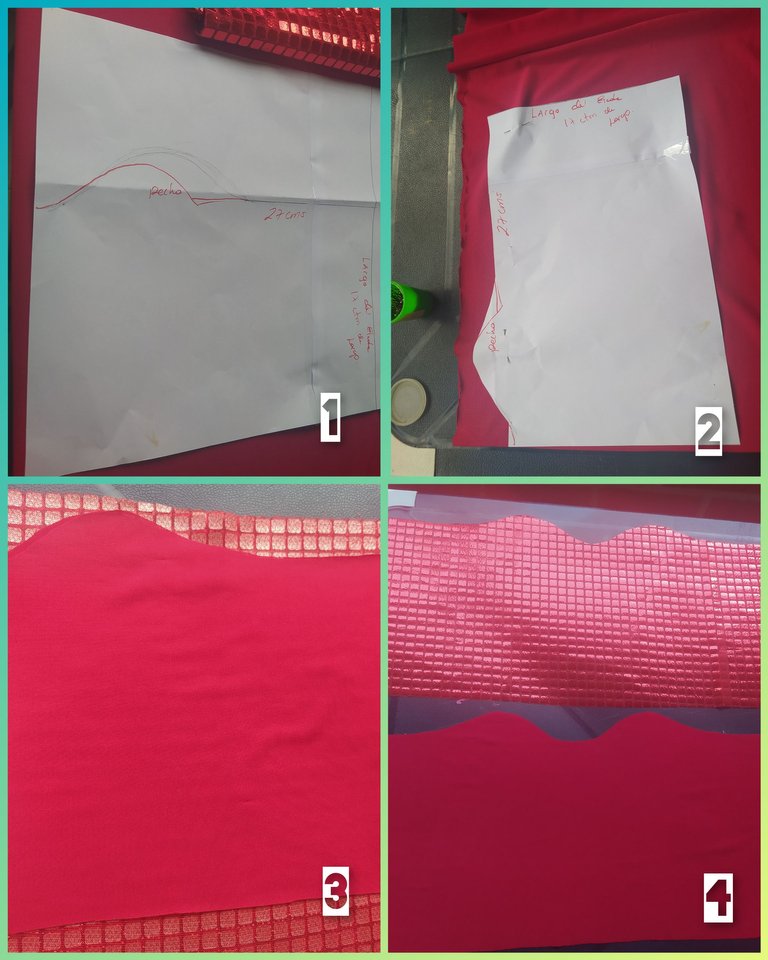
Para el patrón, realicé un rectángulo de 27 centímetros de ancho por 17 centímetros de largo, y realicé una pequeña onda que simula la forma del pecho de la sirenita, transferí el patrón a ambas telas tanto para la tela de forro como la tela de lentejuelas.
Step 1
For the pattern, I made a rectangle 27 centimeters wide by 17 centimeters long, and made a small wave that simulates the shape of the little mermaid's chest, I transferred the pattern to both fabrics for both the lining fabric and the sequin fabric.
Paso 2
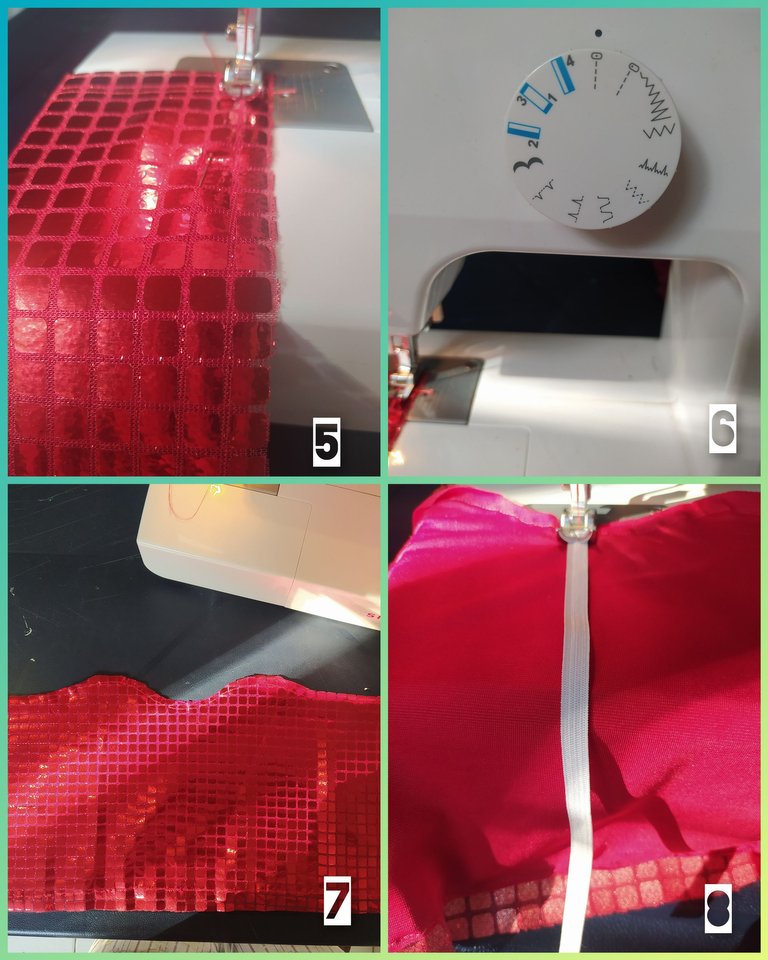
Uní la pieza de la tela lentejuelas con la tela para el forro utilizando costura recta, adicionalmente coloqué elástico (0,5 centímetros de ancho) de forma vertical en el centro de la pieza para arruchar esta zona.
Step 2
I joined the sequin fabric piece with the lining fabric using straight stitching, additionally I placed elastic (0.5 centimeters wide) vertically in the center of the piece to gather this area.
Paso 3
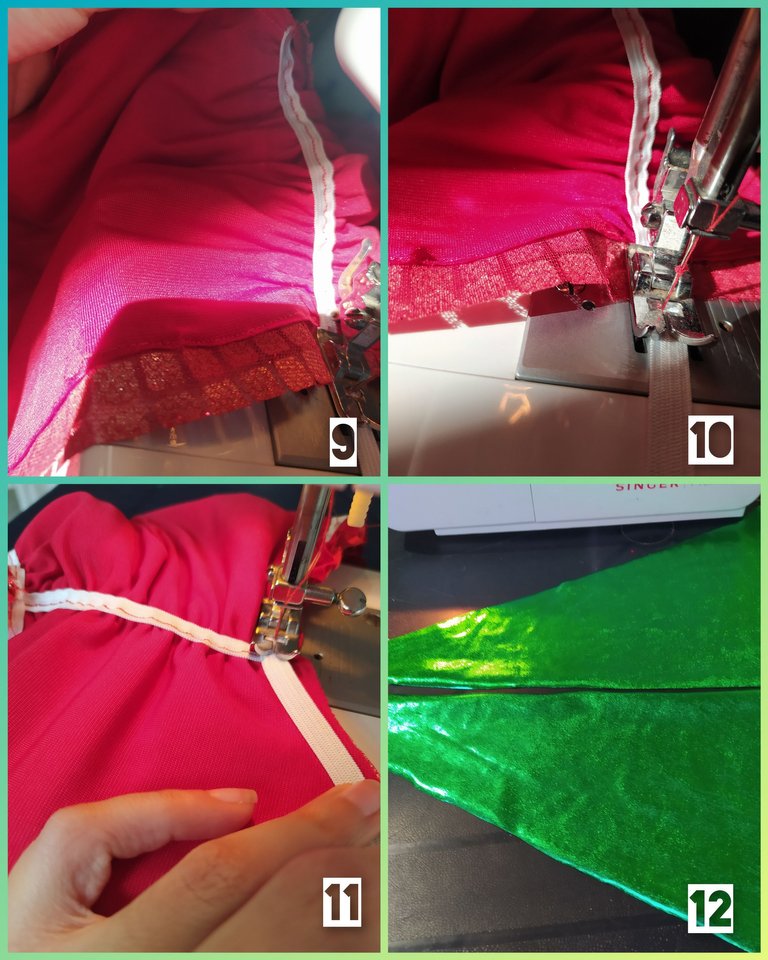
Coloqué elástico (0.5 centímetro) de forma horizontal a lo largo del top justo en la parte inferior, también recorté 2 triángulos para unir al ancho del top y amarrar en la parte de atrás.
Step 3
I placed elastic (0.5 centimeter) horizontally along the length of the top just at the bottom, I also cut out 2 triangles to attach to the width of the top and tie at the back.
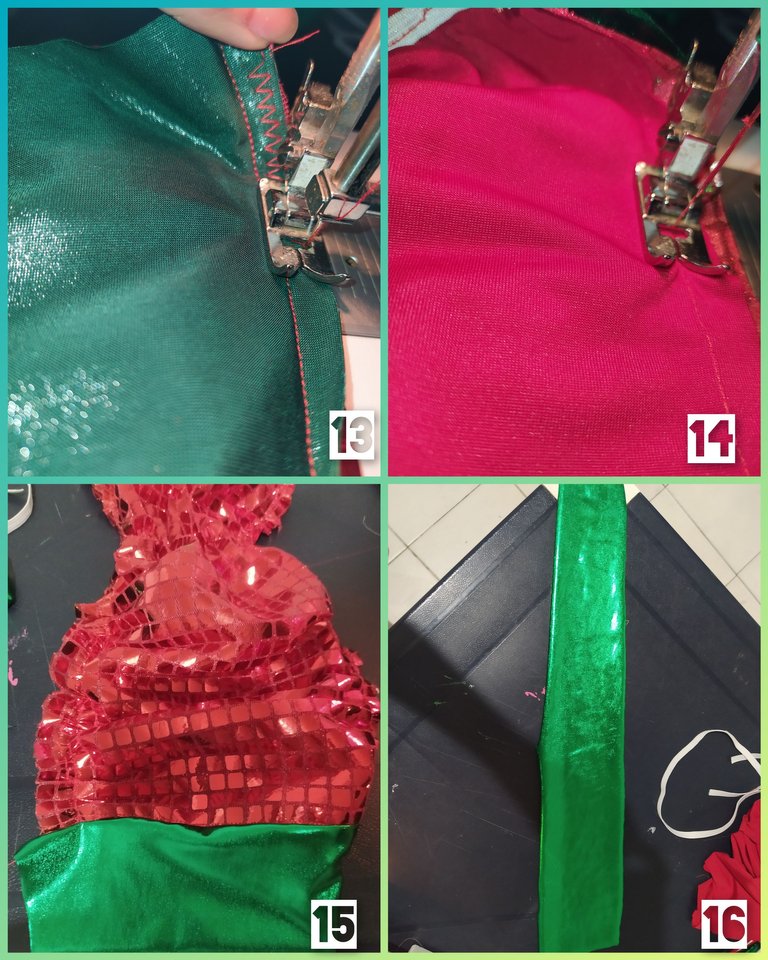
Paso 4
Finalmente, al unir los triángulos con costura recta y zigzag, aseguré la costura por el otro lado y corté una tira del ancho del top para coser y formar un faralao.
Step 4
Finally, joining the triangles with straight and zigzag stitching, I secured the seam on the other side and cut a strip the width of the top to sew to form a faralao.

Finalmente, el resultado...Finally, the result...
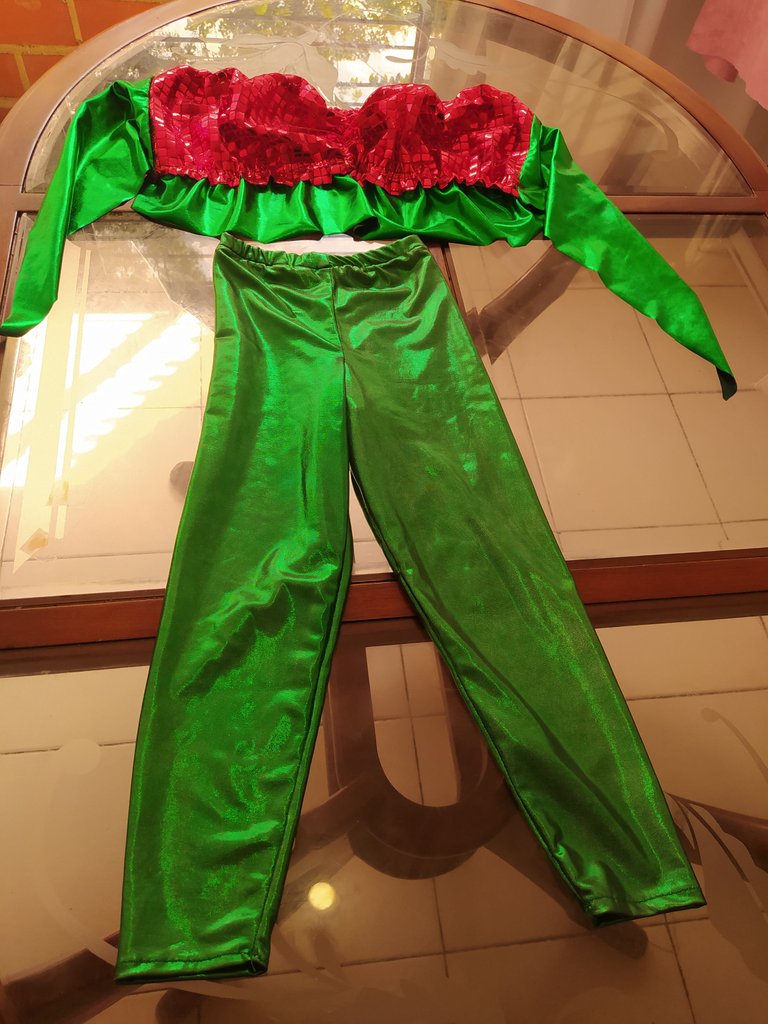
Espero les haya gustado mi post de hoy... Nos vemos pronto...// I hope you liked my post today.... See you soon...

𝘚𝘦𝘱𝘢𝘳𝘢𝘵𝘰𝘳 𝘢𝘯𝘥 𝘉𝘢𝘯𝘯𝘦𝘳 : 𝘥𝘦𝘴𝘪𝘨𝘯𝘦𝘥 𝘣𝘺 @𝘢𝘺𝘭𝘦𝘦𝘯𝘳 𝘦𝘯 𝘊𝘢𝘯𝘷𝘢 || 𝘛𝘳𝘢𝘯𝘴𝘭𝘢𝘵𝘰𝘳: 𝘋𝘦𝘦𝘱𝘓 || 𝘊𝘰𝘭𝘭𝘢𝘨𝘦 𝘰𝘧 𝘱𝘩𝘰𝘵𝘰𝘴 𝘵𝘢𝘬𝘦𝘯 𝘧𝘳𝘰𝘮 𝘮𝘺 𝘤𝘦𝘭𝘭 𝘱𝘩𝘰𝘯𝘦 𝘪𝘯 𝘊𝘰𝘭𝘭𝘢𝘨𝘦 𝘔𝘢𝘬𝘦𝘳 || 𝘗𝘩𝘰𝘵𝘰𝘨𝘳𝘢𝘱𝘩𝘦𝘳: @𝘢𝘺𝘭𝘦𝘦𝘯𝘳 || 𝘍𝘪𝘳𝘴𝘵 𝘱𝘩𝘰𝘵𝘰 𝘪𝘴 𝘰𝘧 𝘮𝘺 𝘥𝘢𝘶𝘨𝘩𝘵𝘦𝘳 || 𝘓𝘰𝘤𝘢𝘵𝘪𝘰𝘯: 𝘐𝘯 𝘮𝘺 𝘢𝘱𝘢𝘳𝘵𝘮𝘦𝘯𝘵 𝘭𝘰𝘤𝘢𝘵𝘦𝘥 𝘪𝘯 𝘊𝘢𝘳𝘢𝘤𝘢𝘴, 𝘝𝘦𝘯𝘦𝘻𝘶𝘦𝘭𝘢.
Te quedó estupendo!
Gracias amiga 😊
Wow this is so cute thanks for sharing
Hola. Ya está por llegar Halloween y empiezo a buscar disfraces para mi hija, gracias por esta excelente idea. Saludos
Holaaa gracias, también se me esta ocurriendo realizarle un disfraz de Halloween vamos a ver si me pongo en eso pronto. Gracias por comentar, saludos.😁
Queeeeeeeeeeeeeeeeee? Que hermosura, que ingenio, bravoooooooo. Felicidades por esa obra y la modelo fabulosa.
Gracias @afrikablr que bien que te gustó...jajaja desde que comencé la costura casi todo es dedicado a mi hija, desde los vestidos para sus barbies hasta este atuendo para su cumpleaños. Muchas gracias, saludos y un gran abrazo. 😃