A Memory Bracelet For My Son (ENG-ESP) Una pulsera de recuerdo para mi hijo
Salutation Salutation!!! @jewelry teammates. We are gradually coming to an end of August full of many activities. This August cut me into stoping my last born from breastfeeding. I believe mother's here are strongly noticable that this stage of stopping a child from feeding from a mother's breast milk is not an easy task. For about days now I and my last child moved into the journey crying has been the pillar of the day. To make my writing brief, I chose to put together a leather and bead bracelet for my son for remembrance in the future.
Among all my children, I was unable to put together any handmade work for them when I stopped them from breastfeeding. It's because then i was not into putting together of any kind of handmade work except for now a friend was able to put me through. I believe every stage of a child should be marked with a gift and other memorable ideas that can never be forgotten in the family and the child also. Things like this are good memories we can leave behind for our children as they grow from childhood to adulthood.
The bracelet I was able to put together for my child using a leather and beads may not be the kind of memorable ideas for others to use for their child but you know, that's all I got and my children do accept them that way. My child will keep wearing the leather bracelet as he grows and I know it can't easily spoil as it was put together using a leather.
Materials
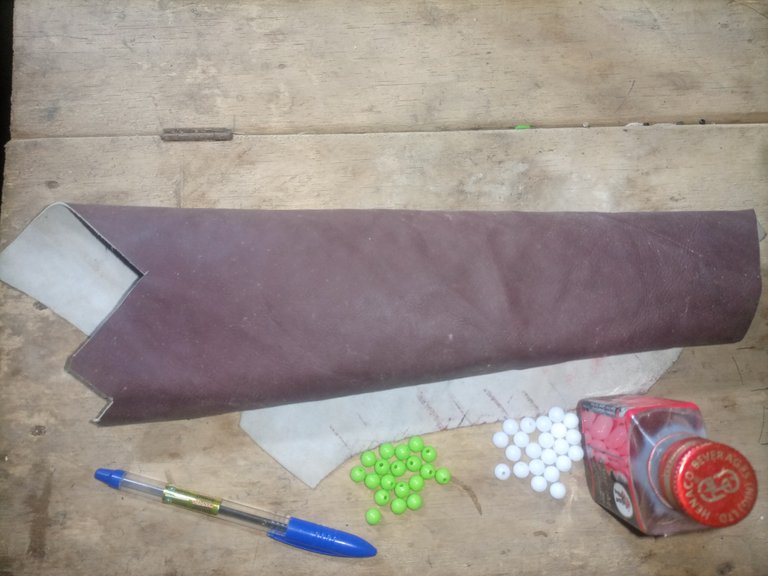
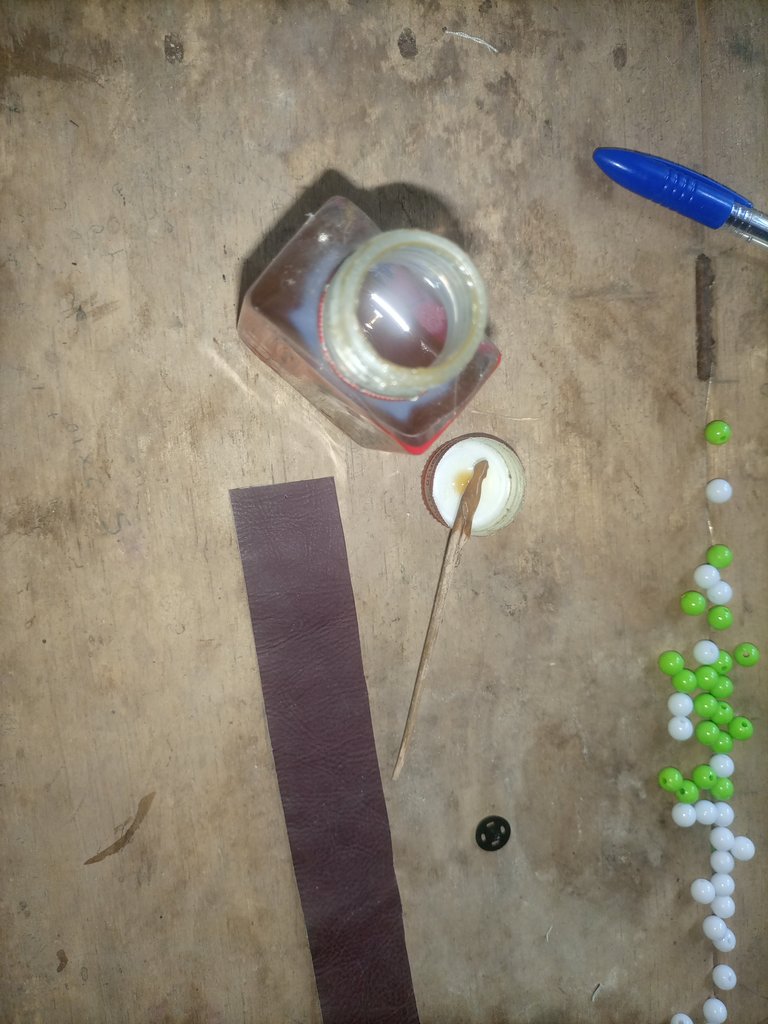
To state materials I was able to bring together for putting together of the bracelet we'll be learning today will be very important as there are below.
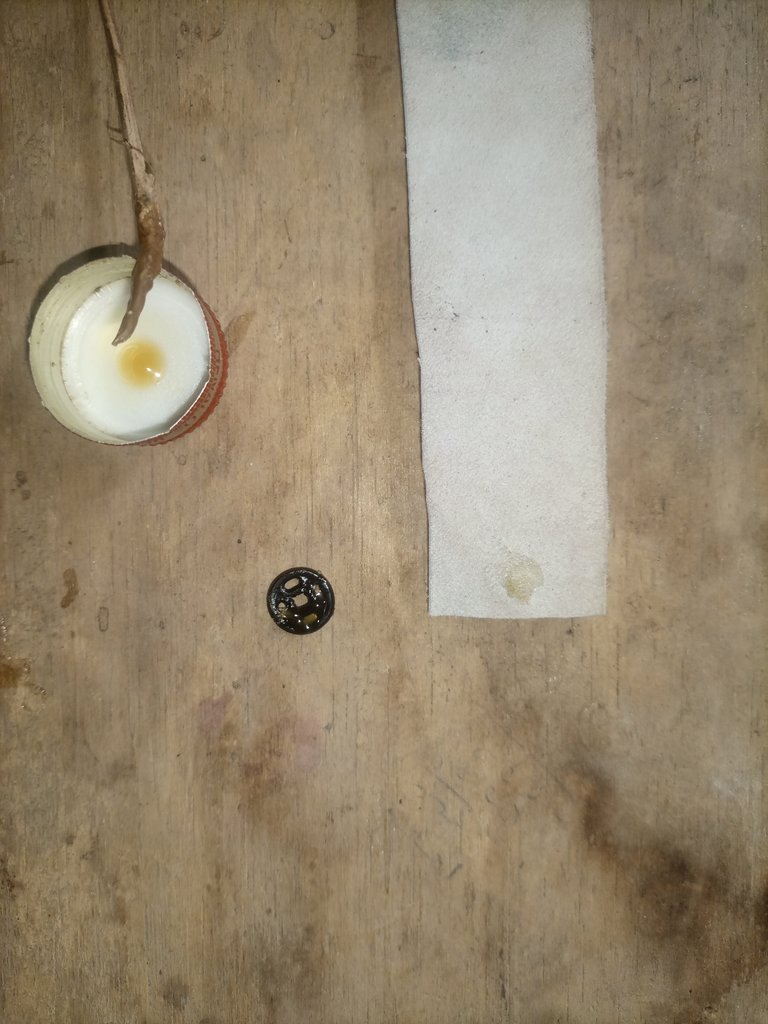
Gum.
A brown leather.
A black button.
Ten white ball bead.
Ten green ball bead.
Pen.
Methods
We'll follow the steps for the putting together of the bracelet easily so that we'll not miss any line for other things.
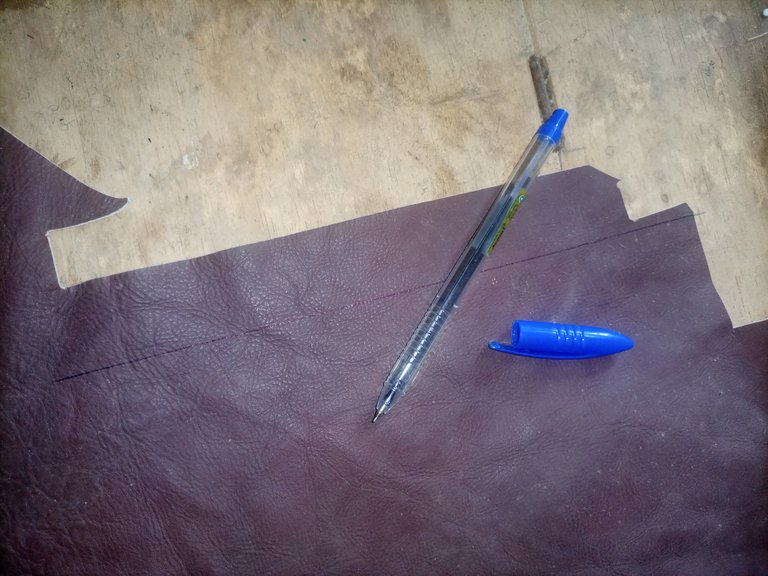
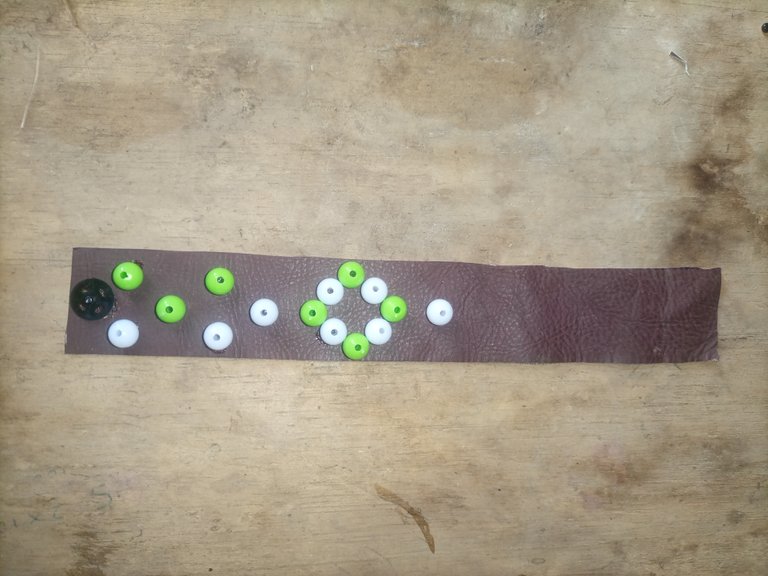
We'll use our pen with a measuring instrument like ruler to mark a straight line on the brown leather and then use a sharp instrument like scissors to cut the brown leather according to our measurement.
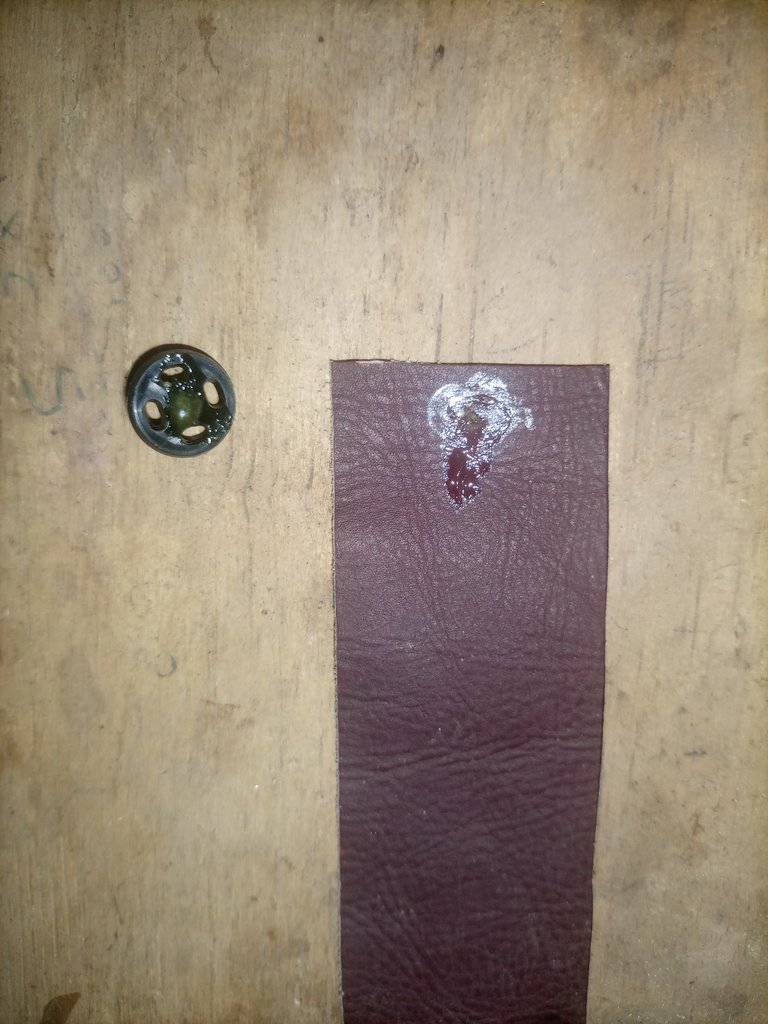
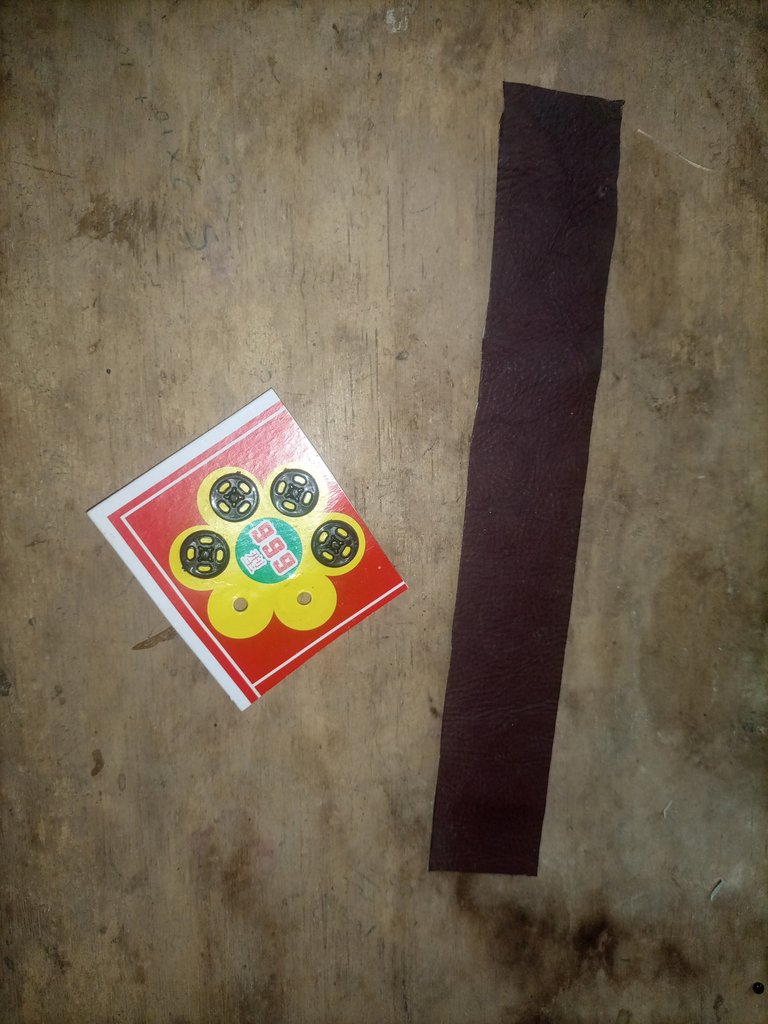
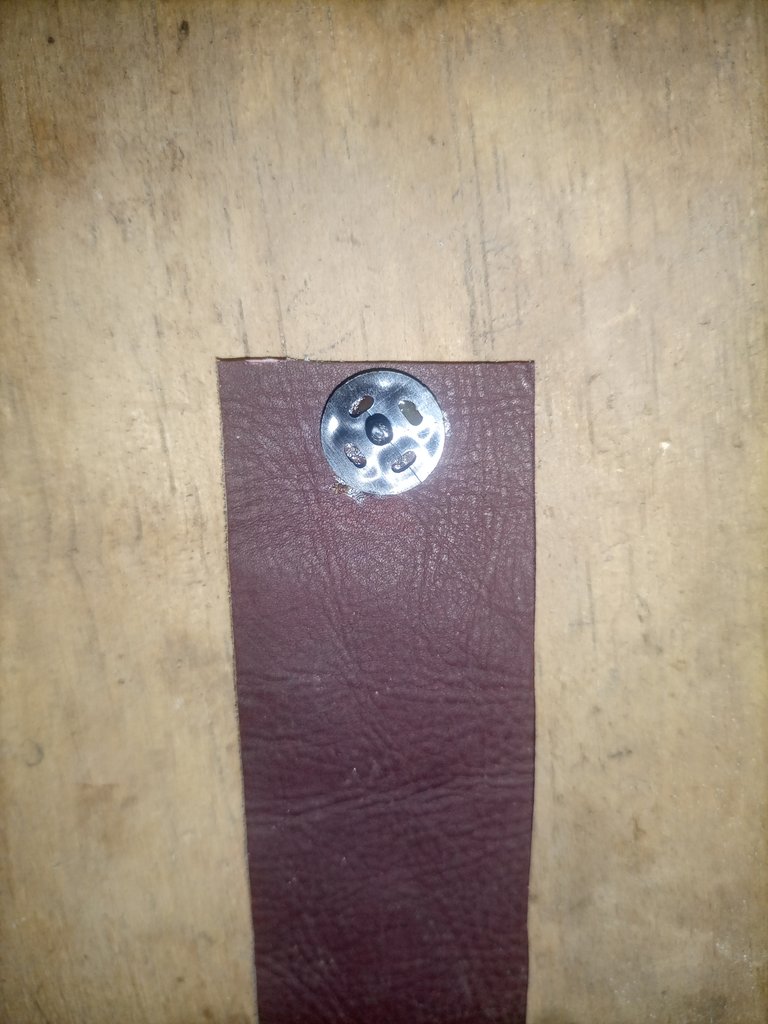
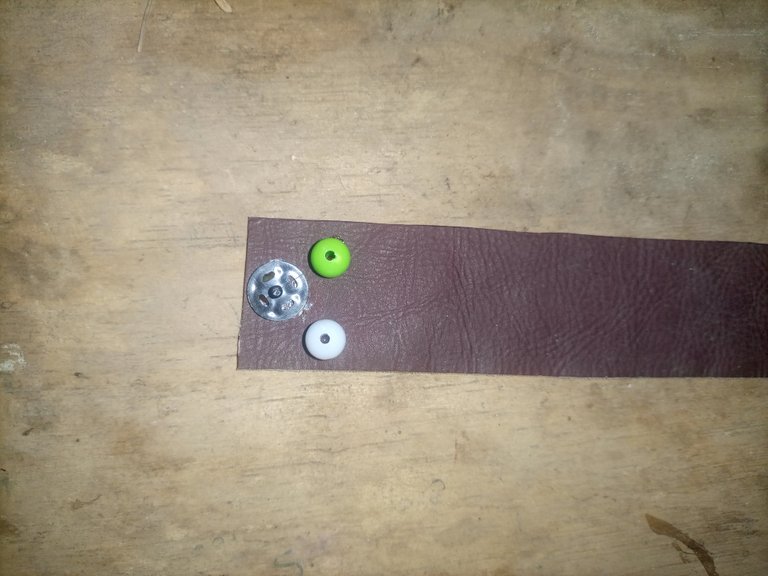
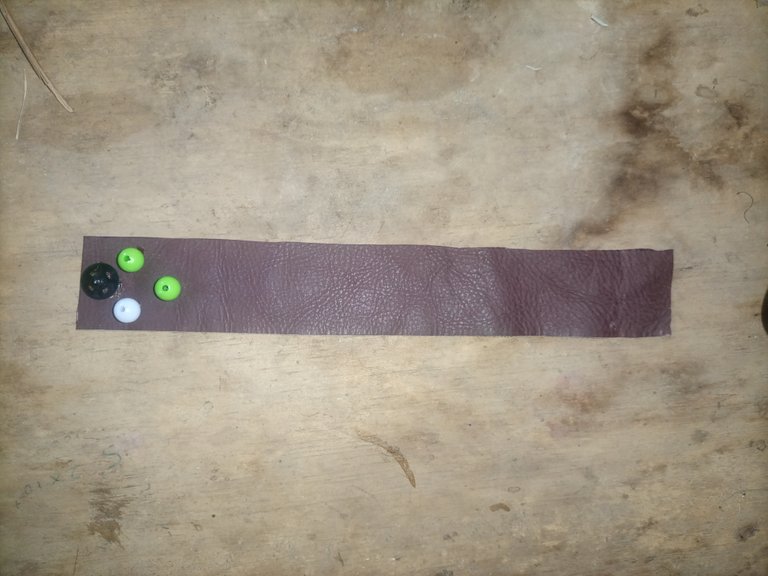
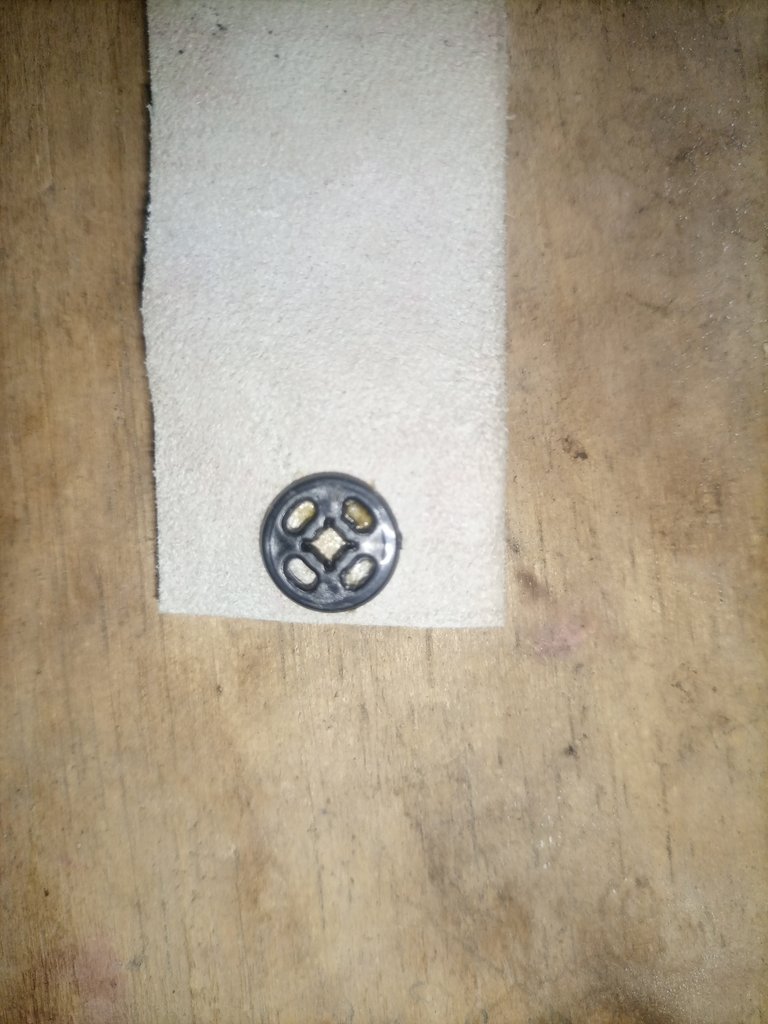
We'll bring one button container both the male and female of it. We'll open the button and then add a gum on the front brown leather and allow for three minutes to dry. We'll gum the front button to the brown leather.
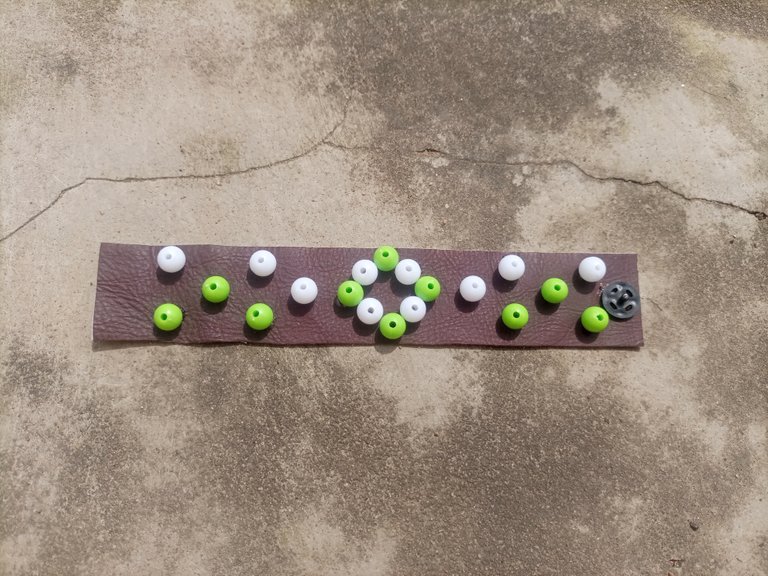
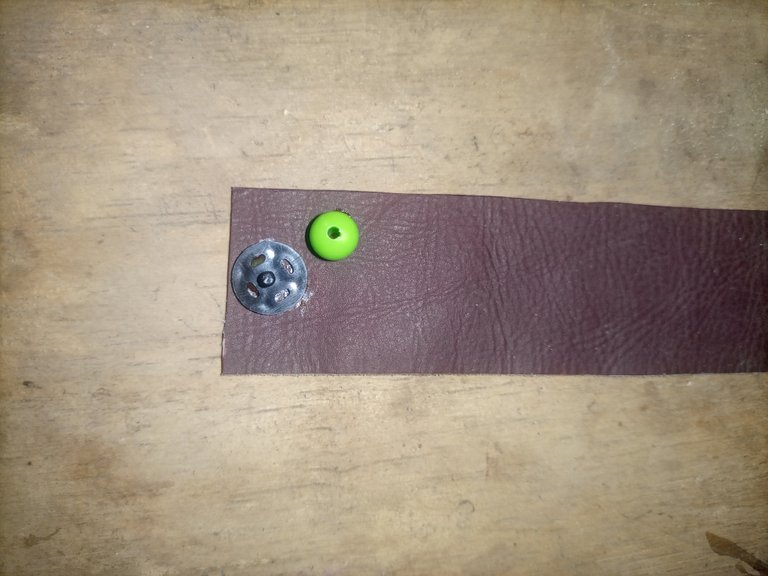
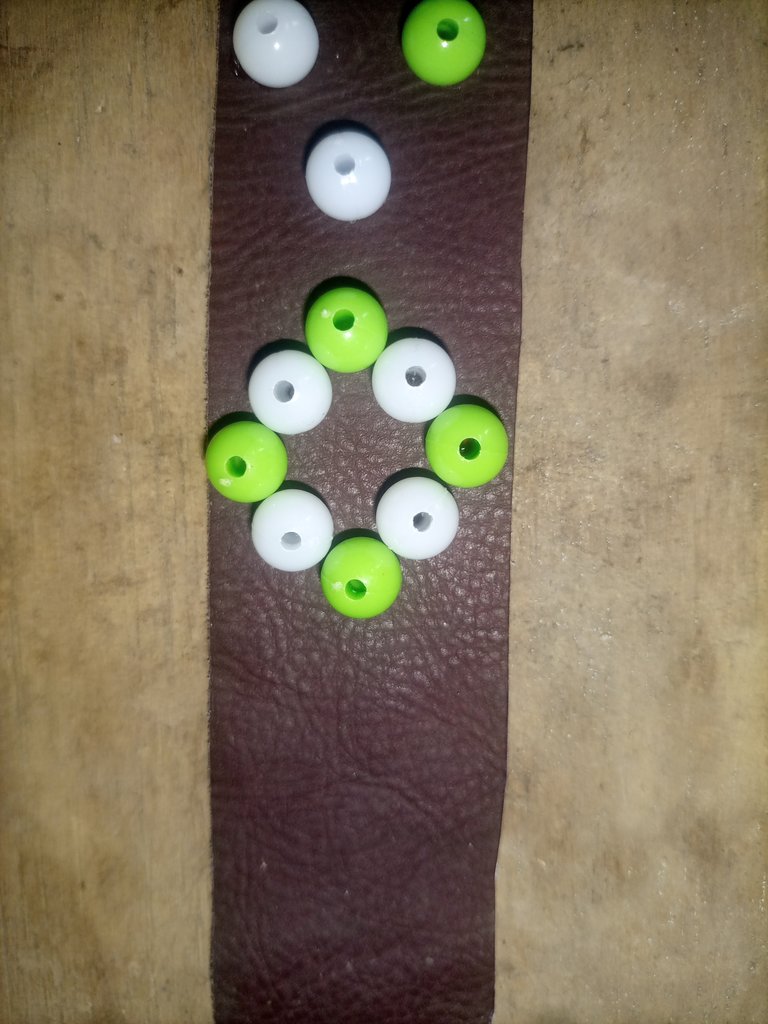
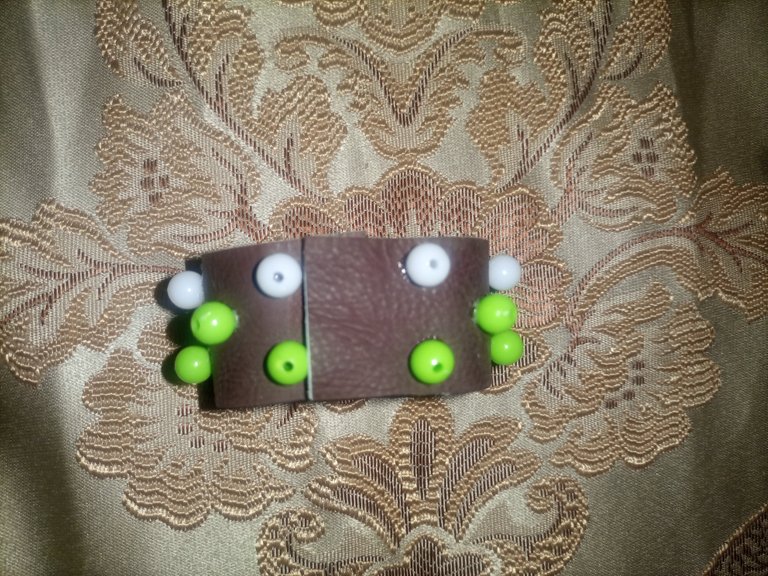
It's time to put those beads we mentioned from the beginning. Add a gum to one green ball bead and gum to the brown front leather up. Add a gum to one white ball bead and gum to the front brown leather down. Add a gum to one green ball bead and gum and the middle of the two ball beads gummed. Add a gum to one green ball bead and gum at the front brown leather up. Add a gum to one white ball bead and gum at the front brown leather down. Add a gum to one white ball bead and gum at the middle of the two ball beads recently gummed.
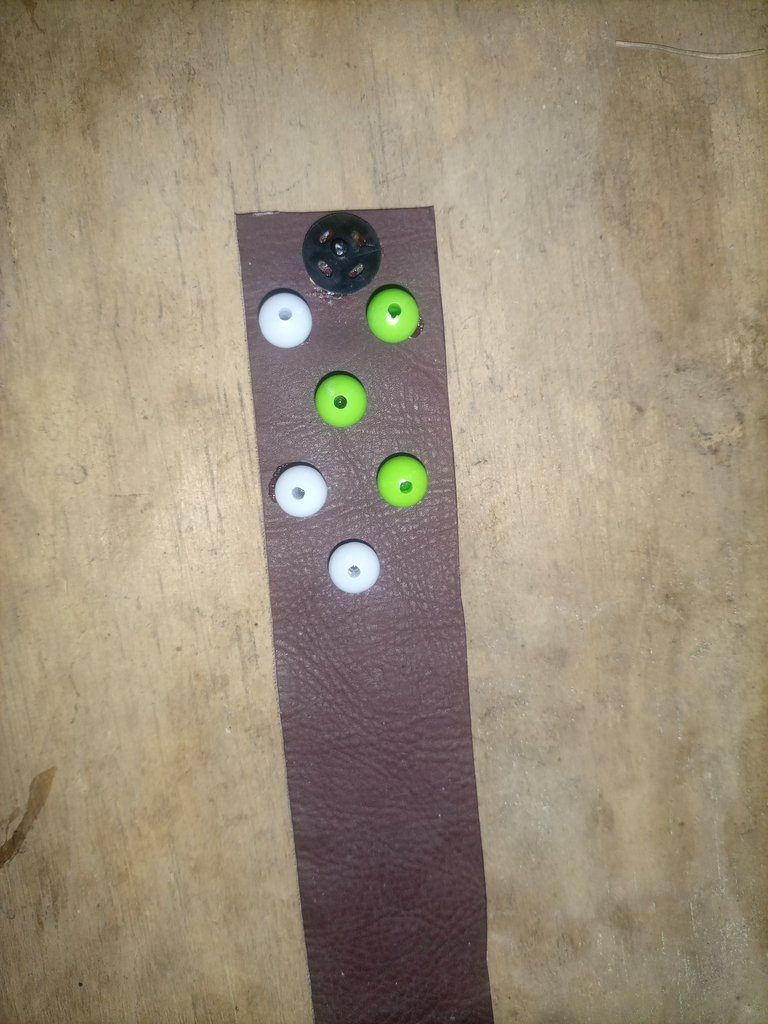
Add a gum to one green ball bead and gum on a straight line with the white ball bead previously gummed. Add a gum to one white ball bead and gum to down of the green ball bead. Add a gum to one green ball bead and gum to the down white ball bead. Add a gum to one white ball bead and gum to the up green ball bead. Add a gum to one green ball bead and gum to the up white ball bead. Add a gum to one white ball bead and gum to the up green ball bead. Add a gum to one green ball bead and gum to the up white ball bead. Add a gum to one white ball bead and gum to the up of green ball bead. We have formed a shape for the bracelet.
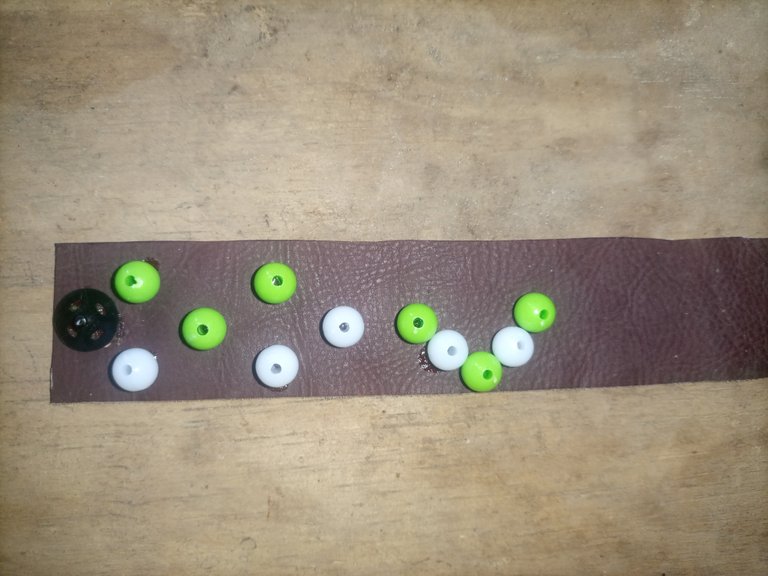
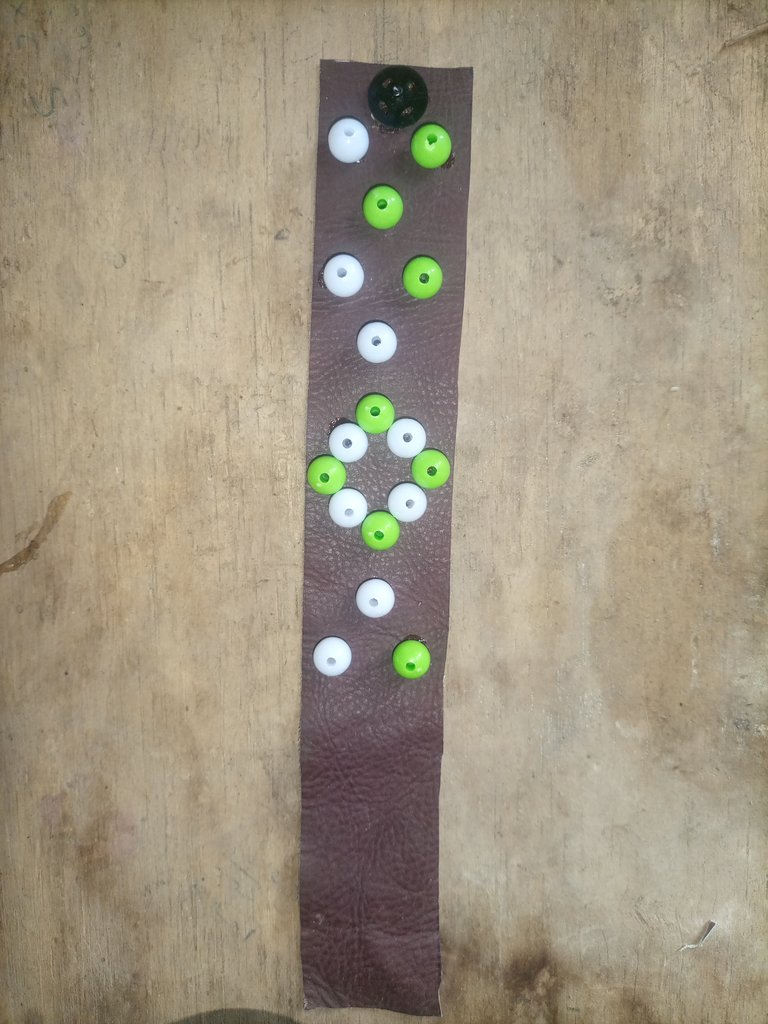
Add a gum to one white ball bead and gum to the straight line of the newly shape we formed. Add a gum to one green ball bead and gum at the up of the front brown leather. Add a gum to one white ball bead and gum to the down of the front brown leather. Add a gum to one green ball bead and gum at the middle of the two ball beads gummed previously. Add a gum to one green ball bead and gum and the up of the front brown ball bead. Add a gum to one white ball bead and gum to the down of the front brown leather.
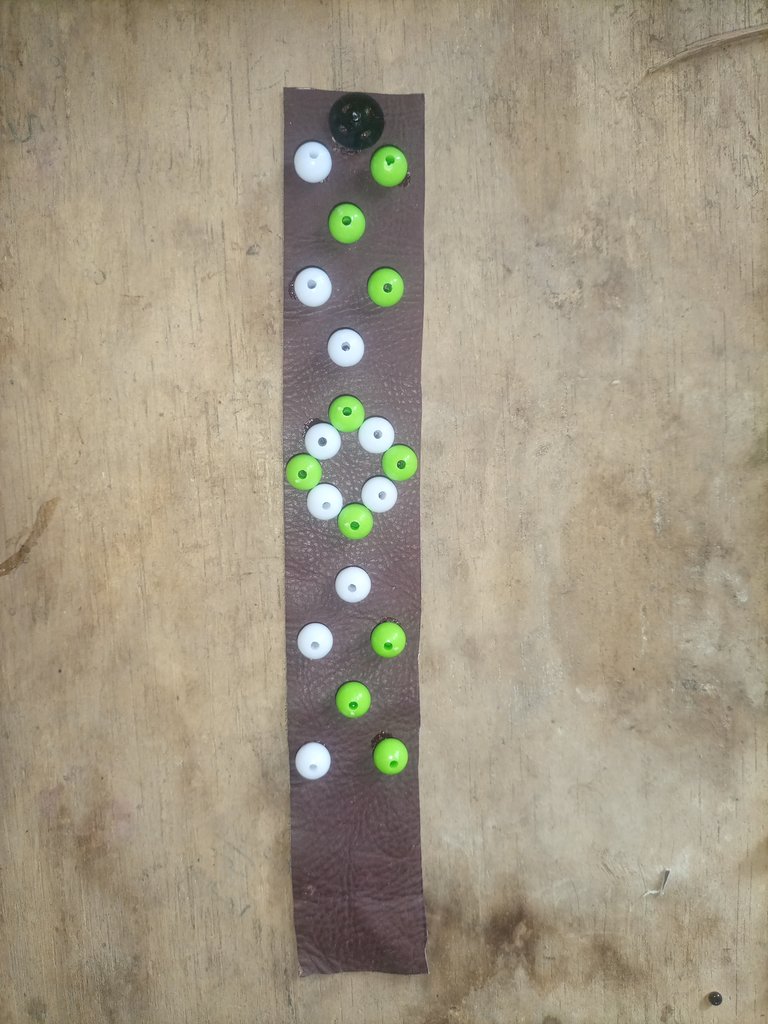
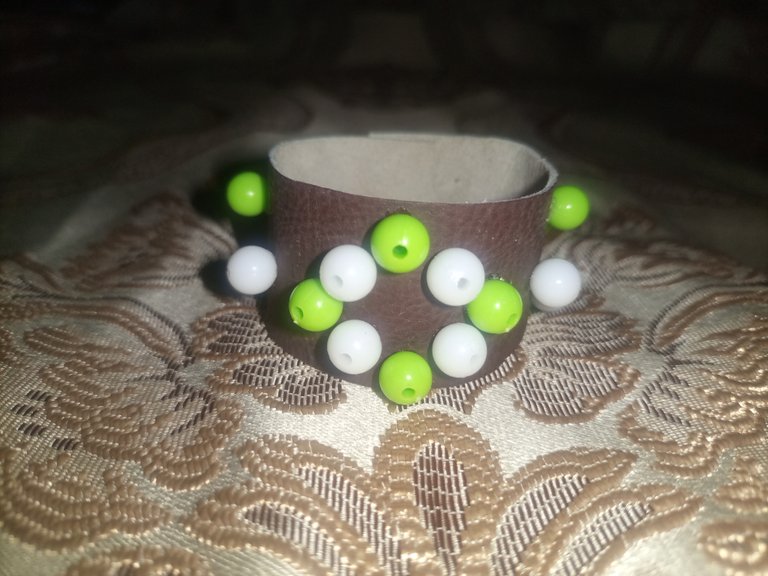
We are done gumming beads. We'll use a scissors ✂️ to reduce the longitude of the leather. Turn the back of the brown leather and add a gum. Take the second remaining button and gum. We'll place the bracelet under the sun 🌞 for about one hour to allow the gum and the beads tight well.

Spanish Language Translation
¡¡¡Saludo Saludo!!! @compañeros de equipo de joyería. Poco a poco vamos llegando a un final de agosto lleno de muchas actividades. Este mes de agosto me ha cortado el dejar de dar el pecho a mi último nacido. Creo que aquí las madres notamos mucho que esta etapa de dejar de alimentar a un hijo de la leche materna no es tarea fácil. Desde hace unos días yo y mi último hijo nos trasladamos a la jornada el llanto ha sido el pilar del día. Para hacer breve mi escrito, opté por armarle a mi hijo una pulsera de cuero y cuentas para recordarlo en el futuro.
De todos mis hijos, no pude armarles ningún trabajo artesanal cuando dejé de amamantarlos. Es porque entonces yo no estaba en el montaje de cualquier tipo de trabajo hecho a mano a excepción de ahora un amigo fue capaz de ponerme a través. Creo que cada etapa de un niño debe estar marcada con un regalo y otras ideas memorables que nunca puedan ser olvidadas en la familia y en el niño también. Cosas como estas son buenos recuerdos que podemos dejar a nuestros hijos a medida que pasan de la infancia a la edad adulta.
La pulsera que pude confeccionar para mi hijo utilizando cuero y abalorios puede que no sea el tipo de ideas memorables que otros puedan utilizar para sus hijos, pero es todo lo que tengo y mis hijos las aceptan así. Mi hijo seguirá llevando la pulsera de cuero a medida que crezca y sé que no se estropeará fácilmente, ya que se hizo con cuero.
**Materiales
Para indicar los materiales que pude reunir para armar de la pulsera que aprenderemos hoy será muy importante como hay a continuación.
Goma de mascar.
Un cuero marrón.
Un botón negro.
Diez bolas blancas.
Diez bolas verdes.
Un bolígrafo.
Métodos
Vamos a seguir los pasos para montar la pulsera fácilmente para que no nos falte ninguna línea para otras cosas.
Usaremos nuestro bolígrafo con un instrumento de medida como la regla para marcar una línea recta en el cuero marrón y luego usaremos un instrumento afilado como las tijeras para cortar el cuero marrón según nuestra medida.
Traeremos un contenedor de botones tanto el macho como la hembra del mismo. Abriremos el botón y luego añadiremos una goma en el cuero marrón delantero y dejaremos secar durante tres minutos. Engomaremos el botón delantero al cuero marrón.
Es hora de poner las cuentas que mencionamos al principio. Añade un chicle a una bolita verde y pégala al cuero marrón delantero hacia arriba. Añade un chicle a una bola blanca y un chicle al cuero marrón delantero hacia abajo. Añada un chicle a una cuenta de bola verde y el chicle y el centro de las dos cuentas de bola engomadas. Añadir un chicle a una cuenta de bola verde y engomarla en la parte delantera de cuero marrón hacia arriba. Añada un chicle a una cuenta de bola blanca y péguela en la parte delantera de cuero marrón hacia abajo. Añada un chicle a una bola blanca y un chicle en el centro de las dos bolas recién engomadas.
Añadir un chicle a una bola verde y engomar en línea recta con la bola blanca previamente engomada. Añadir un chicle a una cuenta de bola blanca y engomar hacia abajo de la cuenta de bola verde. Engoma una bolita verde y la bolita blanca hacia abajo. Añade un chicle a una bola blanca y otro a la bola verde de arriba. Añade un chicle a una bola verde y otro a la bola blanca de arriba. Añade un chicle a una bola blanca y otro a la bola verde superior. Añade un chicle a una bola verde y otro a la bola blanca de arriba. Añade un chicle a una bola blanca y otro chicle a la bola verde. Ya tenemos la forma de la pulsera.
Añade un chicle a una bola blanca y pégala en la línea recta de la forma que acabamos de formar. Añade un chicle a una bola verde y pégala en la parte superior de la parte delantera de cuero marrón. Añade una goma a una bola blanca y pégala en la parte inferior de la parte delantera de cuero marrón. Engomar una bolita verde en el centro de las dos bolitas engomadas anteriormente. Añada un chicle a una bola verde y péguela en la parte superior de la bola marrón delantera. Añada un chicle a una bola blanca y péguela en la parte inferior del cuero marrón delantero.
Hemos terminado de engomar cuentas. Usaremos una tijera ✂️ para reducir la longitud del cuero. Damos la vuelta a la parte trasera del cuero marrón y engomamos. Cogemos el segundo botón restante y engomamos. Pondremos la pulsera al sol 🌞 durante una hora aproximadamente para que la goma y las cuentas se fijen bien.
Hola. Se bien bonita la pulsera para tu niño. Sé que estará feliz de llevarla y recordará su día especial de dejar de ser amamantado.
Keeping such a memory for my child through bracelet is important.
Conservar un recuerdo así para mi hijo a través de la pulsera es importante.
Congratulations @agbogo! You have completed the following achievement on the Hive blockchain And have been rewarded with New badge(s)
Your next target is to reach 600 replies.
You can view your badges on your board and compare yourself to others in the Ranking
If you no longer want to receive notifications, reply to this comment with the word
STOPCheck out our last posts: