💫Hermosos Aretes Para Lucir En Toda Ocasión 💫Beautiful Earrings To Wear On Every Occasion 💫
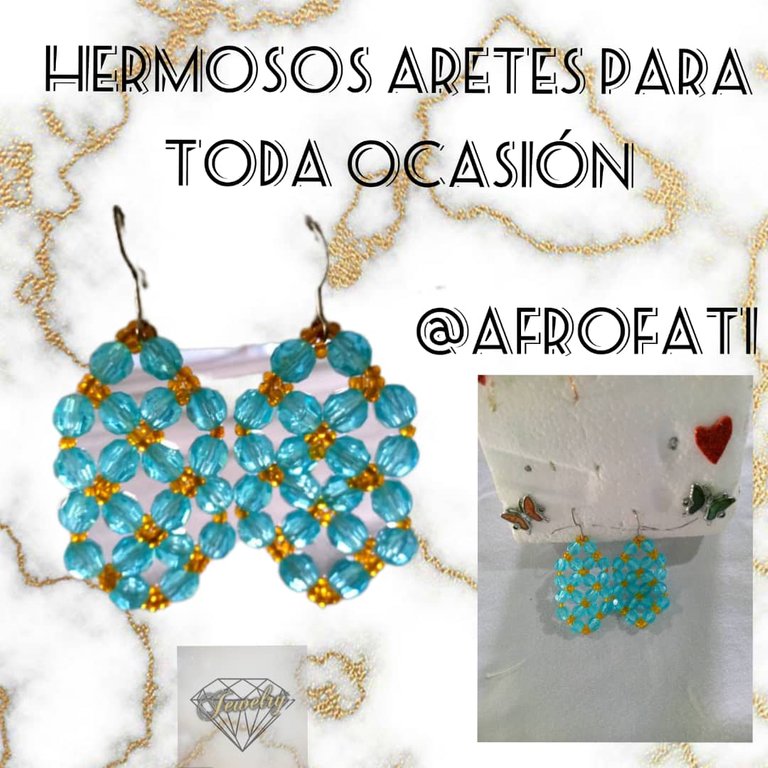
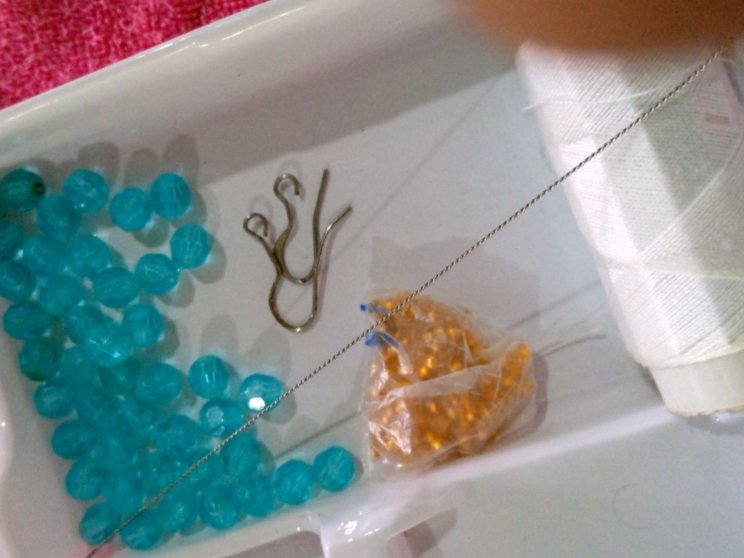
Los materiales Utilizados para la elaboración de estos hermosos pendientes fueron los siguientes
MOSTACILLAS ANARANJADAS
BICONOS AZULES
AGUJA
HILO NAILIN
GANCHO PARA ARETES
A continuación les mostrare como realizar estos hermosos aretes en pocos pasos,estos son los siguientes
PASO 1
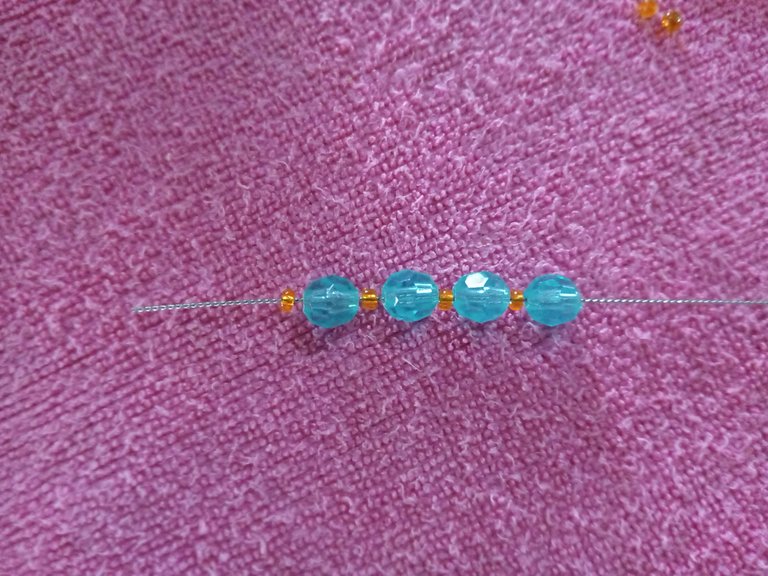
Para empezar vamos a tomar 4 biconos intercalado con 4 mostacillas,comenzamos con 1 bicono y terminamos con 1 mostacilla
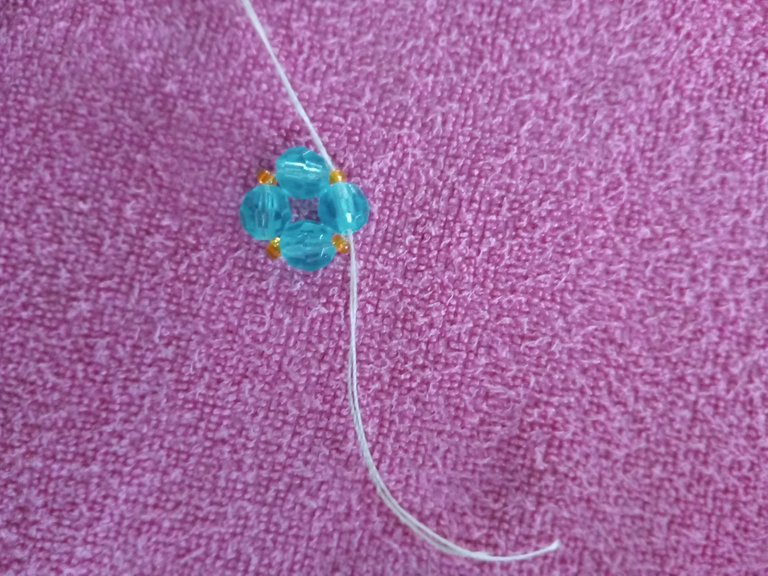
Lo siguiente es hacerle varios nudos simples para así obtener el resultado que queremos,es un pequeño circulo,cortamos el excedente del hilo y así se verá
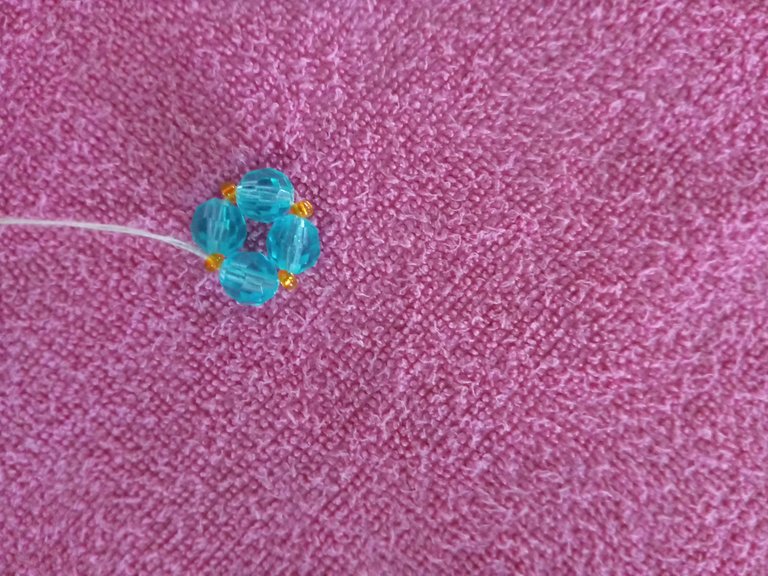
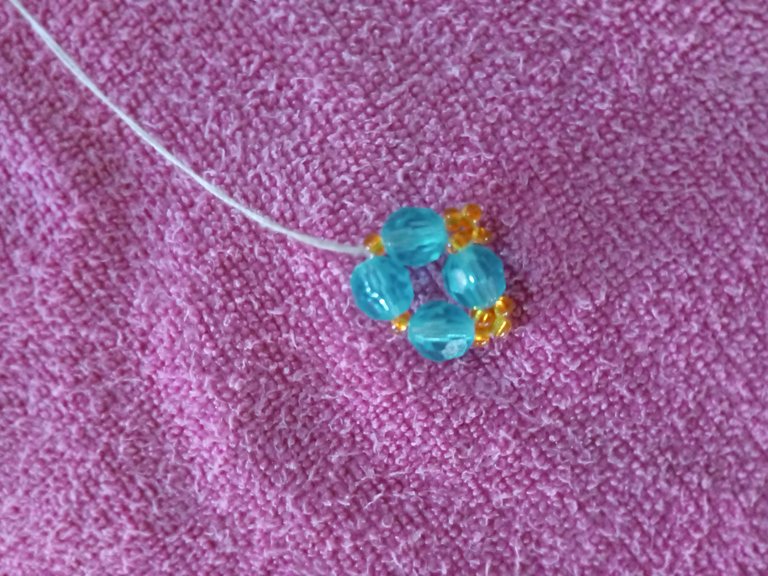
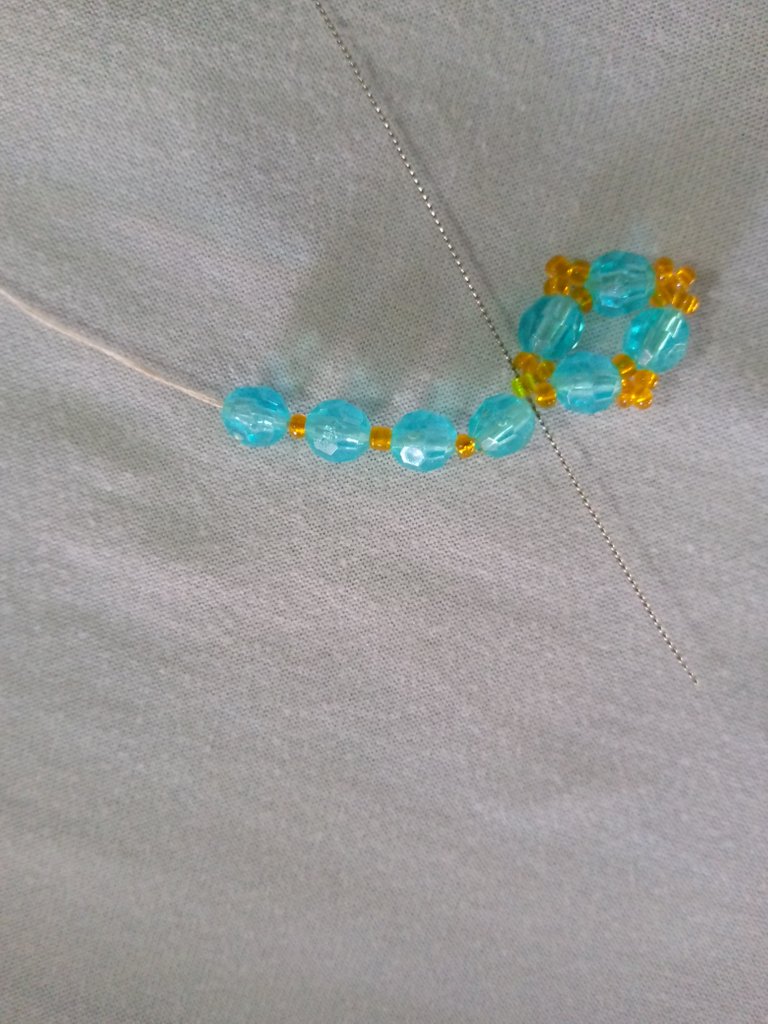
Lo próximo que haremos será tomar 3 mostacillas anaranjadas y vamos a introducir nuestra aguja en el siguiente bicono así que saltamos de un bicono al otro y nos quedará de esta manera
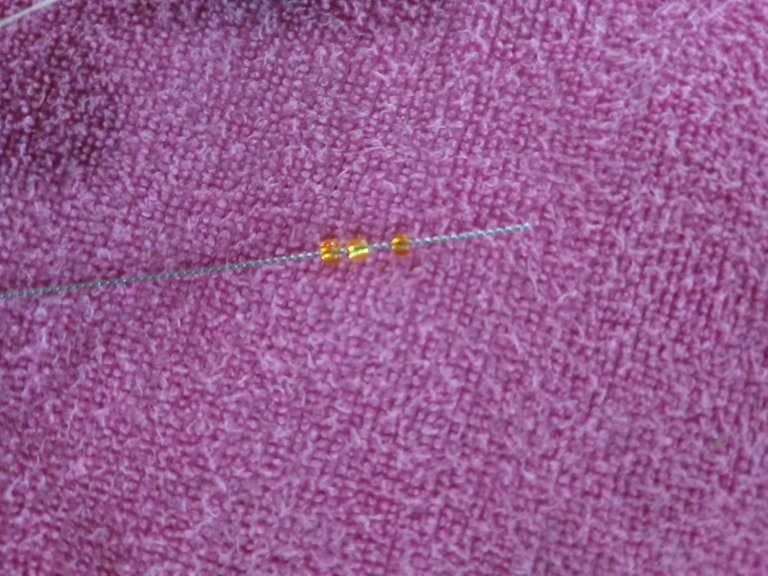
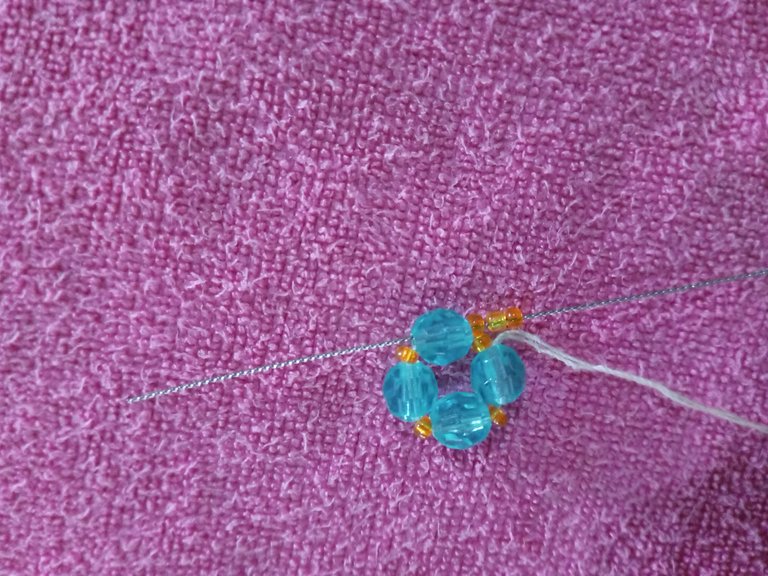
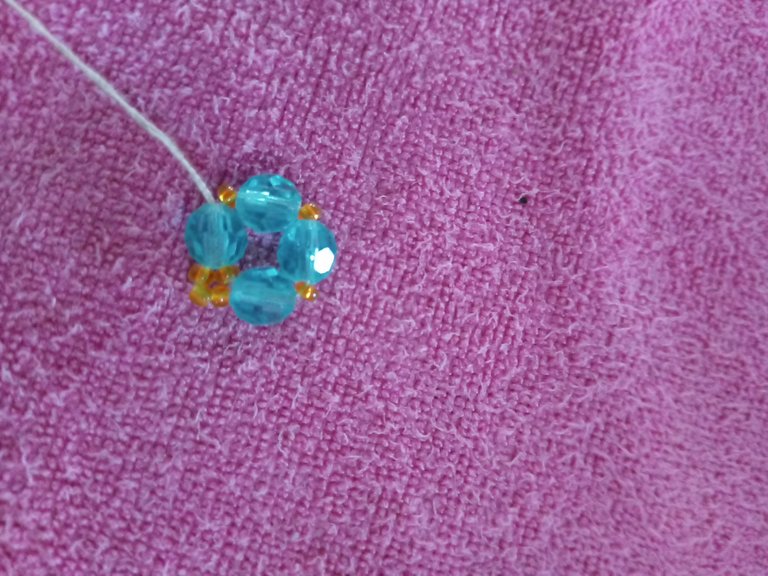
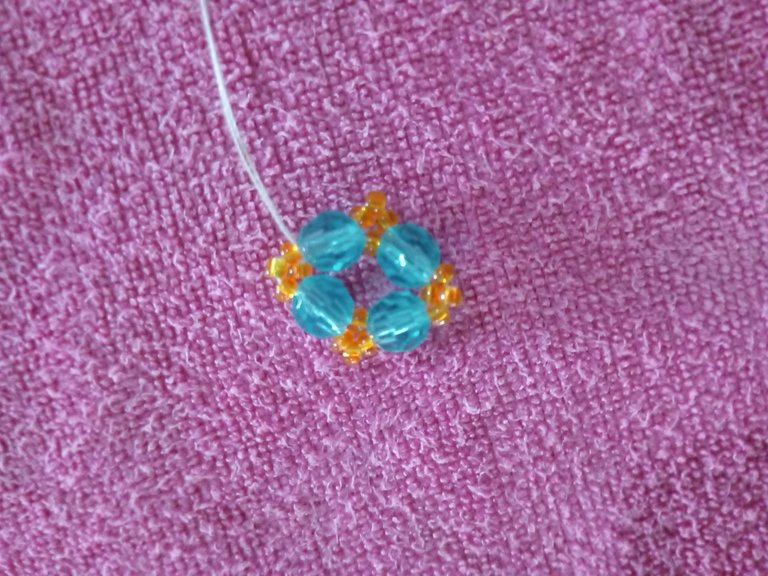
Seguimos con la secuencia hasta rodear nuestro círculo,tomamos 3 mostacillas anaranjadas introducimos por el siguiente bicono y tendremos listo nuestro primer paso
PASO 2
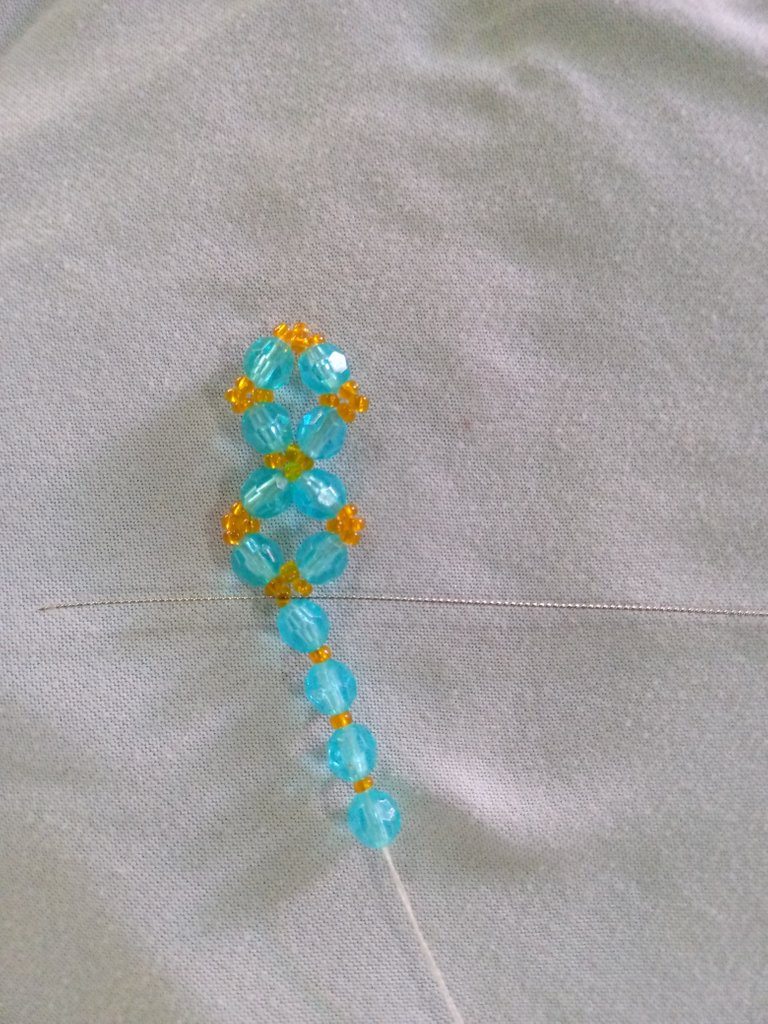
Para el próximo paso nos posicionaremos en la segunda mostacilla que está en la parte superior del bicono y luego vamos a repetir el primer paso
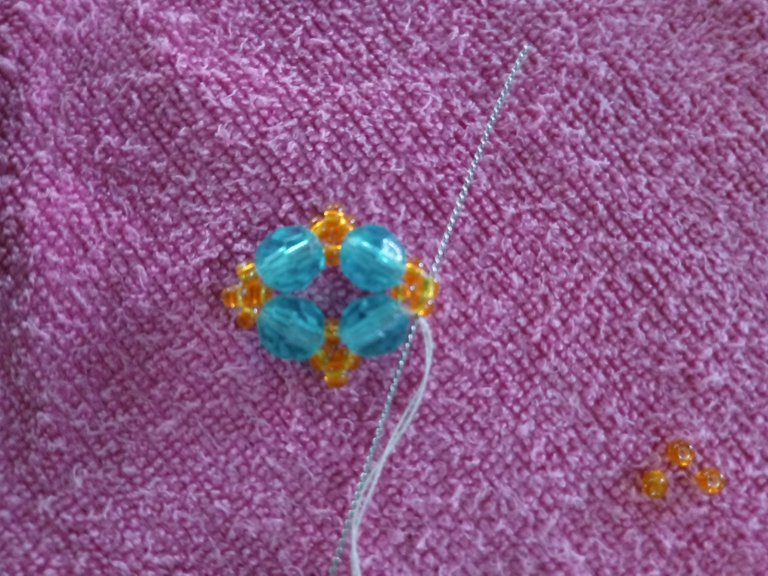
Tomaremos 4 biconos y 3 mostacillas estás intercaladas de igual manera,comenzando por un bicono y está vez terminamos con 1 bicono
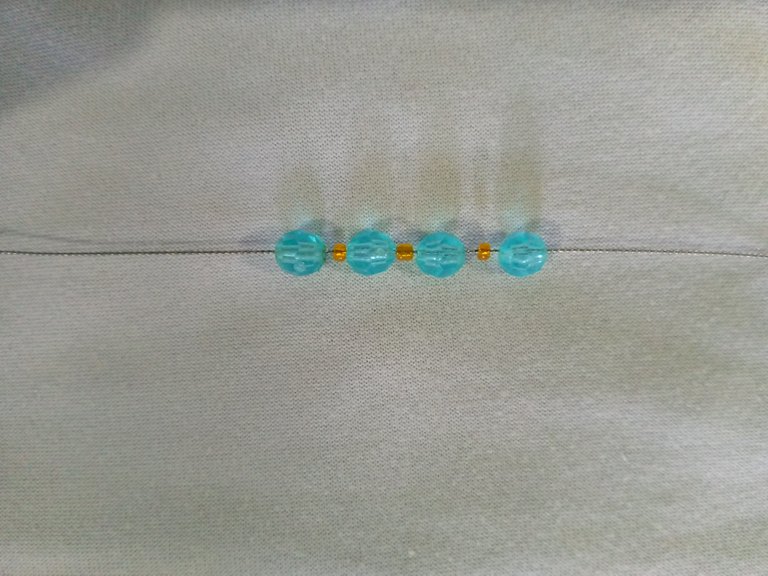
Luego vamos a introducir nuestra aguja por la segunda mostacilla de las 3 que colocamos anterior está será la del medio,luego tiramos del hilo y nos quedarán de esta manera
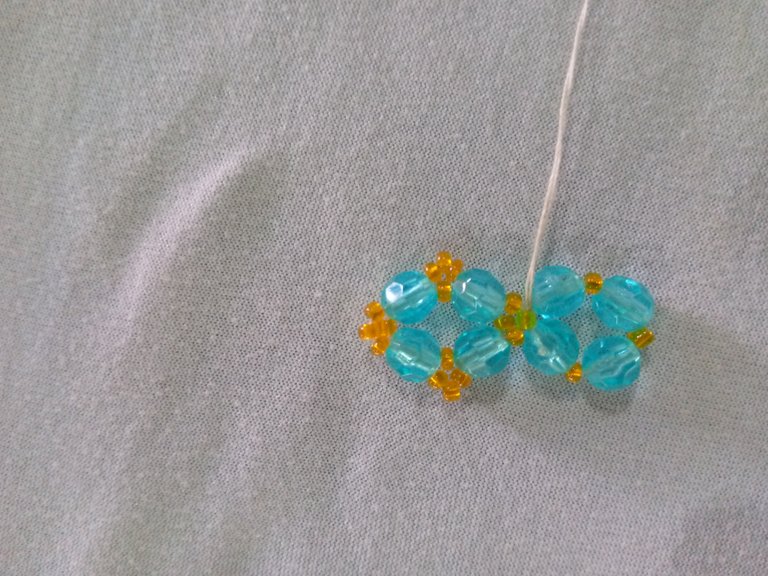
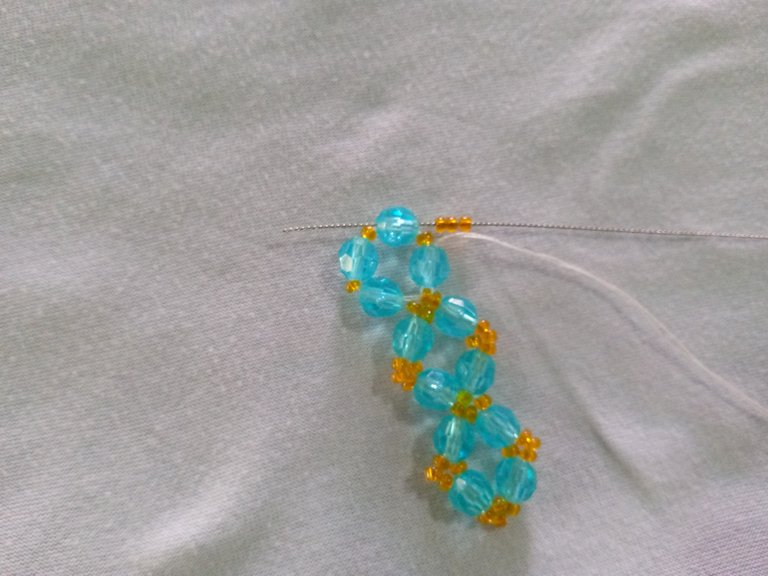
Después de esto tomamos 3 mostacillas anaranjadas y hacemos el mismo procedimiento,salimos del bicono y pasamos la aguja por el siguiente, repetimos el proceso hasta tener rodeados los 3 lados
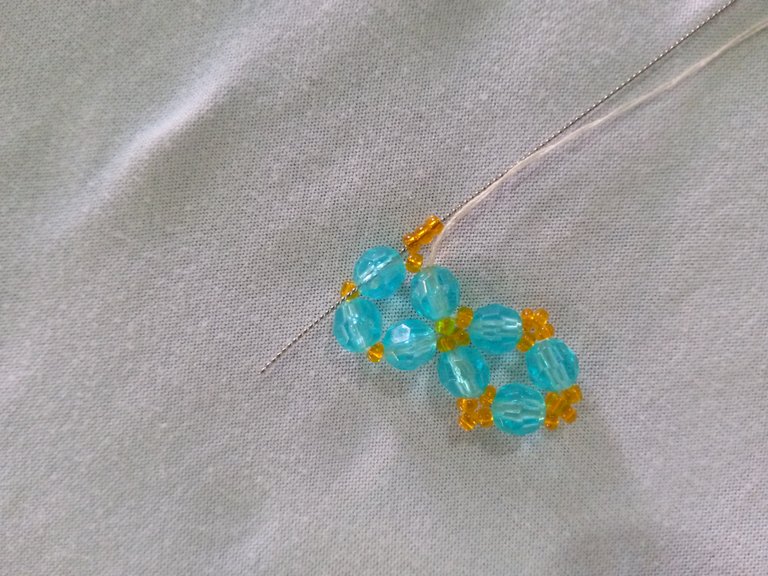
PASO 3
Para el siguiente paso lo que haremos es posicionar nuestra aguja en las mostacillas que están en la parte de la derecha,solo hay que meter la aguja por las mostacillas y el bicono hasta llegar al sitio que queremos para ir colocando mas redondos y darle el largo que gustemos,en mi caso yo solo coloque 3 usted puede colocar los que guste
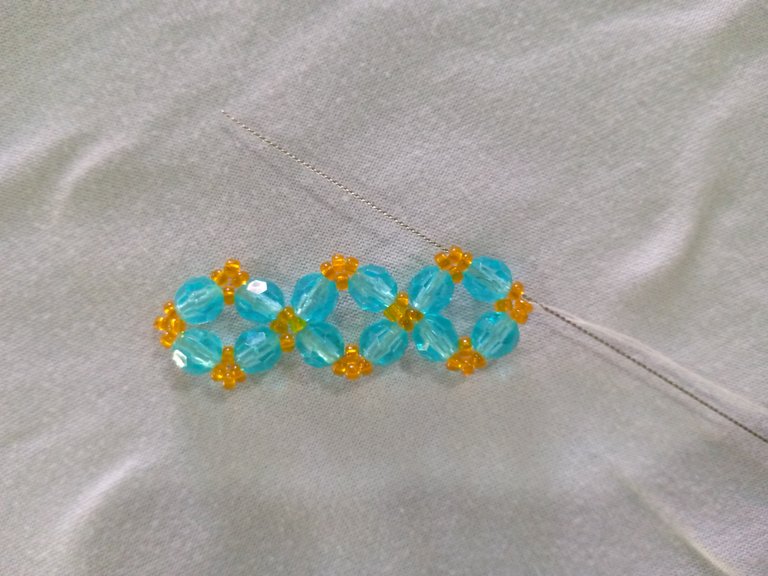
Lo que haremos será tomar 1 bicono 1 mostacilla y 1 bicono,vamos a introducir nuestra aguja por la siguiente mostacilla que está sobresaliente
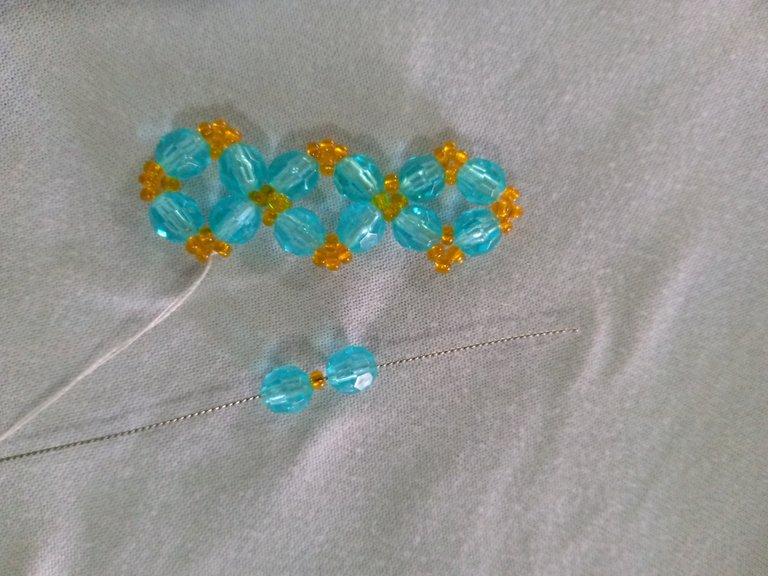
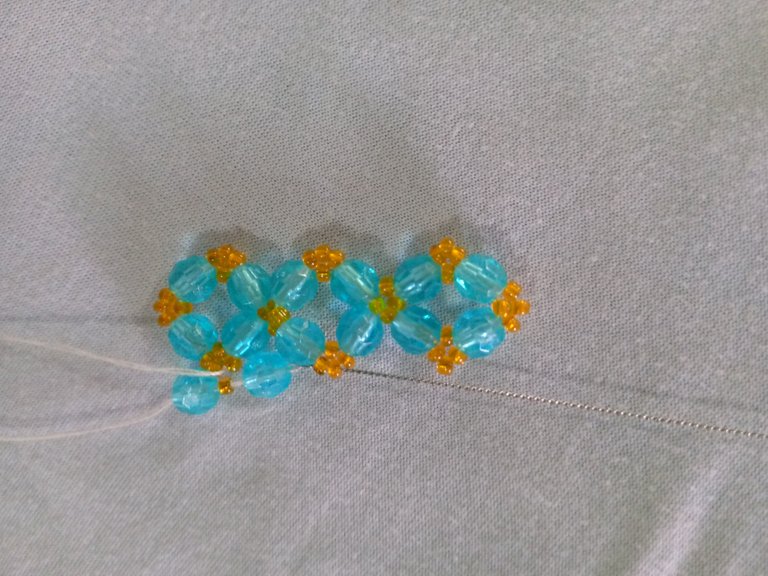
De igual manera tomaremos 1 bicono 1 mostacilla y 1 bicono y de igual manera introducimos nuestra aguja por la siguiente mostacilla y tiramos del hilo
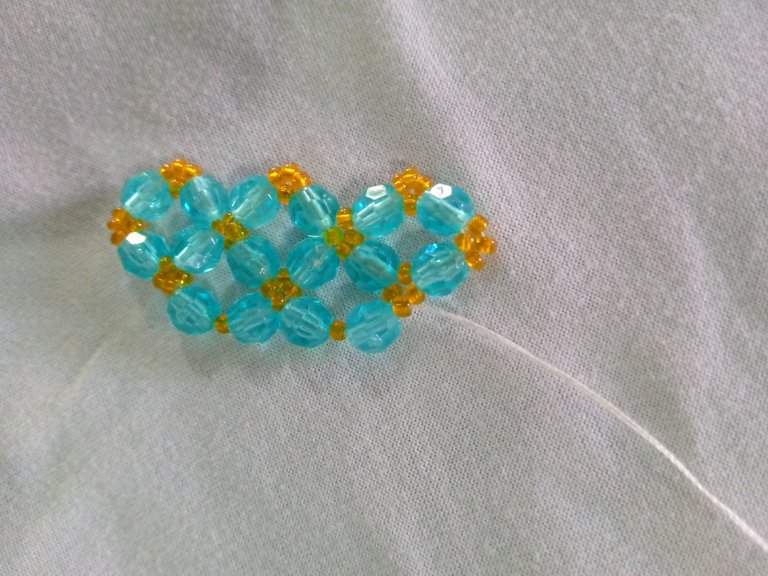
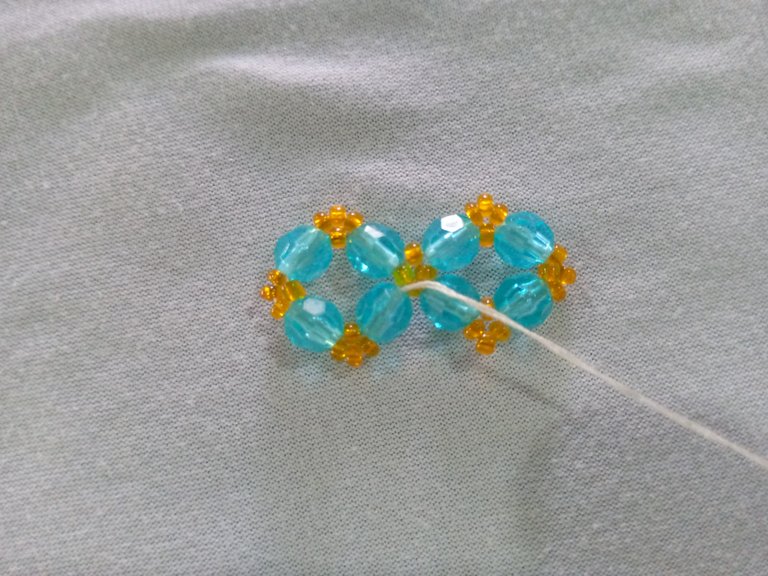
seguiremos con la misma frecuencia hasta completar el diseño,lo que haremos es cruzar al otro lado introduciendo la aguja con el hilo por las mostacillas y el los biconos para seguir haciendo el mismo procedimiento,tomando 1 bicono 1 mostacilla y 1 bicono y terminaremos el diseño
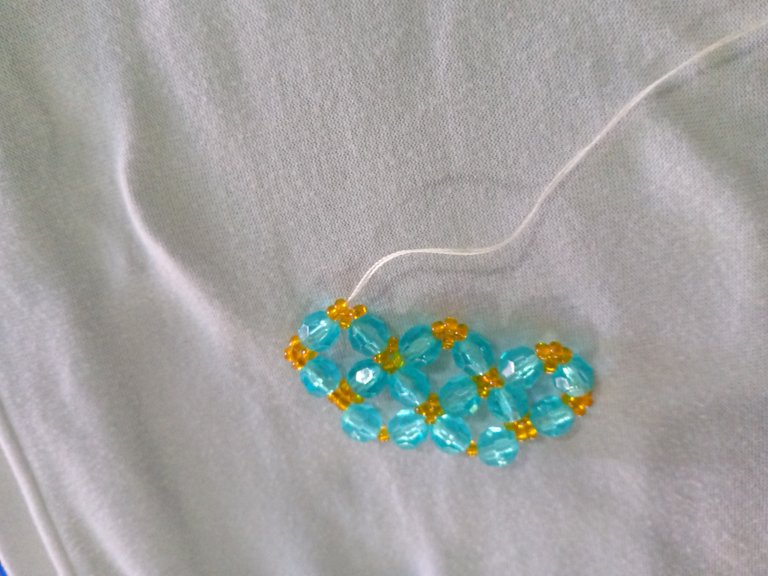
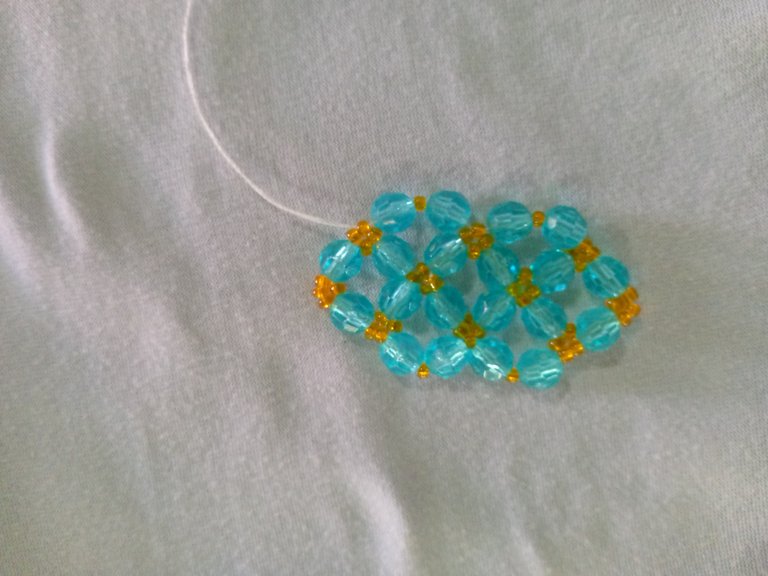
Luego le colocamos nuestros ganchos para aretes y estará listo para lucir
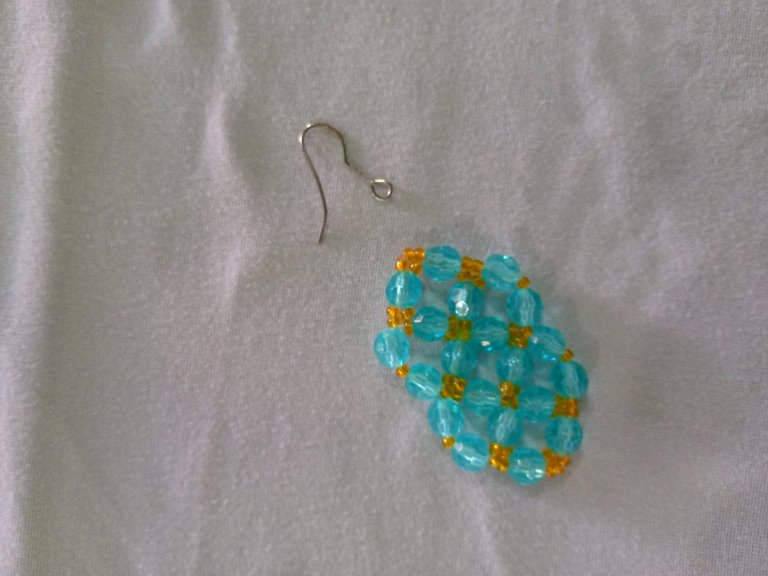
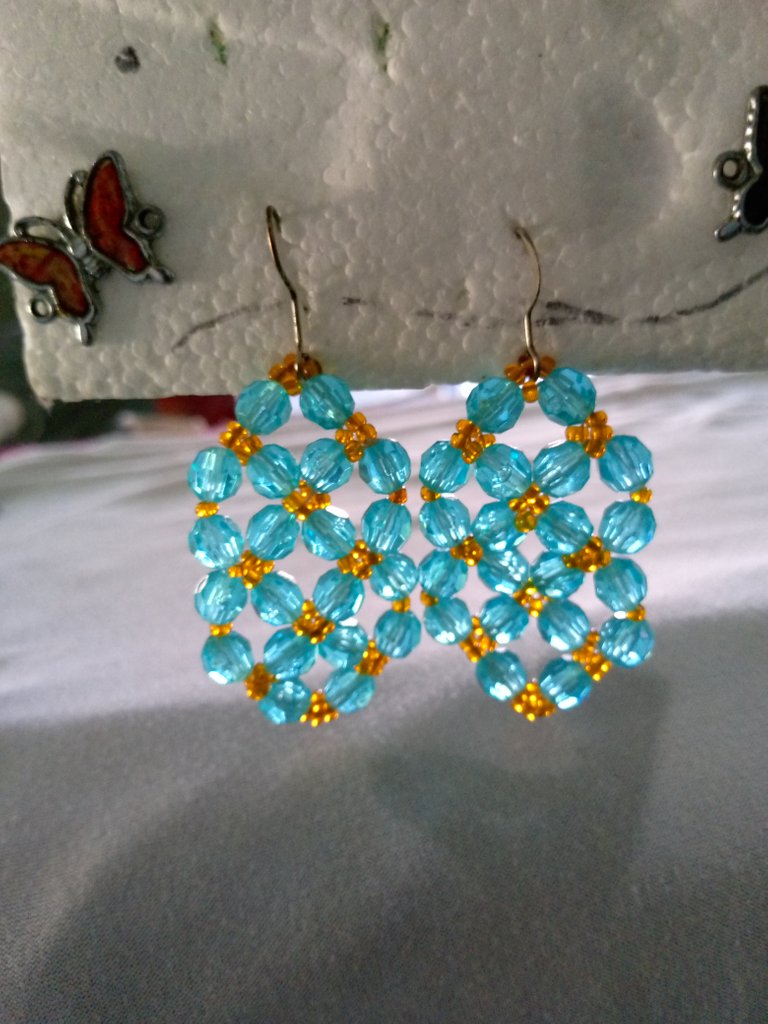
Así se verá nuestro hermoso arete,lo que queda es repetir los mismos pasos para realizar el segundo arete
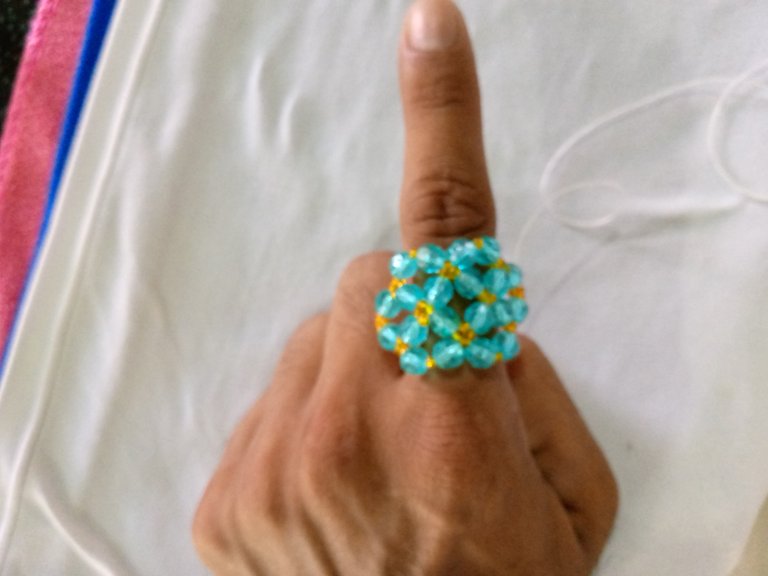
Este tipo de diseño también lo pueden utilizar para hacer anillos,miren lo bien que se ven.
Espero les haya gustado este tutorial y sea de su ayuda a la hora de crear estos accesorios,muchas gracias por su atención espero se encuentren bien,muchas bendiciones
EXITOS
- Las fotos son de mi propiedad y fueron tomadas por mi teléfono tecno spark Go 2023
-Las imágenes son editadas mediante la aplicación editor de fotos polish
-Traductor Utilizado:Deelp traslater

The materials used to make these beautiful earrings were as follows
ORANGE BEADS
BLUE BICONES
NEEDLE
NYLON THREAD
EARRING HOOK

Next I will show you how to make these beautiful earrings in a few steps, these are as follows
STEP 1
To start we are going to take 4 bicones interspersed with 4 beads,we start with 1 bicone and finish with 1 bead.

The next thing is to make several simple knots to get the result we want, it is a small circle, cut the excess thread and it will look like this


Next we are going to take 3 orange beads and we are going to insert our needle into the next bicone so we jump from one bicone to the other and it will look like this


We continue with the sequence until we go around our circle, we take 3 orange beads and we introduce them through the next bicone and we will have our first step ready.


STEP 2
For the next step we will position ourselves on the second bead that is at the top of the bicone and then we will repeat the first step.

We will take 4 bicones and 3 beads are interspersed in the same way, starting with a bicone and this time we finish with 1 bicone.

Then we are going to introduce our needle through the second bead of the 3 that we placed before, this will be the one in the middle, then we pull the thread and we will have this way


After this we take 3 orange beads and do the same procedure, we leave the bicone and pass the needle through the next one, we repeat the process until we have surrounded the 3 sides.


STEP 3
For the next step what we will do is to position our needle in the beads that are on the right side, just put the needle through the beads and the bicone until you get to the place we want to place more rounds and give the length that we like, in my case I only placed 3 you can place as many as you like

What we will do is to take 1 bicone 1 mustard and 1 bicone, we are going to introduce our needle through the following mustard that is protruding


In the same way we will take 1 bicone 1 mustard and 1 bicone and in the same way we introduce our needle through the following mustard and we pull the thread

Continue with the same frequency until completing the design, what we will do is to cross to the other side introducing the needle with the thread by the beads and the bicones to continue doing the same procedure, taking 1 bicone 1 bead and 1 bicone and we will finish the design.


Then we place our earring hooks on it and it is ready to show off

This is how our beautiful earring will look, what remains is to repeat the same steps to make the second earring.

This type of design can also be used to make rings, look how good they look.

I hope you liked this tutorial and it will be of help when creating these accessories, thank you very much for your attention, I hope you are well, many blessings.
SUCCESS
- Photos are my property and were taken by my tecno spark Go 2023 phone.
-The images are edited using polish photo editor application.
-Translator Used:Deelp traslater
Amigo están super mega bonitas excelente trabajo exitos .
This is such a nice earring. So sophisticated and beautiful. Lovely work
Están muy lindos felicidades amigo ..
Congratulations @afrofat1! You have completed the following achievement on the Hive blockchain And have been rewarded with New badge(s)
Your next target is to reach 500 upvotes.
You can view your badges on your board and compare yourself to others in the Ranking
If you no longer want to receive notifications, reply to this comment with the word
STOPTo support your work, I also upvoted your post!
Check out our last posts:
Excelente explicación, @afrofat1 te han quedado Bellísimos. Gracias por compartir tu proceso creativo.
Demasiado lindos estos zarcillos, me gustó mucho la combinación de colores que usaste 😍
Te han quedado muy hermosos, me encanta el color 💙 el paso a paso está muy bien explicado 👍🏻