Do I need a new inner tube? || ¿Necesito una nueva cámara de aire?
A puncture in the inner tube is something very common when we use our bike regularly, so we can probably learn quickly how to fix that. However, sometimes we might do what we know, but the solution is a little more complicated. Something like this happened to me recently. Please allow me to tell you about it.

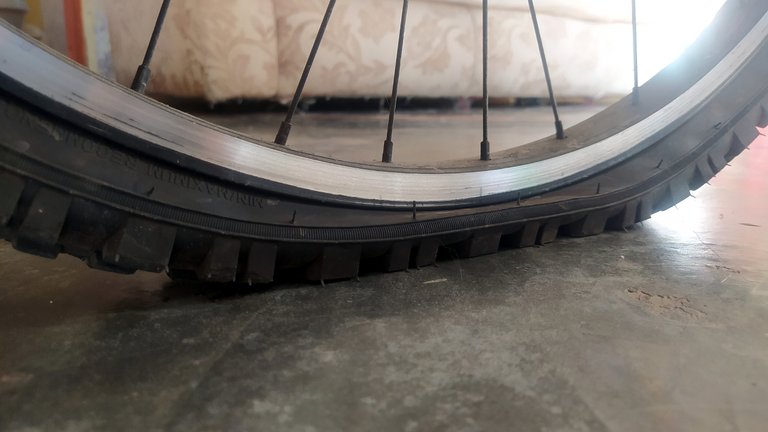
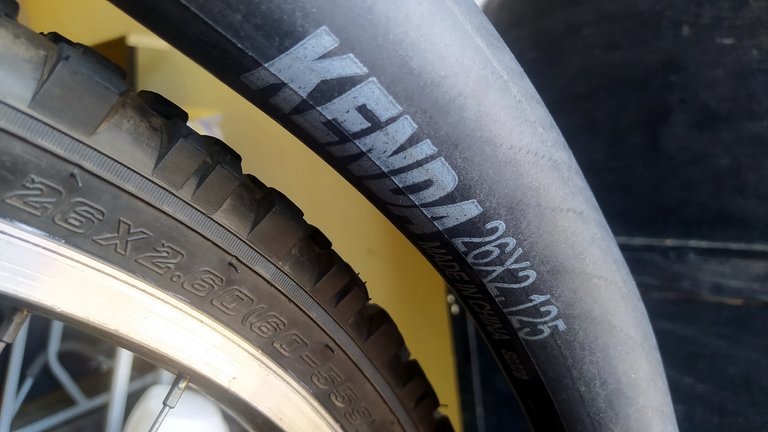
One morning last week the rear rubber inner tube dawned spiked. I know sometimes it's because air leaked out of the valve. The day came to use it, I inflated it and it retained air just fine. So I went out with it, did the day's shopping and came back with no problems. However, that night it spiked again. I suspected it was a small hole in the inner tube, as had happened to me in the past.
A couple of days later I wanted to do the same thing: inflate it before going out and do a short ride. But within a mile it completely spiked. That afternoon I had to stop four times and pedal fast to make it all the way home. I was exhausted, and obviously understood that it was time to dedicate some time to this necessary repair.
 | 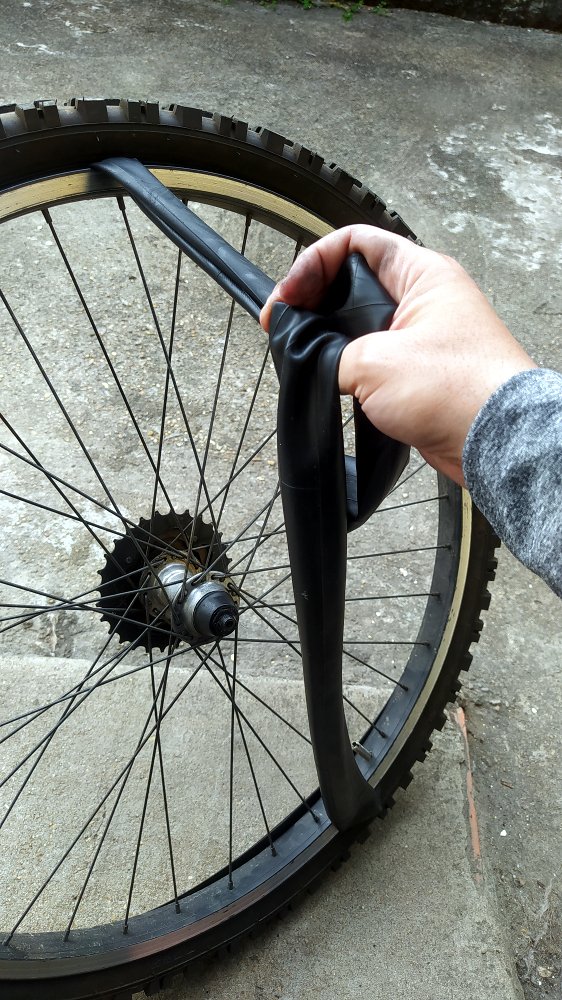 |
After breakfast, I removed the rear wheel and then the inner tube. I find it better to do all this to work more comfortably and detect the fault more thoroughly, although I admit that it is a bit annoying to remove the rear wheel because it has the whole system with the chain and the gears. Wow, I had forgotten how many patches I had put on it! I had to laugh to see that it was still serviceable. One of the people who helped me with the first repairs told me not to worry about that, because it was normal, and that even the ones on the vehicles happened and that it would still have a useful life. Well... let's check it then to see if they still have the will to live 😂

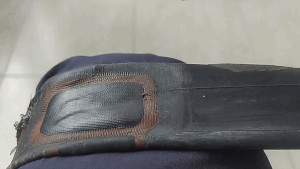
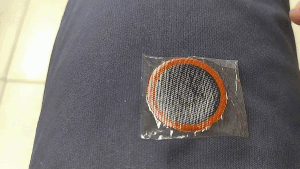
When filling it with air I quickly noticed where the hole was: in one of the patches. So the solution was to put a patch on the patch, how about that? Well, I've done it before and it works. Here we go again then. I looked for the glue and the box with patches so I could work.

The first thing we do is sand the part where we will attach the patch, removing any debris that might prevent the glue from doing its job. Before I thought it was something invented by the person who helped me, but when I bought the patch kit I noticed that it comes with this sandpaper, so we have to do it.
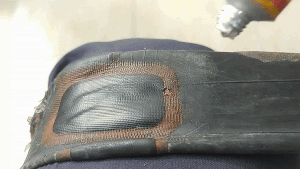
Then I glue both the inner tube and the patch. Enough, it doesn't matter if it exceeds the area that the patch will cover.
 |  |
When the glue has dried a little, enough so that your dry finger doesn't get stuck, then I put the patch together and try to adhere it well. After a couple of minutes I place it pressed down on something for a long time, like under a bed leg or heavy shelf.
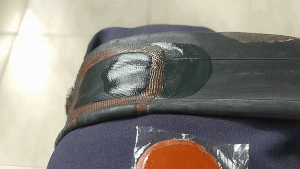 |  |
After about an hour or so, I removed it from where it was and started filling it with air. Unfortunately the job did not turn out well, as when the air chamber took its cylindrical shape the patch peeled off at one end. I had wasted all my time and materials.
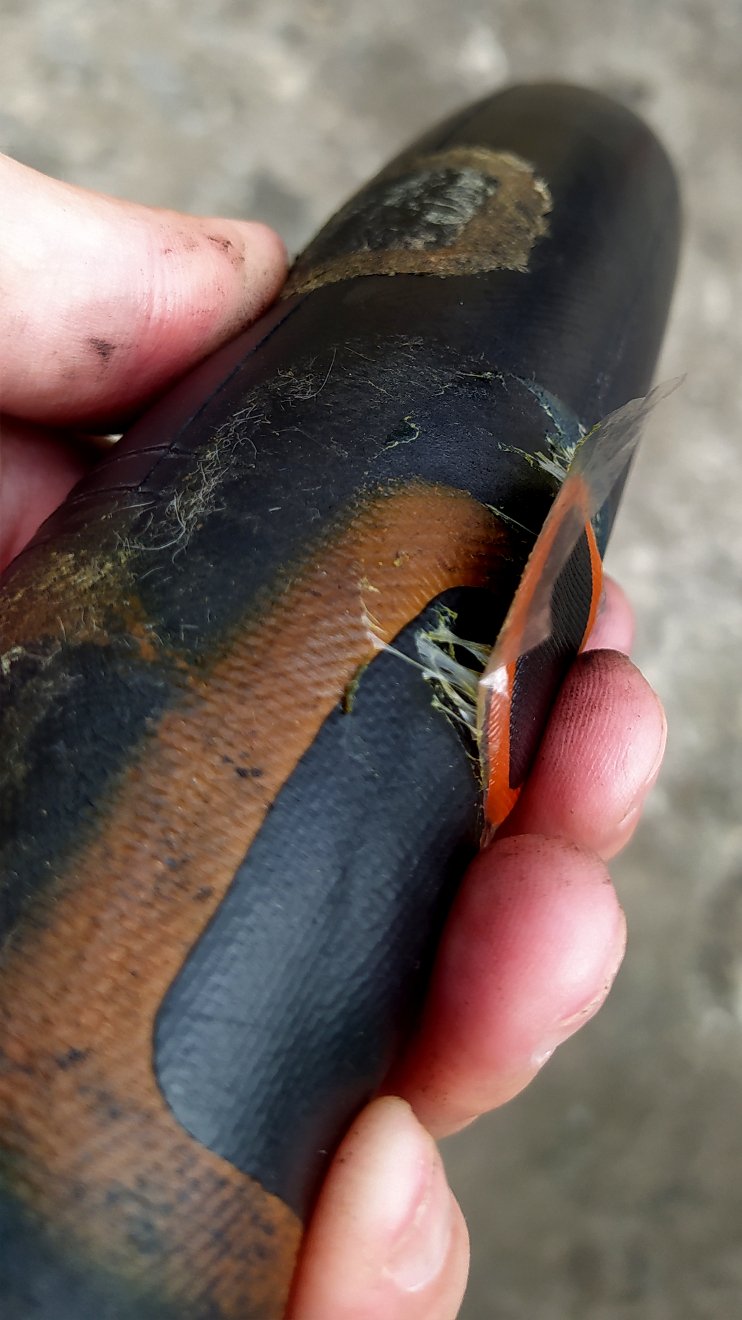
I suspected it might be the quality of the patch, so I took a newer, larger one and repeated the process again, but unfortunately the result was the same. Then I thought it was the glue that had already lost its properties. After doing some mental work and shaking off my laziness, I walked to the nearest bicycle parts store, located almost three kilometers from my house. I bought a new one in the hope that this one would work.
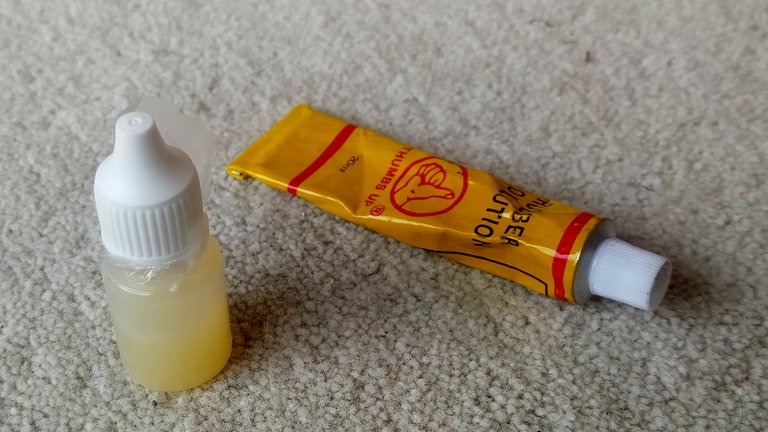
After lunch, I repeated the process again with the new glue. And what do you know, it didn't work either! The patch did not adhere. If I had already changed patch types and used a new glue, I was convinced that it was time to buy a new inner tube. Besides, it was very complicated to have such a big hole in a patch and expect another patch to keep it airtight. Maybe there's someone who thinks it's still repairable, but I'm also thinking that it's not as safe to go around with the speed of a bike with those kinds of repairs. I would feel safer if I knew I had an inner tube in good shape. But I no longer had the time or energy to go to the store again. I waited for the next day.

In the morning I needed to shop for supplies for the house. It had been a long time since I had done it on foot, I always go on my bicycle. So I stopped for a moment at the store and bought it. It cost me $4 USD. I realized something during these days: I have to remember to take pictures in the stores while I buy things. I remembered already at home. Now I'm determined to improve this aspect in my next posts, although I hope I won't need to shell out more money soon.
Without a doubt, this was the remedy I needed. After doing everything I could with my old inner tube, the solution was to buy a new one. My bike is now active, ready to accompany me on future routes and errands. Do you have any similar experience with inner tubes? How do you solve these problems? I read them in the comments box. Thanks for making it this far, see you next time!


Un pinchazo en la cámara de aire es algo muy común cuando usamos nuestra bicicleta con regularidad, por lo que probablemente podamos aprender rápido cómo se soluciona eso. Sin embargo, a veces pudiéramos hacer lo que sabemos, pero la solución es un poco más complicada. Algo como esto me sucedió recientemente. Por favor, permite que te lo cuente.
Una mañana de la semana pasada la cámara de aire del caucho trasero amaneció espichada. Sé que a veces es porque se le escapó el aire por la válvula. Llegó el día de usarla, la inflé y retuvo el aire bien. Así que salí con ella, realicé las compras del día y regresé sin problemas. No obstante, esa noche volvió a espicharse. Sospeché que era un pequeño hueco en la cámara de aire, tal como me había sucedido en el pasado.
Un par de días después quise hacer lo mismo: inflarla antes de salir y hacer una vuelta corta. Pero en un kilometro y medio se espichó completamente. Esa tarde tuve que detenerme cuatro veces y pedalear rápido para poder hacer todo y volver a casa. Quedé extenuado, y obviamente entendí de que era momento de dedicarle tiempo a ésta necesaria reparación.
| |
Luego de desayunar, saqué la rueda trasera y posteriormente la cámara de aire. Me resulta mejor hacer todo esto para trabajar más cómodo y detectar la falla con más detenimiento, aunque admito de que es algo fastidioso sacar la rueda trasera porque tiene todo el sistema con la cadena y los cambios de velocidad. ¡Vaya! ¡Había olvidado cuántos parches le había pegado! Me dio risa ver que aún servía. Una de las personas que me ayudó con las primeras reparaciones me dijo que no me preocupara por eso, porque era normal, y que hasta a los de los vehículos le sucedía y eso aún tendría vida útil. Bueno... vamos a revisarla entonces para ver si aún tienen ganas de vivir 😂
Al llenarla de aire noté rápidamente donde estaba el hueco: en uno de los parches. Así que la solución era ponerle un parche al parche, ¿qué tal? Bueno, antes lo he hecho y funciona. Aquí vamos de nuevo entonces. Busqué la pega y la caja con parchos para poder trabajar.
Lo primero que hacemos es lijar la parte en la que fijaremos el parche, quitando los residuos que pudiera impedir que la pega haga su trabajo. Antes pensé que era algo inventado por quien me ayudó, pero al comprar el kit de parches noté de que trae ésta lija, así que hay que hacerlo.
Posteriormente le coloco pega tanto a la cámara de aire como al parche. Suficiente, no importa que exceda el área que cubrirá el parche.
| |
Cuando la pega se ha secado un poco, suficiente para que tu dedo seco no se quede pegado, entonces uno el parche y procuro adherirlo bien. Luego de un par minutos lo coloco presionado en algo durante un buen rato, como debajo de una pata de la cama o estante pesado.
| |
Al cabo de una hora aproximadamente, la retiré de donde estaba y empecé a llenarla de aire. Lamentablemente el trabajo no quedó bien, puesto que cuando la cámara de aire tomó su forma cilíndrica el parche se despegó en una de sus extremos. Había perdido todo mi tiempo y materiales.
Sospeché que podría ser la calidad del parche, así que tomé otro más nuevo, más grande y volví a repetir el proceso, pero lamentablemente el resultado fue el mismo. Entonces pensé que era la pega que ya había perdido sus propiedades. Luego de hacer un trabajo mental y sacudirme la flojera, me fui caminando a la venta de repuestos de bicicleta más cercana, ubicada a casi tres kilómetros de mi casa. Compré una nueva pega con la esperanza de que esta sí sirviera.
Luego de almorzar, repetí el proceso otra vez con la pega nueva. Y ¿qué creen? ¡No funcionó tampoco! El parche no se adhirió. Si ya había cambiado los tipos de parche y usado una pega nueva, me convencí de que ya había llegado el momento de comprar una cámara de aire nueva. Además, era muy complicado tener un hueco tan grande en un parche y esperar de que otro parche lo mantuviera hermético. Tal vez haya alguien que crea de que aún es reparable, pero pienso también en que no es tan seguro ir por allí con la velocidad de una bicicleta con ese tipo de reparaciones. Me sentiría más seguro si sé que tengo una cámara de aire en buen estado. Pero ya no tenía el tiempo ni las energías para ir de nuevo a la tienda. Esperé al siguiente día.
En la mañana necesitaba hacer las compras de provisiones para la casa. Tenía mucho tiempo que no las hacía a pie, siempre voy en mi bicicleta. Así que paré un momento en la tienda y la compré. Me costó $4 USD. Me di cuenta de algo durante éstos días: tengo que acordarme de tomarme fotos en las tiendas mientras compro las cosas. Me acordaba ya en casa. Ahora me propuse mejorar éste aspecto en mis próximas publicaciones, aunque espero que no necesite pronto desembolsar más dinero.
Sin duda, éste fue el remedio que necesitaba. Luego de hacer todo lo posible con mi cámara de aire vieja, la solución fue comprar una nueva. Ya mi bicicleta está activa, lista para acompañarme en las rutas y diligencias futuras. ¿Tienes alguna experiencia parecida con las cámaras de aire? ¿Cómo solucionas tú estos problemas? Los leo en la caja de comentarios. Gracias por llegar hasta aquí. ¡Hasta la próxima!
🚴

FUENTES / SOURCES
Cover: Made with the free version of CANVAS || Portada: Hecho con la versión gratuita de CANVAS
Imágenes: Realizadas con mi teléfono Xiaomi Redmi Note 8 y editadas con GIMP // Images: Shot with my Xiaomi Redmi Note 8 phone and edited with GIMP
GIF: usé imágenes capturadas con mi teléfono Xiaomi Redmi Note 8 y transformadas gratuitamente en ezgif.com // GIF:** I used images captured with my Xiaomi Redmi Note 8 phone and transformed for free in ezgif.com
Banner: Hecho por mi en GIMP con imágenes propias y recursos gratuitos del sitio pfpmaker.com/ // Banner: Made by me in GIMP with my own images and free resources from the site pfpmaker.com/
Idioma: Post redactado en español y luego traducido al inglés mediante Hive Translator/ by @noakmilo // Language: Post written in Spanish and then translated into English through Hive Translator by noakmilo
Posted Using InLeo Alpha
Oh, that's annoying that you had to do the repair twice without succes. Your ideas about the patch and glue were good. What I often do when parching an inner tube if filling the tube with a little air before applying the patch. This way the tire will take its original shape and the patch won't stretch that much.
It does depend on the size of the hole wether this works or not.
But sometimes it is better to replace the inner tube completely like you did.
This post was upvoted by the Cycling Community
Subscribe to the Cycling Community and share your cycling related posts with us.
Join our Discord Channel if you want to chat about cycling.
You can support the Cycling Community by delegating HP
| 25 HP | 50 HP | 100 HP | 250 HP | 500 HP |
This is a good strategy. I keep the inner tube stretched when I'm fixing the patch, to more or less simulate the effect you're talking about. Yes, I'm all for having things with as few patches as possible. So this time I was able to make this investment and I'm happy. Thanks for your valuable comment. Greetings to all the team of @hive-177745
Gracias por compartir!! Un par de excelentes consejos. Particularmente no se correr bicicleta. Pero la estática síii 😂
Nunca es tarde para aprender. Con las bicicletas estáticas necesitamos una buena playlist y mas nada! Saludos @albanyg12
Uh-oh! A patch over patch doesn't work well. Less pain in the behind to just swap the inner tube indeed.
cuando ya tiene 5 parches, ahí es cuando decido comprar una nueva
La mía tenía muchos más 😂. Saludos @fixie
Oh, that inner tube has seen better days 😆 Honestly, I've never been able to stick one patch over another. I think it has to do with the composition of the rubber that the outer layer of the patch is made of. Also, always check the inside of the outer tyre, because it happens that a nail or part of the tire's wire weave is responsible for the tire defect, so that after mounting the inner tyre, they make a new hole... don't ask me how I know 🤣
You are right. Sometimes between the inner tube and the rubber there is debris that can cause punctures. Now that you mention it, I should have checked that better this time😅. Regards @dejan.vuckovic